
Get the data off the phone. Lawfully, and the honest way.
How to recover data from a device you are authorized to access - a consenting owner's phone, or a device you hold under lawful authority in a forensic case. Guided acquisition and the method choice, locked and dead devices and the real ceiling, app decoders and deleted messages, iOS vs Android, and the forensic sealing wrapper - each with real situations and exact steps.
Authorized, in-scope acquisition only. Every method on this page is for a device that is IN SCOPE and that you are LAWFULLY AUTHORIZED to access - a consenting owner's phone in a recovery job, or a device held under a warrant, court order or written consent in a forensic case. The purpose is to RECOVER data, for a recovery job or a forensic examination, and nothing else. Every locked-device job records the operator's stated authority and the case reference before it runs; the product never asserts ownership, never acts outside the authority you record, and states plainly where no lawful software route exists rather than promising one.
Get the data off the phone - the right method, chosen for you
Shared by RecoverYantra Mobile and the SakshyaYantra Mobile Workbench: a method registry that reads the real device state and picks the route that fits, byte-exact and hashed, honest about what it cannot reach.
1How to get there
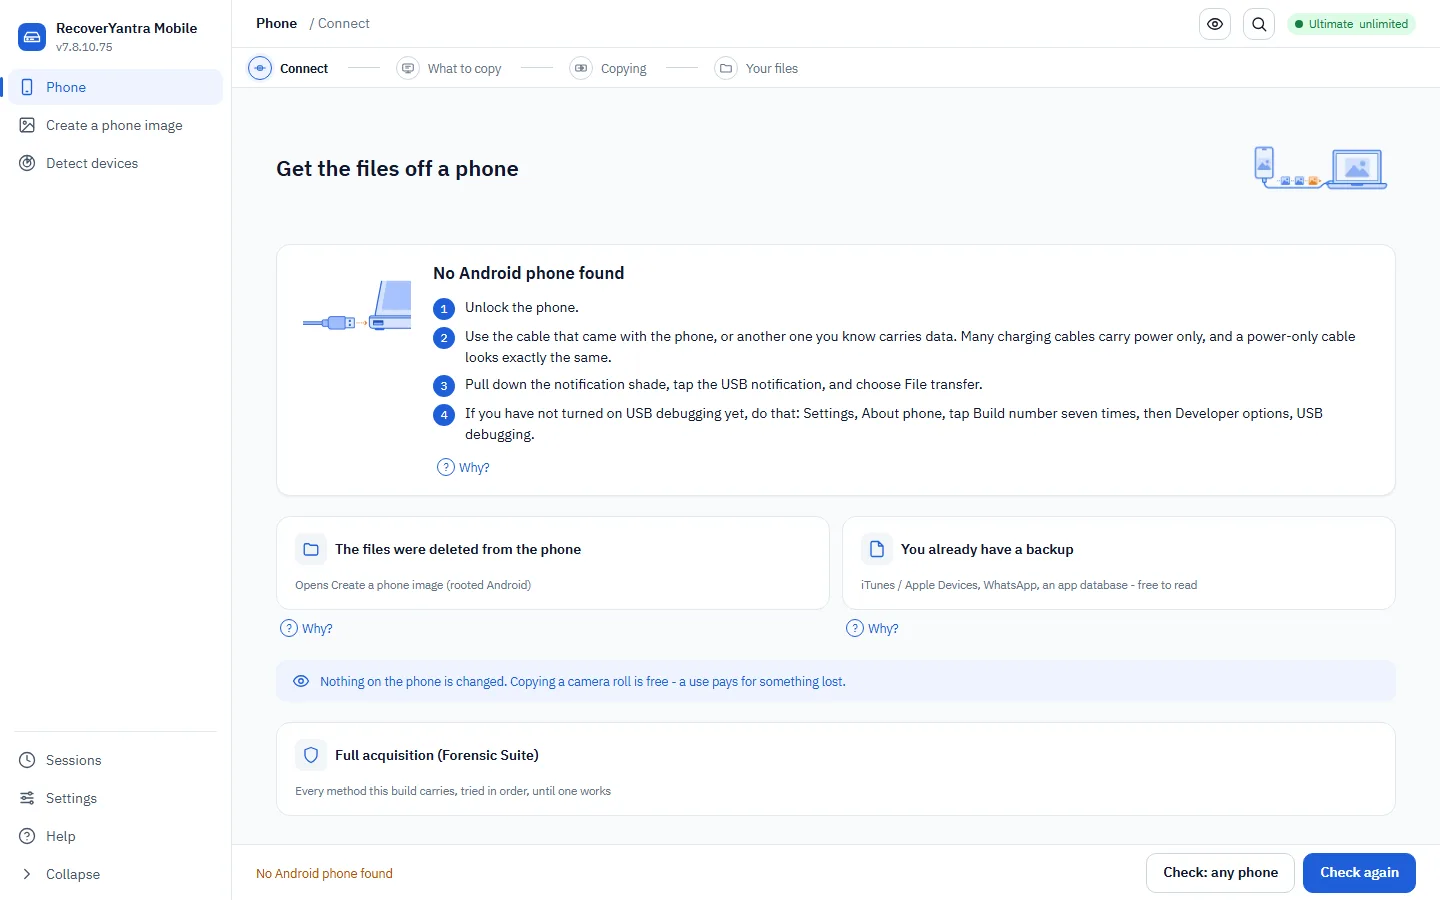
- 1Connect / probe reads the real device state; never assumes reachability.
- 2Method registry each method with the devices it reaches and what it needs.
- 3Authority + case id the authority / case gate for a locked-device job.
2Which method, and what you get back
The honest ceiling. The tool never fakes a capability. A locked device it cannot open says which method WOULD reach it and what that needs; where nothing public can (a modern locked iPhone with no available vector) it says so plainly rather than pretending.
3Step by step
- Connect the device and probeThe tool reads the real state. A locked device that a method cannot reach says so, with the reason.
- Record authority and the case idA locked-device job records the operator's stated authority; the tool never asserts ownership.
- Choose Try-everything or a methodAutomatic walks the sequence; manual runs one route you can document.
- Acquire - byte-exact and hashedThe image is verified by reading it back; a short image is reported failed, never handed over whole.
- Recover or examine the imageHand the extraction to the recovery flow (photos, messages) or seal it in a forensic case.
4Situations, and exactly what to do
Photos after a factory reset
An Android was reset; the owner wants the camera roll.
Acquire a physical image if the vector allows, then carve the userdata for photos.
- Connect + probe
- Try-everything acquisition
- Recover from the image (Photos)
- Export
Deleted messages
SMS / WhatsApp messages were deleted on a rooted phone.
Acquire, then the app decoders read deleted rows from the WAL and superseded pages.
- Acquire the image
- Run the app decoders
- Read deleted-row results
- Export to CSV
Locked, lawful, for evidence
A seized iPhone is locked; the acquisition must be sealed.
Record authority, use the method the device's chip allows, and seal it in a case.
- Record authority + case id
- Pick the method the registry offers
- Acquire (hashed)
- Seal in the forensic case
checkm8, EDL, BROM, ADB or backup - the right route for this exact device
Every method the Mobile Workbench carries, honestly labelled: what it reaches, what it needs, and the state it hands back. Nothing here claims more than the device in front of you allows.
1How to get there
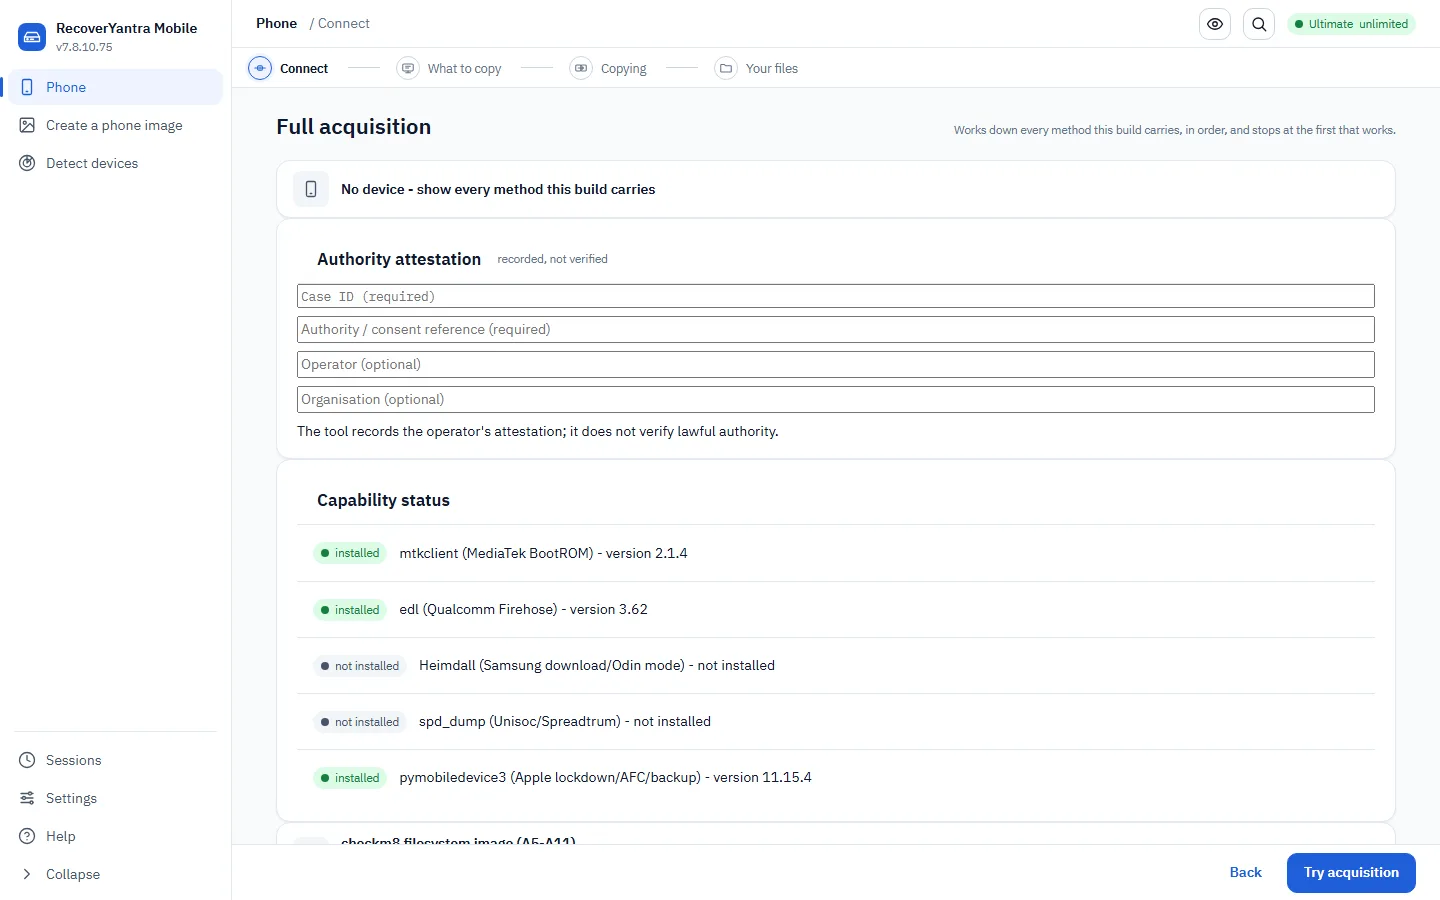
- 1Case ID the case reference, required before any locked-device method runs.
- 2Authority / consent the lawful basis or consent reference for this specific device.
- 3Method + ceiling the method, the state it yields (physical / file-system / logical / backup) and what it needs.
2The methods, what they reach, what they need
| Option | What it does | What to choose |
|---|---|---|
| checkm8 (iOS) | A public BootROM acquisition method; a near-full file-system image even locked (before first unlock), on the chips it reaches. | A5 to A11 (iPhone 4S through iPhone X). A12 and later are not vulnerable and the plan says so. |
| Qualcomm EDL / firehose (Android) | 9008 mode dumps raw flash once a signed firehose loader is supplied. | A Qualcomm chipset with a loader the case can lawfully use. No loader means no proceeding, and the tool says so rather than guessing. |
| MediaTek BootROM (mtkclient) | Dumps partitions through the MediaTek BootROM acquisition route on the chipsets it reaches, locked or powered off. | A locked or dead MediaTek phone. No root needed on a chipset the method reaches. |
| Samsung download mode | The vendor's own flashing mode, used to reach partitions on a Samsung device that will accept it. | A Samsung phone you can put into download mode; the state it yields depends on the model and what the mode permits. |
| ADB physical (rooted) | dd's the userdata partition to a raw image over ADB once the phone is rooted and USB debugging is on. | A rooted Android with debugging enabled - the full physical route, including deleted data. |
| ADB backup / AFC + iOS lockdown backup | A logical backup: app data the platform is willing to export, not raw storage. | A non-root Android or an iPhone with no vulnerable chip - the honest floor when nothing deeper applies. |
Never a guess. An unknown chipset is never assumed to be vulnerable. The plan is built from the device's own identifiers - a DFU serial, a BootROM/preloader mode, an Android descriptor - and states plainly when nothing in this build reaches it.
3Step by step
- List what this build carriesIn-house protocol, a detected external tool, or a licensed capability package - each with its real certification state.
- Rank the methods for THIS deviceFrom the device's own identifiers (an iOS DFU serial or an Android descriptor), before anything is touched.
- Run one named methodBehind the same lawful-use gate as every forensic acquisition; a build without full mobile acquisition refuses by naming the product.
- Verify a licensed package before it runsEd25519 signature and payload hashes checked against the signed manifest; a tampered or wrong-key package is refused outright, never partially installed.
- Write the hashed manifestThe method, its provenance, and (for a licensed package) the authority that unlocked it all travel with the image.
4Ten situations, and exactly what to do
iPhone 8 in DFU mode
A seized iPhone 8 answers CPID:8015 in DFU mode.
checkm8 applies to A11 and earlier; the plan reports a proto-proven route needing the physical device and the loader tool.
- Read the DFU identifiers
- Rank methods for this device
- Run checkm8
- Hash and seal the image
A modern flagship, no public vector
The same case includes a current-generation Android on a modern chipset.
No public method reaches it. The plan names a licensed capability package as the only route rather than pretending one exists.
- List methods for the device
- See the honest refusal
- Check the licensed-package route
- Record the outcome in the case
MediaTek phone, locked and off
A budget Android on a MediaTek chipset will not power on.
MediaTek BootROM dump reaches it locked or off, no root required, on a vulnerable chipset.
- Identify the chipset from the BootROM/preloader mode
- Run the MediaTek method
- Recover from the dump
- Report the method used
Qualcomm phone, no loader available
A Qualcomm device sits in EDL (9008) mode but no signed firehose loader is in hand.
EDL needs a loader the case can lawfully use. Without one the method is refused with the reason, not attempted.
- Confirm the device is in EDL mode
- Check for a lawful loader
- If none, name the refusal in the plan
- Reconsider once a loader is available
Samsung device in download mode
A Samsung phone is put into Odin/download mode for acquisition.
The vendor mode reaches what it reaches for that model; the plan states the resulting state honestly rather than assuming full-physical.
- Put the device into download mode
- Run the Samsung method
- Read the state it actually yielded
- Recover from the result
Rooted Android, straightforward
A consenting owner's phone is already rooted with debugging on.
ADB physical - the full route, including deleted data, with no low-level method needed.
- Confirm root and USB debugging
- Run ADB physical acquisition
- Recover the image
- Export
Non-root Android, owner consents
A family member's Android has never been rooted.
ADB logical backup - allowed app data only, no deleted recovery; the honest floor for this device.
- Confirm consent
- Run the ADB backup method
- Extract app data
- Report what could not be reached
iPhone with device trust already granted
An iPhone has previously trusted this computer.
AFC + iOS lockdown backup - a logical backup; more comes out if the backup is encrypted with a known passcode.
- Confirm trust and unlock state
- Run the iOS backup method
- Parse Manifest.db and the stores
- Export
A dead, physically damaged handset
A phone will not power on and the board is damaged.
Chip-off / JTAG / ISP - hardware extraction done off-tool; the resulting dump is recovered here.
- Send the board for hardware extraction
- Receive the raw dump
- Recover from the dump
- Report the acquisition method as hardware
Auditing a licensed package before use
A vendor capability package arrives for a case that may need it.
Verify the package's signature and payload hashes before it ever touches a case machine.
- Receive the .sypkg file
- Verify signature and hashes
- Install only if it passes
- Record the package version in the manifest
5The same job at the command line
recoveryantra phone --plan "CPID:8015 ECID:001A70"The honest ceiling - what software can and cannot reach
Before first unlock or after, a vulnerable chip or none: the state decides what is possible, and the plan is built from the device's own identifiers, never a guess about the model.
1How to get there
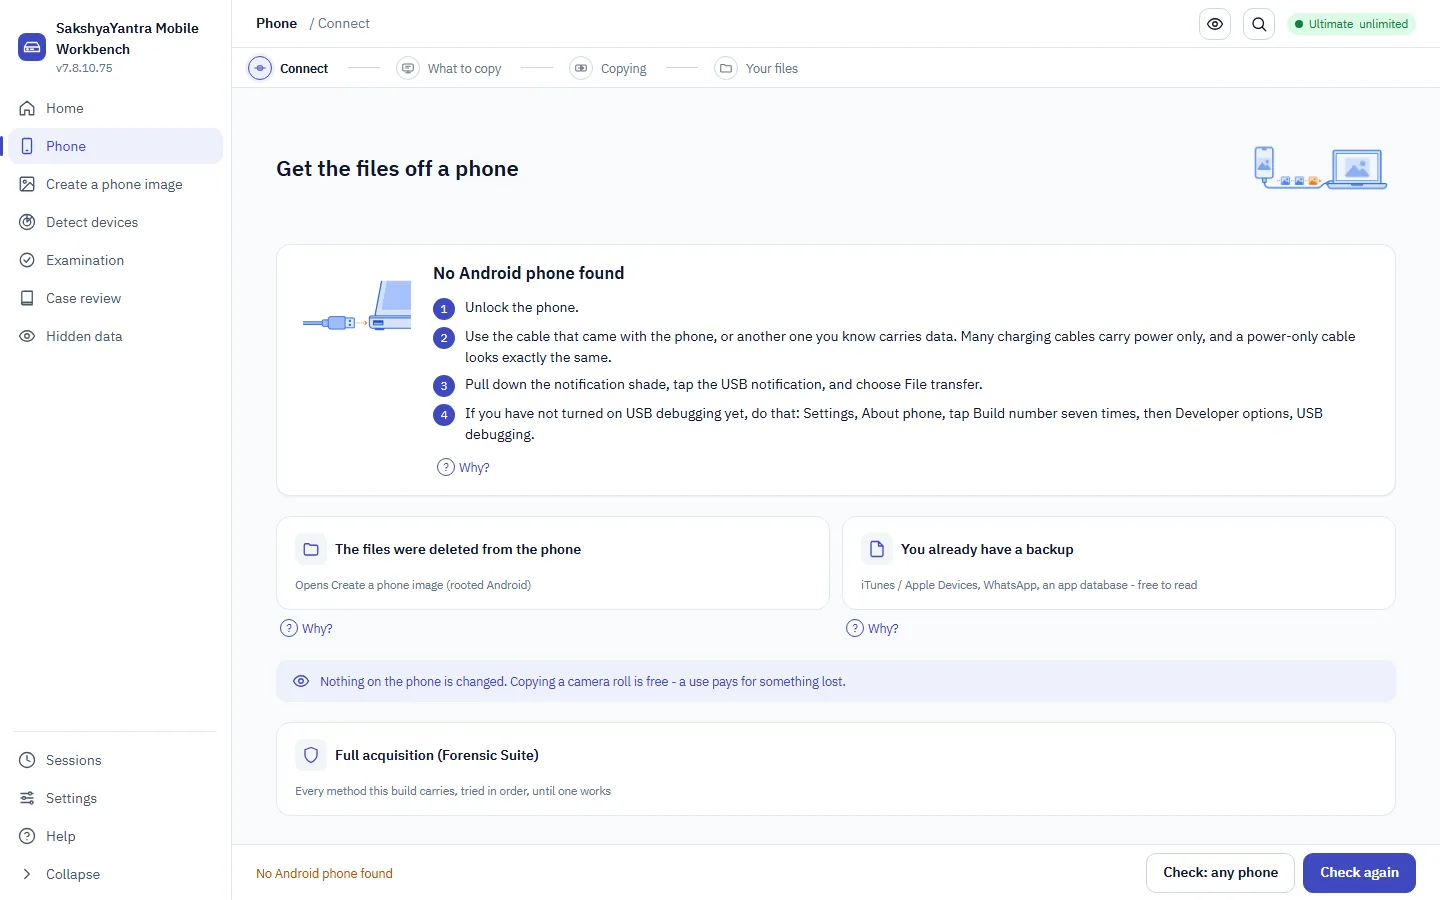
- 1Why? an explanation of why a route is or is not available - never a bare code.
- 2Route for deleted content where deleted material would come from, if this device allows it.
- 3Full acquisition (Forensic Suite) the full method framework, gated to the Forensic Suite and the Suite's own mobile workspace.
2The state the device is in decides what is possible
The honest ceiling. A locked modern handset's passcode is not recoverable by software. That is a silicon and hardware-laboratory question, and the product says so rather than promising a route that does not exist. checkm8 reaches A5 through A11 only; A12 and later carry no known public vector.
3The commands that establish the ceiling
| Option | What it does | What to choose |
|---|---|---|
| --ffs-dfu | From an iPhone's own DFU identifiers, establishes whether a full-filesystem acquisition is possible before anything is promised. | Before quoting a case involving an iPhone. The answer for a modern handset is often no, and the plan says so plainly. |
| --android-ffs | The same question for Android, from the device descriptor. | Before promising a physical acquisition on an Android device of unknown chipset. |
| --package-install | Installs a signed capability package under counsel's agreement, after verifying it. | Only once a package has been verified; a tampered or wrong-key package contributes nothing to the method registry. |
| --package-list | Lists installed capability packages that still verify. | Before a case, to confirm which licensed routes are actually available on this bench today. |
| --cloud-tokens | Scans a lawfully acquired artefact for cloud account tokens and returns the lawful route to the provider. | When cloud data may hold what the device does not. Finding a token is never authority to use it; follow the lawful route instead. |
4Ten situations, and exactly what to do
iPhone locked, never unlocked since seizure
The device was seized powered on and has not been unlocked since.
BFU state. Check the chip against checkm8's reach before promising a filesystem image.
- Read the DFU identifiers
- Run --ffs-dfu
- If vulnerable, checkm8 reaches it locked
- If not, state the ceiling and name the licensed route
iPhone 14, no public vector
A current-generation iPhone with no known public BootROM vector.
Name the licensed capability package as the only route, or state plainly that none is installed.
- Run --ffs-dfu
- Read the honest refusal
- Check --package-list for an applicable route
- Record the outcome
Dead Android, will not power on
A phone with a damaged board or dead battery will not boot at all.
Not a software question. Chip-off, JTAG or ISP extraction is the route, done off-tool.
- Confirm the device will not power on by any means
- Send the board for hardware extraction
- Recover from the resulting dump
- Report the method as hardware
Android with file-based encryption, unrooted
A modern Android with FBE and no root, no vulnerable chip.
Storage stays encrypted until the first unlock after restart. State this plainly rather than attempting a read that will fail.
- Establish rooted status
- Establish AFU/BFU state
- If BFU and unrooted, state the ceiling
- If AFU, attempt the reachable logical route
Unknown chipset, case just opened
The device model is known but the exact chipset revision is not yet confirmed.
Never assume vulnerability from the model name. Read the real identifiers first.
- Read the BootROM/preloader/DFU identifiers off the device itself
- Run --ffs-dfu or --android-ffs
- Act only on the measured answer
- Record what was read, not assumed
An examiner wants to try an advanced method
A case may benefit from a method that can alter the device.
Advanced methods are off until an examiner opts in, on the record, for this case.
- Record authority, operator, case reference
- Opt the method in explicitly
- Run it, with the opt-in on the audit trail
- Disable it again once the step is complete
Android unlocked earlier today, now locked
The screen is locked now but the phone was used and unlocked hours ago.
AFU state. More is reachable than a device that has never been unlocked since restart.
- Establish AFU state from the case notes or the device itself
- Attempt ADB physical if rooted, backup if not
- Recover from what is reached
- State the ceiling for anything not reached
Qualcomm device, licensed loader available
A case has an applicable licensed capability package for this chipset.
Verify and install the package, then run EDL through it, with the authority recorded.
- Verify the package
- Install it
- Run the EDL method through the package
- Record the package version and authority in the manifest
A phone that 'worked yesterday' now bootloops
The device powers on partially but never reaches a usable screen.
Triage before choosing a method - a bootloop is a different problem from a locked screen.
- Observe the boot behaviour
- Check for a known BootROM/DFU mode regardless of the bootloop
- Choose the method that state actually allows
- Avoid a route that risks making it worse
Confirming a device's special USB mode before touching it
A phone connected via USB shows an unfamiliar vendor/product id.
Identify EDL, MediaTek BootROM, Apple DFU, fastboot or Samsung download mode before running anything.
- Read the USB vendor/product id
- Match it against the known special modes
- Choose the method that mode supports
- Proceed only once the mode is confirmed
Read the phone once, work from the image afterwards
For a rooted Android that trusts this computer: streams the partition to an image file, verified by length, so every recovery pass runs against the copy instead of the handset.
1How to get there
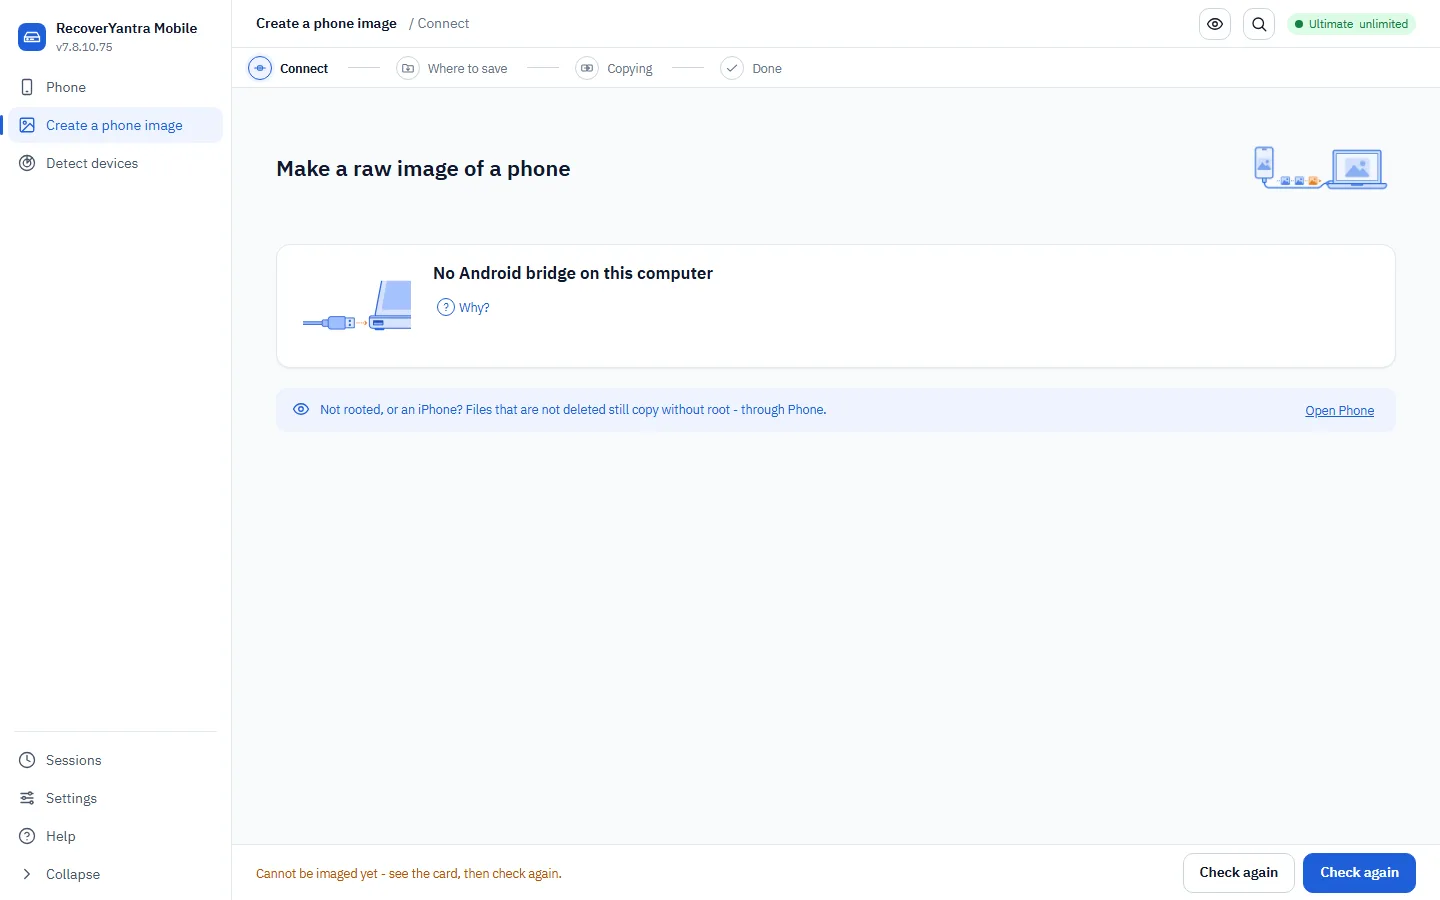
- 1Why? the honest explanation when no rooted or consenting phone is connected.
- 2Open Phone opens the mobile acquisition workspace for a locked or non-root device instead.
- 3Check again re-checks the connection - useful once the phone is unlocked and USB debugging is on.
2What it needs, and what it checks
| Option | What it does | What to choose |
|---|---|---|
| Where to save | The destination for the image file - a drive with room for the whole partition. | Always a separate drive with free space measured against the partition size before the copy starts. |
| USB debugging + unlocked since restart | The two conditions the copy needs; without them storage stays encrypted and unreadable. | Confirm on the phone before starting. A locked phone lists fine over USB and still reads nothing. |
| Length verification | The finished image is compared against the partition size the phone reported. | Always on. A short image (a dropped cable, a sleeping phone) is reported failed, never handed over as whole. |
3Step by step
- Connect the phoneUSB debugging on, and unlocked at least once since it was last restarted.
- Choose where to saveA drive with room for the whole partition; the pre-flight checks free space first.
- CopyingStreamed in blocks with a live figure and a stop that stops.
- Done - hand off to recoveryThe image goes into the ordinary recovery flow: Smart mode reads the filesystem and carves the rest.
What this is for. This copies a rooted or consenting Android's storage to an image file so the phone is read once instead of repeatedly. A locked, unrooted phone, or an iPhone, is not a raw-image device this way - the workspace says so and points at mobile acquisition instead.
4Ten situations, and exactly what to do
Rooted Android before a deep recovery
A rooted phone needs its userdata partition read once, thoroughly.
Image the partition first, then run every recovery pass against the image, not the phone.
- Connect, confirm root and debugging
- Choose the destination
- Copy the partition
- Recover from the image with Smart mode
Phone locked since the last restart
The device lists over USB but has not been unlocked since it last powered on.
Storage stays encrypted until the first unlock after restart. Unlock it once, then image.
- Connect the phone
- See the honest 'locked since restart' state
- Unlock the phone once
- Check again, then image
Large partition, limited destination space
The phone's userdata partition is larger than the free space on the chosen drive.
The pre-flight measures the partition size against free space before starting, and refuses rather than filling the drive mid-copy.
- Connect the phone
- Choose a destination
- See the space check
- Pick a drive with enough room
The cable drops mid-copy
A USB connection is interrupted while the image is being written.
The copy compares its length against the reported partition size; a short result is reported failed, never handed over as whole.
- Copying begins
- Connection drops
- The result is reported failed, not partial-complete
- Reconnect and image again
Non-rooted phone offered for imaging
An unrooted Android is connected and imaging is attempted anyway.
A raw partition image needs root. The workspace states this and offers the mobile acquisition workspace instead.
- Connect the phone
- See the honest refusal naming root as the requirement
- Open the mobile acquisition workspace
- Use ADB backup or the method registry instead
iPhone offered where a raw image is not the route
An iPhone is connected to the same workflow.
iOS does not yield a raw partition image this way. AFC and the iOS backup route apply instead.
- Connect the iPhone
- See the honest 'not a raw-image device' state
- Open the mobile acquisition workspace
- Run AFC + iOS lockdown backup
Imaging once, reading many times
Several recovery passes are planned against the same phone.
Read the phone once into an image; every subsequent pass runs against the image, not the handset.
- Image the partition once
- Run Smart mode recovery
- Run a targeted carve if needed
- Never reconnect the phone for each pass
Checking free space before a long copy
A large partition is about to be imaged to an external drive.
The destination step states free space against the measured partition size before Copying starts.
- Connect the phone
- Choose the destination
- Read the free-space figure
- Proceed only once it clears
The phone sleeps mid-session
The screen locks itself partway through connecting.
The same encrypted-until-unlock rule applies; wake and unlock it, then Check again.
- Connect the phone
- Screen locks itself
- Wake and unlock the phone
- Check again to re-probe
Handing the image to a forensic examination instead
The image is needed for a case, not a customer handover.
The same image file feeds either flow; choose the forensic profile when it goes into a case.
- Image the partition
- Open the Forensic Suite's case workbench
- Add the image as an exhibit
- Continue under the sealing wrapper
Read the app's own store - including what was deleted
Per-application decoders for SMS, WhatsApp, contacts and more, reading live rows and recovering deleted ones from the write-ahead log and superseded database pages, always flagged as deleted.
1How to get there
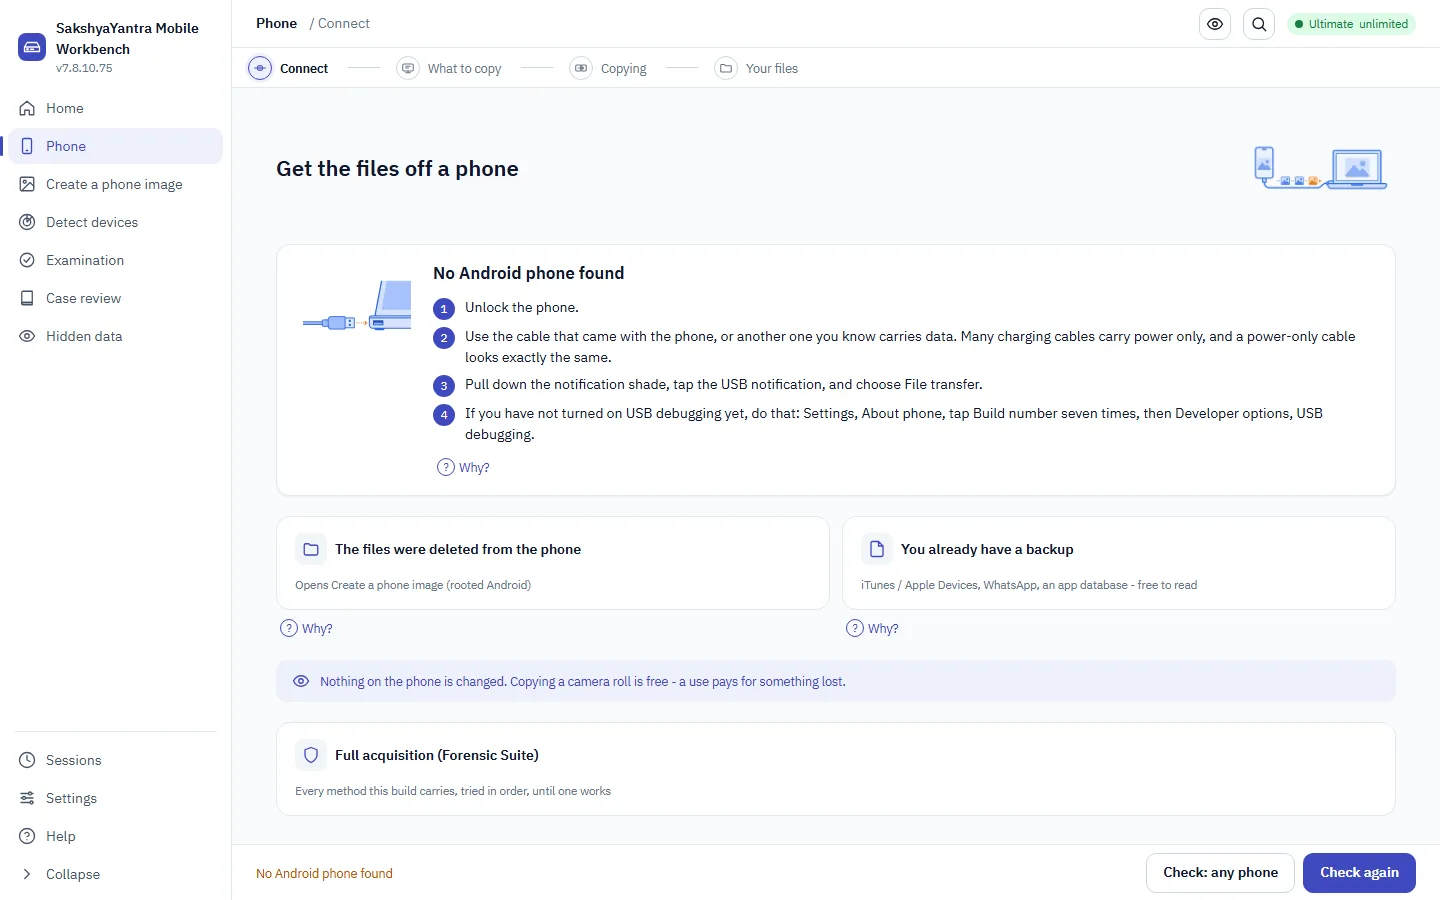
- 1Files deleted from the phone the route to run when files or messages were deleted, not just lost with the phone.
- 2You already have a backup decode an existing backup or pulled store without reconnecting the device.
- 3Why? the honest explanation of what this app's data allows.
2The options, and what to choose
| Option | What it does | What to choose |
|---|---|---|
| --store | Points at a single database or file already pulled off a handset. | When you already know which application's data you need. |
| --leveldb | Reads a LevelDB folder or a single .log file, for Chrome, Electron chat apps and browser local storage. | Only the write-ahead log is read; data already compacted into .ldb table files is a stated limit, not everything the store held. |
| --deep | Mines a whole pulled phone folder for deleted material: trash, deleted database rows, thumbnails of photographs no longer present. | When deleted material matters. It takes considerably longer than reading one store, and recovered rows are flagged as such. |
| --app | Forces a profile when auto-detection picks the wrong one. | A renamed or unusually located database that the automatic match misses. |
| --key | Supplies the key for an encrypted store - a WhatsApp key file, or a hex key for SQLCipher. | Required for an encrypted store. Without the key the store cannot be read, and the product says so rather than returning partial output. |
| --breadth / --platform | Runs the signed iLEAPP (ios) or ALEAPP (android) toolpack over an extraction for the long tail of apps. | When a case needs wider coverage than the in-house decoders. Rows are labelled as the tool's own, shown as corroboration. |
3Step by step
- Pull or acquire the storeA single database, a LevelDB folder, or a whole pulled phone folder.
- Point the decoder at it--store for one database, --deep for a whole folder, --key for anything encrypted.
- Read deleted rows honestlyA deleted row that survives in the write-ahead log or a superseded page comes back whole and flagged deleted; a fragment without its headers is returned as recovered text, not a reconstructed message.
- Widen coverage if neededRun the breadth tool for the app list beyond the in-house decoders, labelled as its own findings.
- ExportMessages, contacts and call history export in a form that can actually be used, not a private format.
How deleted rows are handled. A deleted row that survives in a write-ahead log or a superseded page comes back whole and is flagged deleted. A fragment with its headers gone is returned as recovered text, never welded back into an invented message.
4Ten situations, and exactly what to do
Deleted WhatsApp messages
WhatsApp messages were deleted on a rooted phone.
Supply the key file and read the store's deleted rows alongside the live ones.
- Acquire the phone
- Locate the WhatsApp key file
- Run the decoder with --key
- Export flagged as deleted where recovered
SMS deleted from the message store
Text messages were deleted from an Android's SMS database.
Read mmssms.db directly and show only the deleted rows.
- Pull the database
- Run the decoder
- Filter to deleted-only
- Export
A deleted contact, recovered whole
A contact was deleted from an Android address book.
The phone runs in WAL mode: the superseded page still holding the deleted row is read, giving back the whole contact.
- Pull the contacts database and its WAL file
- Run the decoder
- Confirm the row source is a superseded page
- Export to vCard
A Chrome-based app's local storage
A chat app built on Electron stores its data in LevelDB, not SQLite.
Read the write-ahead .log file; note the stated limit that already-compacted .ldb data is not covered.
- Locate the LevelDB folder
- Run the decoder with --leveldb
- Read the recovered log entries
- Note the compacted-data limit in the report
Mining a whole pulled folder
A full pulled phone folder is available and deleted material across several apps matters.
Deep mining walks trash folders, deleted rows and orphaned thumbnails across the whole folder.
- Pull the phone folder
- Run --deep against it
- Review the flagged deleted results
- Export by app
Auto-detection picks the wrong app profile
A renamed database is misidentified by automatic matching.
Force the correct profile by name.
- Run the decoder and see the wrong match
- Identify the real app
- Re-run with --app set explicitly
- Confirm the fields now parse correctly
Widening coverage past the in-house decoders
A case needs artefacts from an app the in-house decoders do not cover.
Run the signed breadth toolpack over the extraction and treat its rows as corroboration.
- Complete the core extraction
- Run the breadth tool for the platform
- Review its rows alongside the in-house findings
- Label the source of each row
Apps that are honestly not locally recoverable
Snapchat, Instagram and Signal content is expected among the recoverable apps.
These are named as not locally recoverable - ephemeral, server-side, or encrypted - and scoped out of the quote rather than attempted.
- Run --areas to scope the case
- See these apps named as not locally recoverable
- Explain the reason to the customer
- Scope the quote to what is actually reachable
A serialised blob with no surviving headers
A Telegram-style store yields printable text with its structure gone.
Reported as recovered text, not a reconstructed message - inventing a decoded structure from a fragment is not attempted.
- Run the decoder against the store
- See the result labelled as recovered text, not a message
- Review the text manually
- Note the honest limit in the report
Exporting recovered contacts for reuse
Recovered contacts, live and deleted, need to go into another system.
Export to vCard so the result is directly importable, not a private database format.
- Run the contacts decoder
- Confirm live and deleted rows are both present
- Export to vCard
- Hand the file to the customer or the case
The platform decides the route - never guessed, always read from the device
iOS speaks the phone's own pairing, lockdown and AFC protocols; Android goes through ADB or a chipset-specific vendor mode. Root and trust state decide how much of each comes back.
1How to get there
- 1Case ID one case reference, whichever platform the device turns out to be.
- 2Operator / organisation the operator and organisation recorded against the acquisition.
- 3Method list, filtered by platform the method list narrows to what actually applies to the connected platform.
2Which route, and why they differ
3The options on each platform
| Option | What it does | What to choose |
|---|---|---|
| iOS: AFC + iOS lockdown backup | Reads what the device's own backup protocol will hand over; an encrypted backup with a known passcode exposes more. | An iPhone or iPad with device trust already granted, or granted during connection. |
| iOS: checkm8 | A near-full filesystem image even locked, on A5-A11 chips only. | A vulnerable iPhone where a physical result matters more than a logical backup. |
| Android: ADB physical / backup | Full dd image if rooted and debugging is on; otherwise a logical backup of allowed app data. | Root state decides which of the two you get - check it before promising a physical result. |
| Android: EDL / BROM / download mode | Chipset-specific routes for a locked or dead device that ADB cannot reach. | The device is locked or will not boot, and its chipset matches one of these vendor modes. |
| --breadth --platform ios|android | Runs the matching breadth toolpack (iLEAPP or Android's ALEAPP) since the two read different artefact layouts. | Set the platform correctly - the wrong one reads the wrong layout and returns nothing useful. |
4Ten situations, and exactly what to do
iPhone with an existing local backup
The owner already made an unencrypted local backup on a computer.
Parse the existing backup directly; no need to reconnect the device.
- Locate the backup folder
- Run the iOS backup decoder against it
- Review Manifest.db and the stores
- Export
iPhone never paired with this computer
The device has no established trust relationship yet.
Connect and approve the trust prompt on the phone's own screen before AFC can read anything.
- Connect the iPhone
- Approve trust on the device
- Confirm the pairing completed
- Run the iOS backup method
Rooted Android, straightforward physical
A consenting owner's Android is rooted with debugging on.
ADB physical is the full route here; check root before promising it.
- Confirm root and debugging
- Run ADB physical
- Recover from the image
- Export
Android in fastboot/bootloader mode
The device shows a bootloader screen rather than booting normally.
Identify the USB mode before choosing a route - fastboot is a different state from EDL or BROM.
- Read the USB vendor/product id
- Confirm it as fastboot
- Choose the method that mode supports
- Proceed accordingly
iPhone in DFU restore mode
The device is held in DFU mode to check checkm8 eligibility.
Read the CPID/ECID and rank methods before doing anything else.
- Put the device into DFU mode
- Read CPID/ECID
- Run --ffs-dfu
- Act on the honest answer
One case, two phones, two platforms
A household case includes an iPhone and an Android under one investigation.
Acquire each through its own route, under the same case reference.
- Record the case reference once
- Acquire the iPhone via its route
- Acquire the Android via its route
- Review both under the one case
An iPad, treated the same as an iPhone
The device is an iPad rather than a phone.
The same AFC/backup and checkm8 routes apply; the platform is iOS, not the form factor.
- Connect the iPad
- Approve trust
- Run the iOS route that fits its chip
- Export
Non-root Android tablet, media only
A tablet is not rooted and USB debugging was never enabled.
MTP media copy is the floor: user-visible files only, no deleted recovery, no raw image.
- Connect over MTP
- Copy visible media files
- State the limit plainly
- Suggest enabling debugging for anything deeper
iOS backup with no passcode set
The device's local backup was never encrypted.
Fewer artefacts survive in an unencrypted backup than in one protected with a known passcode.
- Run the iOS backup route
- Note the backup is unencrypted
- Extract what is present
- State what an encrypted backup would have added
Deciding which breadth tool to run
Core extraction is complete for both an iPhone and an Android in the same case.
Run iLEAPP against the iOS extraction and ALEAPP against the Android one - never the other way round.
- Complete core extraction on each device
- Run --breadth --platform ios on the iPhone extraction
- Run --breadth --platform android on the Android extraction
- Label rows by their source
From acquisition to exhibit - case, chain of custody, the certificate
The Mobile Workbench's evidentiary layer: every acquisition can become a locked, hashed exhibit with its own Section 63(4) certificate, while the same acquisition remains available unsealed for an ordinary customer recovery.
1How to get there
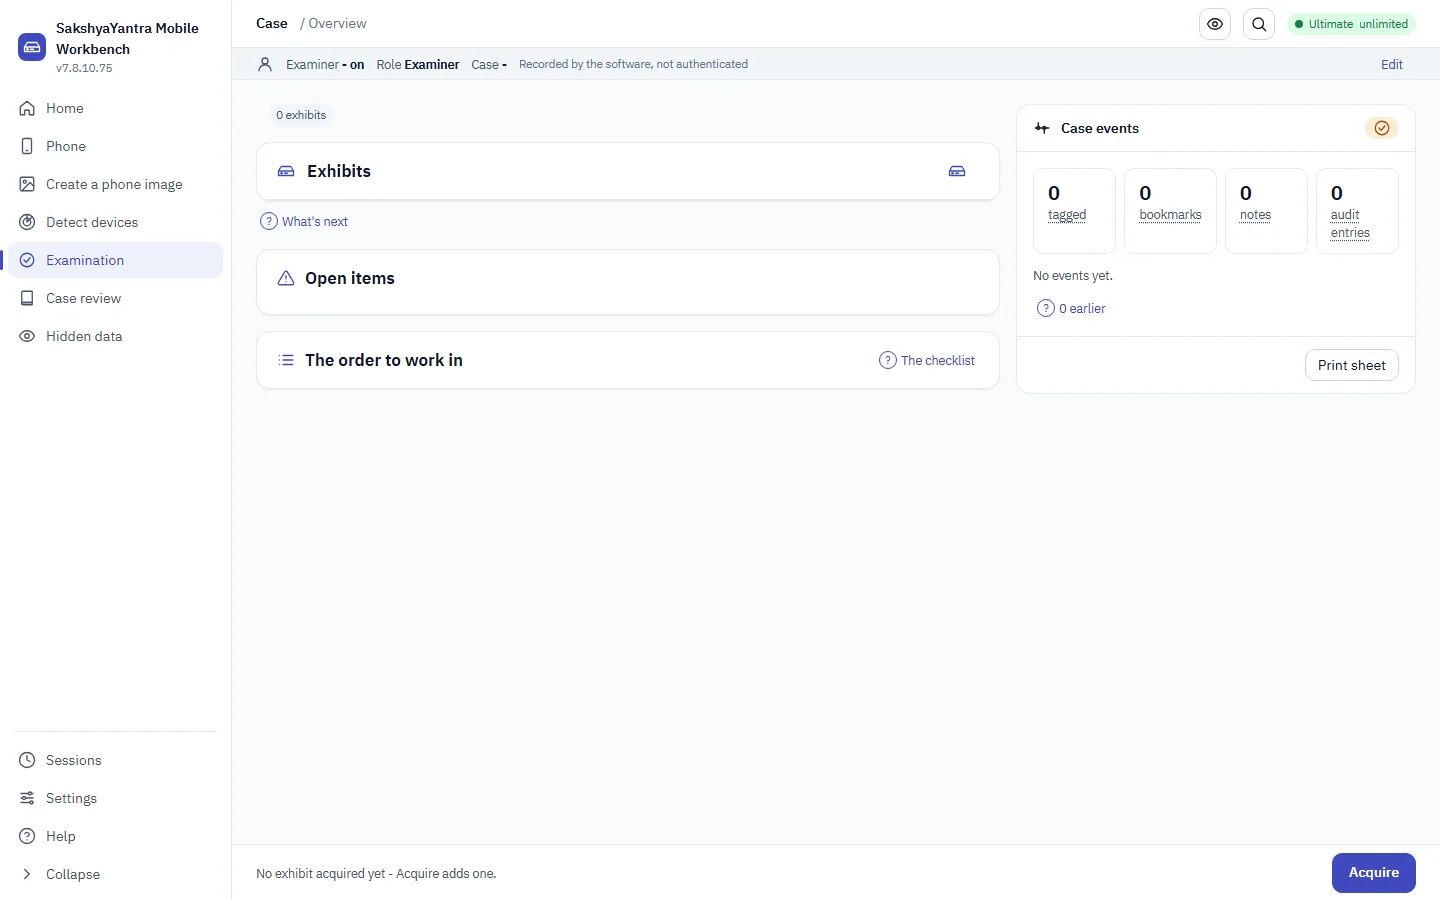
- 1Add an exhibit adds the acquisition to the case as a formal exhibit.
- 2What's next the next step required to move the case forward.
- 3The checklist the tracked checklist of steps this case has and has not completed.
2What sealing adds, and when to use it
| Option | What it does | What to choose |
|---|---|---|
| Case lock and versions | Locks the case's exhibits against silent edits; a new version is created for anything added afterward. | As soon as the first exhibit is sealed - never edit a locked exhibit in place. |
| Chain of custody manifest | A hashed, sealed record of every acquisition step: method, operator, authority, time. | Always, for every exhibit that will be relied on in a proceeding. |
| Section 63(4) certificate | The statutory certificate for electronic evidence under the Bharatiya Sakshya Adhiniyam 2023. | Before the case goes to a proceeding - generated from the sealed manifest, never hand-typed. |
| AI observations | A model's reading of an artefact, labelled and dated, sealed separately from the examiner's own reading. | Optional. The examiner's own reading is sealed BEFORE any AI answer is shown, and an AI observation is never promoted to a finding automatically. |
Forensic-only, not the acquisition itself. The evidentiary wrapper - case lock, versions, the Section 63(4) certificate, registry intake, AI observations - is a Forensic Suite capability. RecoverYantra Mobile carries the same acquisition and the same honest ceiling, without the sealing wrapper: a customer recovery does not need a court certificate.
3Step by step
- Acquire under the method registryThe same acquisition as every other feature here - byte-exact, hashed, with authority recorded.
- Add the result as an exhibitThe image or extraction enters the case, not a loose file on a desk.
- Lock the caseExhibits are sealed against silent edits; anything added afterward creates a new version.
- Generate the certificateThe Section 63(4) certificate is built from the sealed chain-of-custody manifest.
- Hand the case pack to whoever needs it nextAnother examiner, counsel, or the court - the pack carries its own record of how it was made.
4Ten situations, and exactly what to do
Sealing a fresh acquisition into a new case
A phone has just been acquired and needs to become part of a formal case.
Create the case, add the acquisition as an exhibit, then lock it.
- Open or create the case
- Add the acquisition as an exhibit
- Confirm the checklist step completes
- Lock the case
A second exhibit joins the same case
The same investigation also seized a laptop.
Add the laptop's image to the same case reference; each exhibit keeps its own chain of custody.
- Open the existing case
- Add the laptop image as a second exhibit
- Confirm both exhibits are listed
- Continue the examination
Producing the certificate for court
A case is ready to be submitted as evidence.
Generate the Section 63(4) certificate from the sealed manifest, not typed by hand.
- Confirm the case is locked
- Generate the certificate
- Review it against the manifest
- Include it in the case pack
Recording operator authority against the case
The examiner's lawful basis for the acquisition needs to be on the record.
Operator, authority and organisation are recorded once and carried through every exhibit in the case.
- Enter operator and organisation
- Enter the lawful authority reference
- Confirm it is attached to the case
- Proceed to acquisition
An AI observation on a recovered message
A model is asked to summarise a decoded conversation.
The examiner's own reading is sealed first; the AI's answer is labelled an observation, never promoted automatically.
- Seal the examiner's own reading
- Ask the model
- Review the AI observation, labelled as such
- Promote it only through a typed reviewer decision, if at all
A recorder joins a phone case
The same investigation includes CCTV footage alongside the phone.
Registry intake brings the recorder's format and export into the same case as a separate exhibit.
- Run recorder intake for the CCTV export
- Add it as an exhibit in the case
- Confirm both exhibits share the case reference
- Continue the examination
Reviewing before showing an AI answer
A finding is being drafted from decoded message content.
The examiner's own reading is sealed before any AI answer is shown, so the human reading is never anchored by the model.
- Read the recovered material
- Seal the examiner's own notes
- Only then ask the model
- Compare, do not overwrite
A recovery-only acquisition, deliberately not sealed
A customer's own phone is being recovered, not investigated.
The RecoverYantra Suite acquires the same way but does not carry the evidentiary wrapper - no case lock, no certificate.
- Acquire through the recovery family's mobile workspace
- Recover the files
- Export directly to the customer
- No sealing step exists in this product
Case versioning after new evidence arrives
A locked case needs a third exhibit added weeks later.
Adding to a locked case creates a new version rather than editing the sealed one.
- Open the locked case
- Add the new exhibit
- Confirm a new version was created, not an edit
- Review what changed between versions
Exporting the case pack for handover
The case needs to move to another examiner or to counsel.
Export the pack: exhibits, manifest, certificate and the audit trail, together.
- Confirm the case is locked and the certificate is generated
- Export the case pack
- Verify the export against the manifest
- Hand it over