Recover Yantra training.
Zero to confident, step by step.
A hands-on course, not a manual. Each module is a lesson with numbered steps: how to acquire, connect, store, extract, review and validate, plus what to watch for and where to save.
Three rules that never change.
Learn these first. Every module depends on them.
Read-only on the source
The drive you are recovering is only ever read, never written to. Recover Yantra proves it, byte by byte.
Image first if in doubt
If a drive is failing or precious, copy it once to an image and work on the copy. Never stress a dying drive twice.
Save somewhere else
Recovered files always go to a different drive. Writing them back could overwrite the very data you want.
Never install software onto, or save recovery output onto, the same drive you are trying to recover. That is how good data gets overwritten for good.
The 60-second quick start
Every command here is also a guided Easy Card in the app. Answer a few questions and it runs the same engine.
Modules, each a hands-on lesson.
Open a module and follow the numbered steps. Do them in order the first time; jump around once you know your way.
Module 1 · Recover lost or deleted filesThe everyday case: disks, SSDs, cards, USB.
How to recover lost or deleted files.
When to use this: The everyday case: disks, SSDs, cards, USB.
- 1Step 1Acquire the media
Decide image-first or direct. Image first for any drive that is failing, clicking, or that you get one shot at - a byte-for-byte copy so the drive isn't stressed further (use the Imaging card /
image); recover directly only from a healthy drive. - 2Step 2Connect it read-only
Attach the drive read-only - on a hardware write-blocker if you have one. The tool also PROVES read-only by fingerprinting the source before and after. Use a direct reader, not a hub that may drop off the bus.
- 3Step 3Choose where to save
Save recovered files to a DIFFERENT physical drive with enough free space (the pre-flight checks this). Never the source - writing to it can overwrite the very files you're recovering.
- 4Step 4Extract the data
Run
recoverin smart mode: filesystem parsing gets files with their names/folders, signature carving reconstructs the rest by content. A reused cluster chain is flagged, never handed back as wrong bytes. - 5Step 5Review what came back
Open the results grid - previews for image/video/audio/PDF/Office, hex for the rest. Check the flagged mismatch/unplayable files; they are honestly marked, not silently dropped.
- 6Step 6Validate the result
In forensic mode every file gets a SHA-256 in the manifest with its source offset; verify a sample opens and its hash matches. Byte-exact is measured, not assumed.
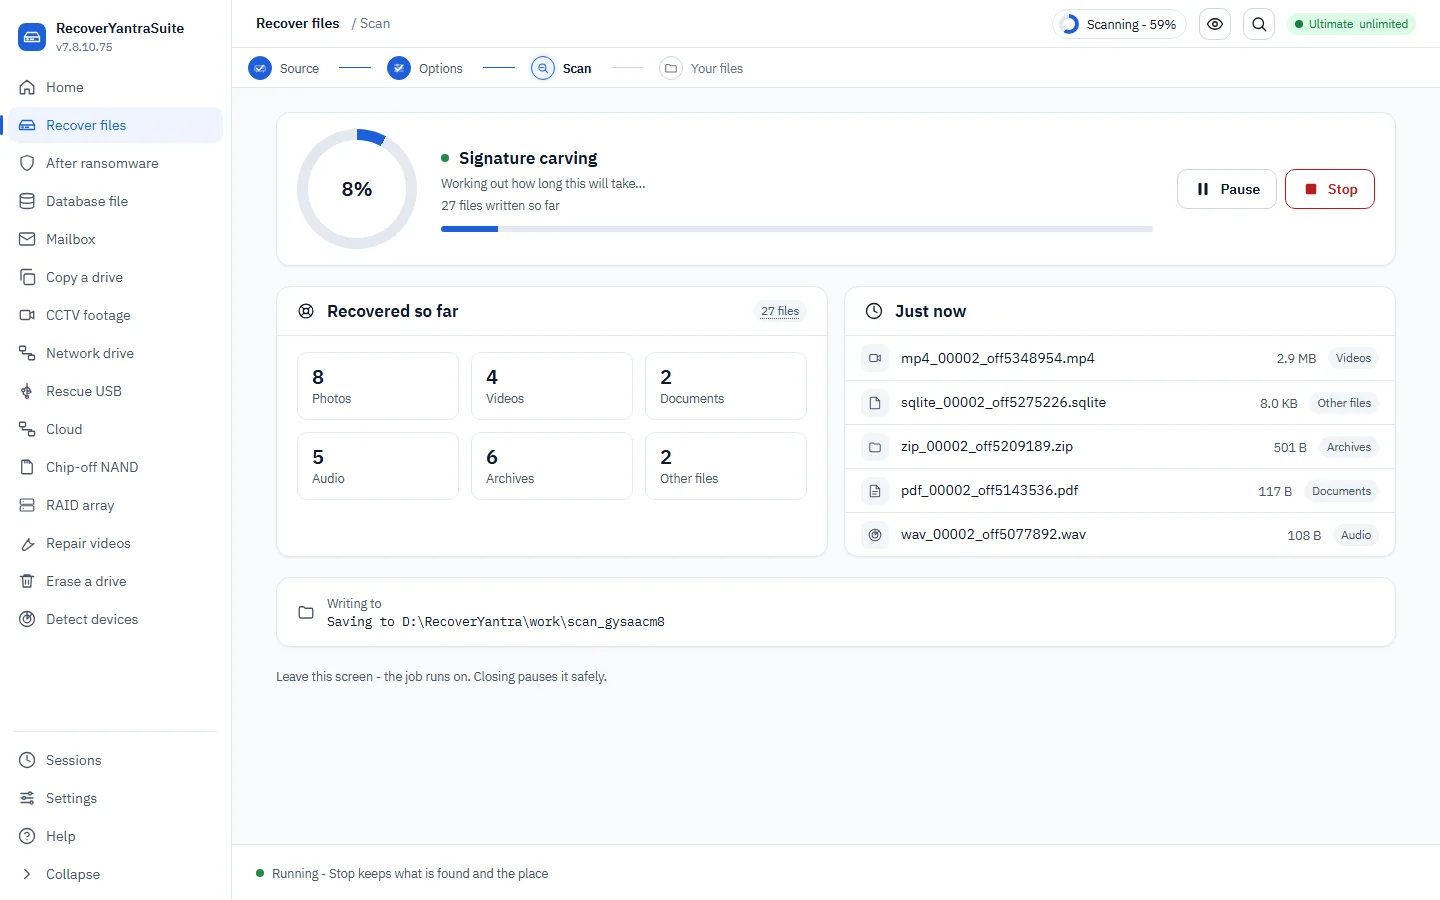
A deleted file on a TRIM-enabled SSD: its clusters are often already zeroed, so nothing recovers it - we say so. Best odds: stop using the drive and image it immediately.
A separate drive from the source; sorted into type folders (recovery) or flat + hashed (forensic). The source is only ever read.
Module 2 · Image a failing or damaged driveRead a weak drive once, safely, then work the copy.
How to image a failing or damaged drive.
When to use this: Read a weak drive once, safely, then work the copy.
- 1Step 1Acquire the media
This IS the acquire step for everything else: make a faithful copy first.
- 2Step 2Connect it read-only
Source read-only; a failing drive should be imaged before any recovery attempt.
- 3Step 3Choose where to save
The image goes to a separate drive with room for the whole source plus headroom.
- 4Step 4Extract the data
N/A - you recover from the image afterwards.
- 5Step 5Review what came back
Check the bad-sector map: which regions couldn't be read, and how much.
- 6Step 6Validate the result
The tool images in passes (skip bad areas, retry gently) and keeps a map, so you know exactly what is and isn't in the copy.
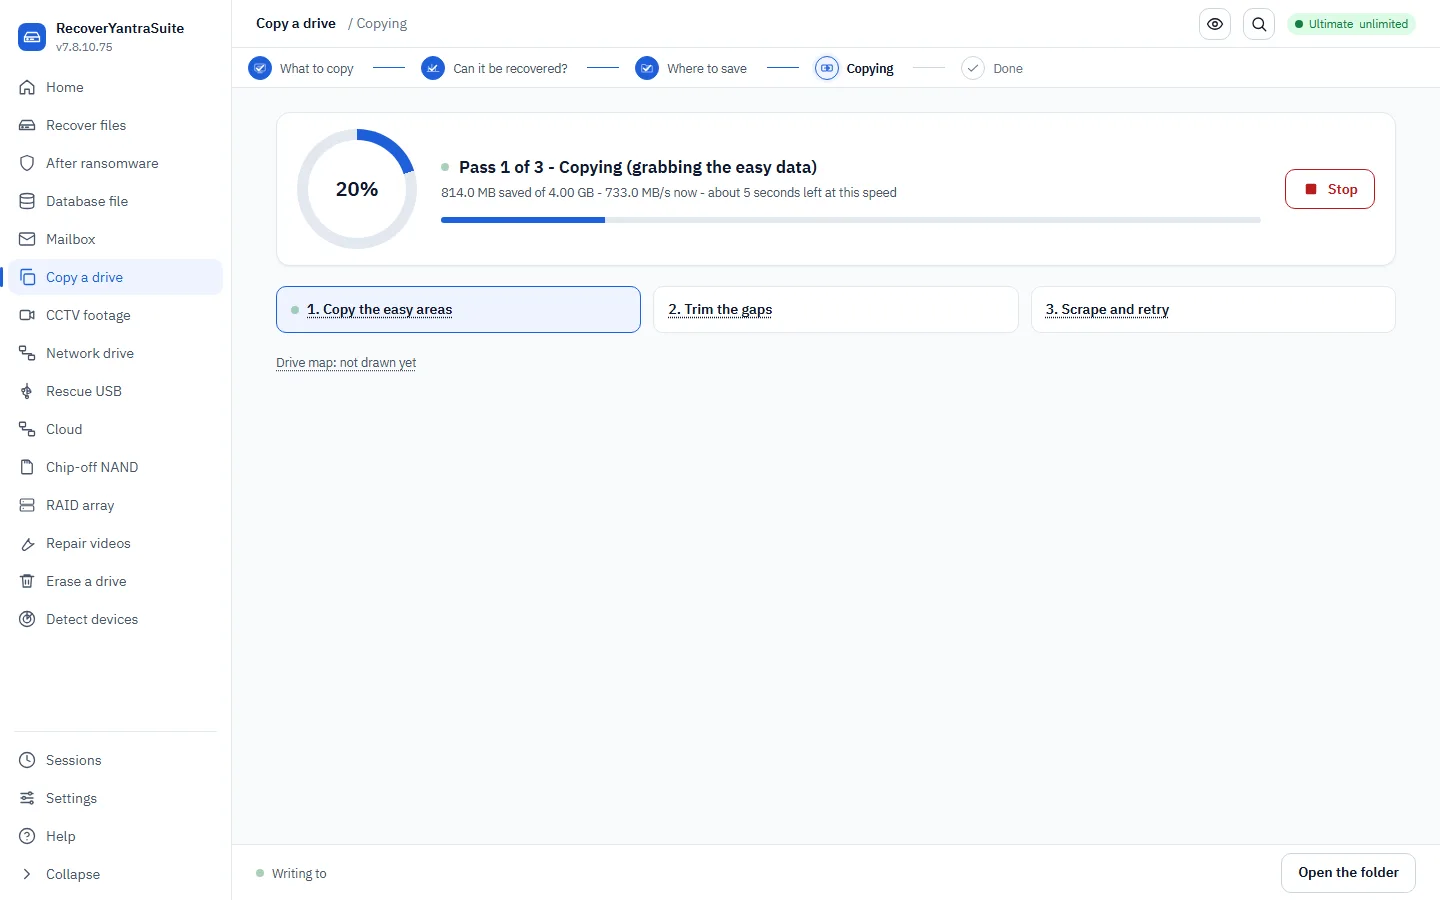
A drive dying mid-image: the pass strategy grabs the readable majority first then retries the rest, so a drive that fails partway still yields the most data possible.
Always save recovered data to a different physical drive from the source, with enough free space. Never write onto the media you are recovering.
Module 3 · Rebuild a RAID or NASReassemble the array, then recover from it.
How to rebuild a RAID or NAS.
When to use this: Reassemble the array, then recover from it.
- 1Step 1Acquire the media
Image EACH member drive individually (gently, bad-sector-mapped). Don't run the array live if a disk is failing.
- 2Step 2Connect it read-only
Attach each member read-only; note the order if known.
- 3Step 3Choose where to save
Rebuild to an image on a separate drive large enough for the whole array.
- 4Step 4Extract the data
raid --autodetects the layout (level, stripe size, order, parity rotation) or you supply it, reconstructs the virtual disk, then recovers files. Linux md metadata is auto-assembled. - 5Step 5Review what came back
Check the reconstructed filesystem mounts / lists files sensibly - wrong parameters produce garbage, a sign to re-detect.
- 6Step 6Validate the result
Recovered files are byte-exact; a RAID-5/6 with more failed members than its redundancy allows cannot be fully rebuilt, and we say which stripes are unrecoverable.
An unknown-order array with a failed member and no metadata: detection narrows it, but a member beyond the redundancy is gone - flagged.
Always save recovered data to a different physical drive from the source, with enough free space. Never write onto the media you are recovering.
Module 4 · Recover from a virtual machineOpen VMDK / VHDX / QCOW2 and pull files from inside.
How to recover from a virtual machine.
When to use this: Open VMDK / VHDX / QCOW2 and pull files from inside.
- 1Step 1Acquire the media
Copy the virtual-disk file (.vmdk/.vhdx/.vdi/.qcow2/.img). For a running VM, snapshot it or power it off first - a live disk is mid-write and inconsistent.
- 2Step 2Connect it read-only
No special connection - the disk is a file. Keep a snapshot chain's delta files together so it resolves to the current state.
- 3Step 3Choose where to save
Save recovered files to a separate drive, never inside the VM's folder or the datastore.
- 4Step 4Extract the data
recover --image <disk.vmdk>opens the virtual disk (VMware/Hyper-V/VirtualBox/QEMU/raw), reads its filesystem, and recovers files including deleted ones. A ransomware'd VM disk can be salvaged region by region. - 5Step 5Review what came back
Check the recovered filesystem lists sensibly; a thin/snapshotted disk may leave some regions unallocated.
- 6Step 6Validate the result
Recovered files are byte-exact; the honest limit is that a running VM's disk is inconsistent - use a snapshot or powered-off copy.
A deleted VM whose .vmdk was removed from an ESXi VMFS datastore: carve the datastore image for the descriptor + flat extents, rebuild the disk, then recover - or route a badly-damaged VMFS to a partner.
Always save recovered data to a different physical drive from the source, with enough free space. Never write onto the media you are recovering.
Module 5 · Recover a database serverCorrupt MySQL, SQL Server, Postgres, Oracle, Mongo.
How to recover a database server.
When to use this: Corrupt MySQL, SQL Server, Postgres, Oracle, Mongo.
- 1Step 1Acquire the media
Find out if the server is RUNNING first. If so, do NOT copy the live file (it's inconsistent) - stop the service and copy, or take an application-consistent snapshot (the DB's VSS writer, pg_basebackup, BACKUP DATABASE). A dead file / backup you just copy.
- 2Step 2Connect it read-only
Work on the copy on a separate disk. A SAN/iSCSI LUN: image the LUN. A cloud-managed DB (RDS/Aurora/Snowflake): there is no disk - use the provider's point-in-time restore or an export.
- 3Step 3Choose where to save
Save extracted rows to a NEW database, .csv or .sql on a separate drive; keep the damaged original untouched.
- 4Step 4Extract the data
db --identifynames the engine and routes it. Deep extractors (dBase/SQLite/MongoDB/Redis/ESE) pull rows directly, including deleted ones; for a corrupt file we read rows from the intact pages the engine won't open. Check BACKUPS first - a good restore beats forensic extraction. - 5Step 5Review what came back
Spot-check recovered rows - counts, key columns, known records. Large values (LOB/TOAST/BLOB) must be present, not truncated to a pointer.
- 6Step 6Validate the result
'Validated or declared-lost': a row is returned only if its page checksum and structure are sound; a bad page is reported, never guessed. Confirm types decode (dates, decimals, text encoding).
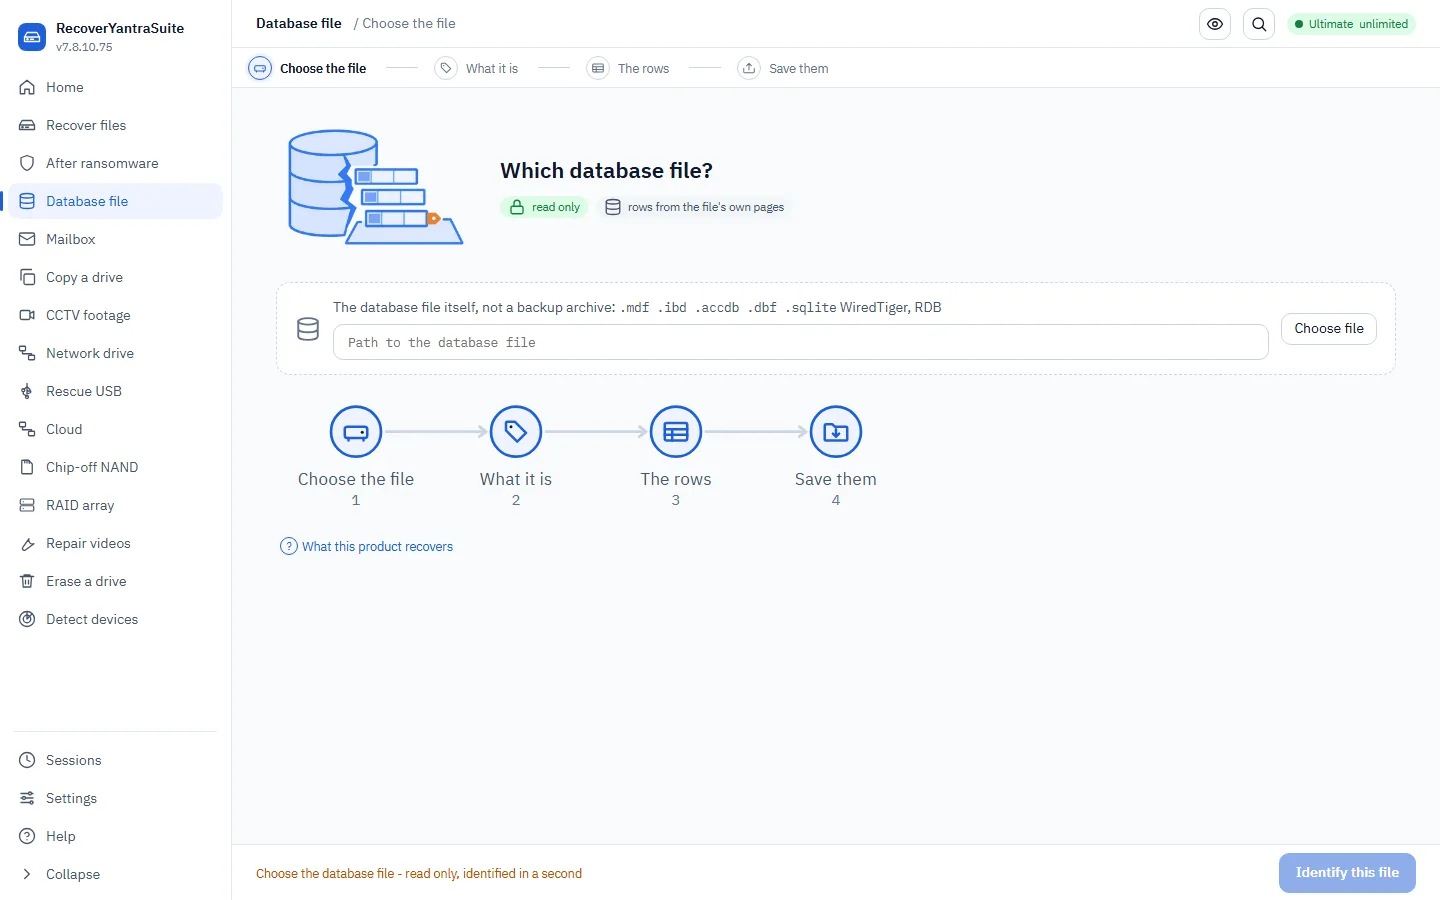
A live, TDE-encrypted, compressed production database needs it stopped/snapshotted AND its key AND compression handling - without the key there is no shortcut, and we say so.
Work on a STOPPED-service or SNAPSHOT copy, never the hot file. Save extracted rows to a NEW database / .csv / .sql on a separate disk; keep the damaged original.
Module 6 · Respond to ransomwareTriage, salvage, and reach an honest verdict.
How to respond to ransomware.
When to use this: Triage, salvage, and reach an honest verdict.
- 1Step 1Acquire the media
Preserve evidence FIRST - the note, a malware sample, encrypted+original pairs, a RAM image, a full disk image - before remediating. Don't delete the encrypted files (a decryptor may appear later) and DON'T pay.
- 2Step 2Connect it read-only
Work only on forensic copies on a separate, clean drive - never the infected system.
- 3Step 3Choose where to save
Save recovered/decrypted data to a clean separate volume; keep the encrypted originals.
- 4Step 4Extract the data
ransomware --triagerecovers files never really encrypted (renamed/fake);--recover-originalsfinds surviving copies (temp/backup/recycle/cloud/VSS);--verdictidentifies the family, checks for a free decryptor or known weakness, hunts the key in memory, and gives one plan. - 5Step 5Review what came back
Check the triage counts and paired originals; confirm recovered files open.
- 6Step 6Validate the result
Recovered files are byte-exact against a known original where you have one; the verdict states plainly when the files themselves cannot be decrypted.
Correct hybrid crypto with unique exfiltrated keys, no backups, no VSS, SSD+TRIM: decryption is impossible for anyone - recover what other avenues got, and don't pay.
Keep the encrypted originals (a decryptor may appear later). Save recovered/decrypted data to a CLEAN separate volume. Preserve the note, a malware sample, encrypted+original pairs, a RAM image and a disk image before remediation.
Module 7 · Open an encrypted volumeBitLocker, LUKS, FileVault, with the credential.
How to open an encrypted volume.
When to use this: BitLocker, LUKS, FileVault, with the credential.
- 1Step 1Acquire the media
Image the encrypted volume as-is; you decrypt the copy.
- 2Step 2Connect it read-only
Source read-only.
- 3Step 3Choose where to save
Recovered plaintext files to a separate drive.
- 4Step 4Extract the data
unlockdecrypts BitLocker (password, recovery password, or key), LUKS1/2 (passphrase), or FileVault2, then you recover from the decrypted view. - 5Step 5Review what came back
Confirm the decrypted volume mounts and files open.
- 6Step 6Validate the result
Decryption is verified by the volume's own checks; without the password/key there is no shortcut and none is faked.
A volume whose password and recovery key are both lost stays encrypted - strong crypto has no back door, and we don't pretend otherwise.
Always save recovered data to a different physical drive from the source, with enough free space. Never write onto the media you are recovering.
Module 8 · Recover cloud and sync dataLocal cache plus provider version history.
How to recover cloud and sync data.
When to use this: Local cache plus provider version history.
- 1Step 1Acquire the media
Two sources: the LOCAL sync cache on the machine (recover it like any disk - image the machine), and the PROVIDER (version history / point-in-time restore, reached through the portal or API).
- 2Step 2Connect it read-only
The local cache needs no special connection. The provider side needs the account's own credentials/permissions, which the owner supplies - we never hold them.
- 3Step 3Choose where to save
Save recovered files to a separate drive from the sync folder; never write back into the sync folder (it may re-upload).
- 4Step 4Extract the data
Recover the local sync cache directly. An online-only placeholder (0-byte stub) means the full copy is safe in the cloud - restore it there. Then use the provider's version history / Files-Restore / trash / object versioning for anything not cached.
- 5Step 5Review what came back
Check the recovered cache files open; note which were placeholders (their content lives in the cloud, not locally).
- 6Step 6Validate the result
Local-cache files are byte-exact; cloud-side restores are verified in the provider's portal. We never claim to raw-read a cloud service.
A file that was only ever online-only and then deleted past the provider's retention window is gone - no local copy, no version to restore, and we say so plainly.
Always save recovered data to a different physical drive from the source, with enough free space. Never write onto the media you are recovering.
Module 9 · Recover CCTV and DVR videoCarve clips from recorder disks.
How to recover CCTV and DVR video.
When to use this: Carve clips from recorder disks.
- 1Step 1Acquire the media
Image the NVR/DVR disk (proprietary filesystems are common; carving works regardless).
- 2Step 2Connect it read-only
Attach the recorder disk read-only, or use its image.
- 3Step 3Choose where to save
Save recovered clips to a separate drive.
- 4Step 4Extract the data
cctvcarves H.264/H.265 clips, giving each its own parameter sets so it plays independently. - 5Step 5Review what came back
Play a sample; any clip that may not play (missing parameter sets, entropy-coded tail) is marked, not passed off as fine.
- 6Step 6Validate the result
Clip boundaries are cut at real frame ends; the honest limit is that per-clip timestamps/channels need a vendor file-table walk we don't yet do (they show as unknown).
A running recorder overwriting oldest-first: stop it and image immediately; footage already overwritten is gone.
Always save recovered data to a different physical drive from the source, with enough free space. Never write onto the media you are recovering.
Module 10 · Securely wipe and verifyDestroy data to a standard, and prove it.
How to securely wipe and verify.
When to use this: Destroy data to a standard, and prove it.
- 1Step 1Acquire the media
N/A - wiping consumes the target. Be certain any needed data is OFF it first.
- 2Step 2Connect it read-only
Attach the drive to erase. The system disk, the drive the tool runs from, and the report drive are refused outright.
- 3Step 3Choose where to save
The opposite of recovery: the destination IS the target. The certificate is saved OFF the wiped drive.
- 4Step 4Extract the data
N/A.
- 5Step 5Review what came back
Type the drive's own serial number back to confirm you picked the right one - a plain 'yes' is too easy to misclick.
- 6Step 6Validate the result
After a NIST-Clear zero-write, the tool reads the drive back with its OWN recovery engine and confirms nothing remains, then issues a certificate stating the level achieved and its limits.
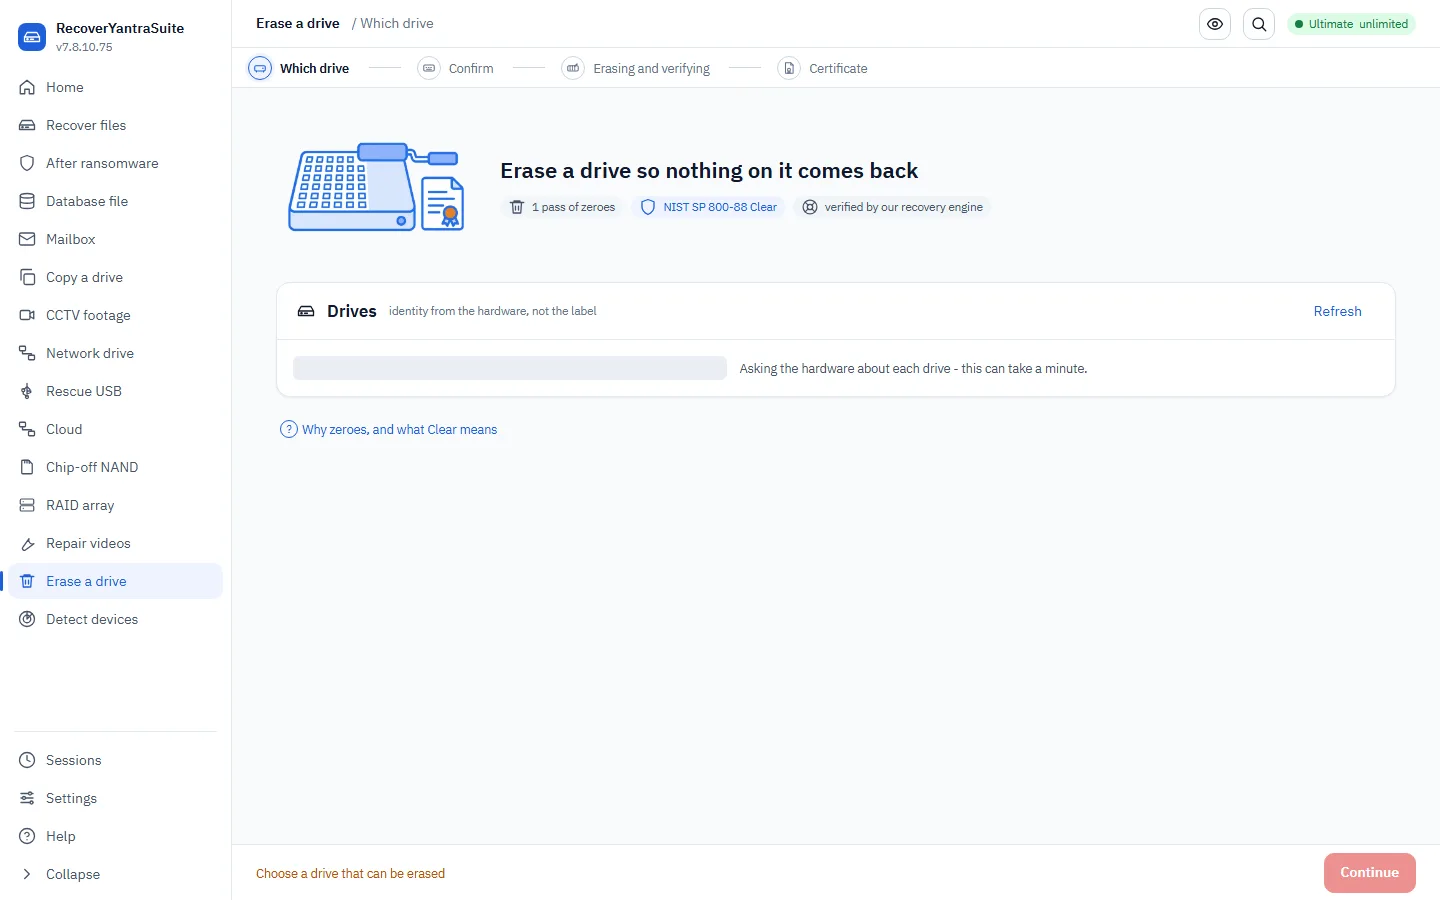
An SSD's wear-levelled spare blocks can retain data a zero-write can't reach; for true destruction, use the drive's built-in secure-erase or physical destruction - stated honestly.
The opposite of recovery: the destination IS the target. Confirm the serial; save the certificate OFF the wiped drive.
Worked examples, start to finish.
Real situations with the exact steps, what to expect, and the honest limit.
Formatted SD card of family photos
Someone reformatted a camera SD card that still held holiday photos and 4K video. Nothing has been written since.
- Stop using the card immediately; put it in a direct reader.
- Image it first:
image --device <card> -o card.img(a copy so the card isn't stressed). - Recover from the copy:
recover --image card.img -o D:/recovered --mode smart. - Review in the results grid; photos/video preview inline.
LockBit ransomware on a file server
A law firm's Windows file server was encrypted overnight; files have a random extension and there's a ransom note.
- Do NOT pay; preserve the note, a malware sample, a RAM image and a disk image before touching anything.
- Work on a forensic copy:
ransomware --triage <copy>to grab the files that were only renamed or fake-encrypted. ransomware --recover-originals <copy>to pair encrypted files with surviving originals (VSS, temp, backups, OneDrive cache).ransomware --verdict <copy> --memory ram.rawfor the family, any known weakness, a memory key, and one honest plan.
Failing external HDD that clicks
A photographer's USB hard drive clicks and mounts intermittently.
- Do not keep retrying it; that accelerates failure.
- Image it gently first:
image --device <drive> -o disk.img(the pass strategy skips bad areas then retries them). - Recover from the image:
recover --image disk.img -o E:/rec. - Check the bad-sector map to see what could not be read.
RAID-5 NAS that won't mount after a disk failure
A 4-disk RAID-5 NAS lost one disk and the volume won't come up.
- Image each surviving member individually.
raid --members d1.img d2.img d3.img --auto -o array.imgto detect the layout and rebuild the virtual disk (a Linux md set auto-assembles).- Recover from the rebuilt image:
recover --image array.img -o out.
MySQL won't start after a power loss
An InnoDB database won't start; the server logs a page-corruption error.
- Copy the data directory (stop the service first).
db --identify ibdata1/ a table's.ibdconfirms InnoDB.- Check backups first; if none, extract rows from the intact pages of the copied
.ibd(deleted/delete-marked rows included). - Save recovered rows to a new database or CSV on a separate disk.
Ransomware hit files synced to OneDrive
A user's Documents were ransomware'd and they also empty a folder by accident.
- Recover the local OneDrive sync cache directly (
cloudcard). - Use 'Restore your OneDrive' to roll the account back up to 30 days, and per-file Version History for the rest.
- Check the OneDrive Recycle Bin (30-93 days).
A VMware VM whose guest OS won't boot
A .vmdk boots to a repair loop; you need the files inside.
- Copy the .vmdk (and its snapshot deltas, kept together).
recover --image guest.vmdk -o outopens the virtual disk and reads its filesystem directly.- Recover the needed files, including deleted ones.
Securely wipe a decommissioned laptop
IT must erase a returned laptop's drive and prove it for compliance.
- Attach the drive (not as the system disk).
erase --target <drive>and type the drive's serial to confirm.- The tool zero-writes, reads it back with its own recovery engine to confirm nothing remains, and issues a certificate.
A DVR that overwrote last week's footage
A shop's DVR records in a loop and you need footage from before it was overwritten.
- Stop the DVR and image its disk immediately.
cctv <image> -o clipscarves H.264/H.265 clips with their own parameter sets so they play.
Ransomware locked the drive with BitLocker
A machine was ransomed not with custom crypto but by turning on BitLocker (ShrinkLocker) and hiding the key.
- Recover the abuse script / registry / a RAM image.
- The living-off-the-land engine finds the BitLocker recovery key or password the abuse left behind and validates it.
- Unlock with
unlockand recover the files.
A partly-encrypted Word document
Ransomware encrypted only the first part of a .docx; you need the text.
- Run format reconstruction (White-Phoenix) on the file.
- It finds the intact ZIP parts (word/document.xml) and pulls the readable text.
Deleted file on an SSD (the honest case)
A single important file was deleted yesterday on a busy internal SSD with TRIM enabled.
- Check the Recycle Bin, backups, VSS, and any cloud sync first.
- Run a scan, but set expectations by media type.
Look it up fast.
The details behind the lessons, in one place.
What you get, and the honest limits
| Capability | What you get | Limits | Where to save |
|---|---|---|---|
| Signature carving | Reconstructs ~130 file types by content, byte-exact, on formatted/corrupt media. | Fragmented files may be partial; needs a signature for the type. | A separate drive from the source. |
| Filesystem recovery | Recovers files WITH names/folders from NTFS/FAT/exFAT/ext/HFS+/APFS/XFS. | A reused cluster chain can't be trusted - such files are flagged, not guessed. | A separate drive. |
| RAID / imaging | Rebuilds RAID 0/1/5/6/10/50/60 and gently images failing drives with a bad-sector map. | A missing member beyond the redundancy can't be reconstructed. | An image goes to a separate drive with room for the whole source. |
| Ransomware recovery (Phase R) | Triage the key-free wins, identify the family, recover surviving originals, salvage partial encryption, exploit documented crypto weaknesses, hunt the key in memory, and give one honest verdict. | Correct AES/RSA with unique, exfiltrated keys is unbreakable - we say so plainly and recover by other means. | A clean, separate drive; keep the encrypted originals. |
| Database recovery (Phase DB) | Identify 51 engines; deep byte-exact extraction for dBase, SQLite, MongoDB/BSON, Redis, ESE; carve/route the rest. | Cloud-managed and mainframe DBs are engine-export/partner jobs, not raw disk; a live server needs a snapshot, not the hot file. | A separate drive; extracted rows to a NEW database/CSV; keep the damaged original. |
| Multilingual search (Phase D) | Finds text in 40+ scripts with correct case/accent/form folding; detects and decodes encodings. | Legacy code-page AUTO-detection is offered as scored options, not a false single verdict; ISCII/TSCII need an external codec. | N/A - searches recovered data in place. |
| Phone acquisition | Read-only copy of what a connected phone exposes, plus deleted-record mining from pulled stores. | A modern locked flagship's passcode is a hardware/undisclosed-exploit problem - routed to a partner, never faked. | A separate drive; lawful-use acknowledged first. |
| Secure wipe (Phase E) | NIST-Clear zero-write with a read-back-verified certificate. | Software can't reach a flash drive's spare area or the standard's 'Destroy' level - the certificate says exactly what was achieved. | The destination IS the target - the opposite of recovery. |
| Encrypted volumes | BitLocker (incl. recovery password), LUKS1/2, FileVault2 unlock and decrypt. | Without the password/key there is no shortcut. | Recovered files to a separate drive. |
| Virtual machines / virtual disks | Recover files from VMware/Hyper-V/VirtualBox/QEMU disks (.vmdk/.vhdx/.vdi/.qcow2/.vhd), follow snapshot chains, and read VM memory (.vmem) for the key hunt. | A running VM's disk is inconsistent - use a snapshot/powered-off copy; a badly-damaged VMFS datastore may need a partner. | A separate drive, not the VM folder or datastore. |
| Cloud recovery | Recover the local sync cache (OneDrive/Google Drive/Dropbox/Box/iCloud) and route the cloud side to the provider's version history / point-in-time restore; object stores (S3/Azure/GCS) via versioning and soft-delete. | We can't raw-read a cloud service; a file that was online-only and deleted past the retention window is gone. | A separate drive from the sync folder. |
Where to save, by data type
| Files | A separate drive from the source; sorted into type folders (recovery) or flat + hashed (forensic). The source is only ever read. |
| Database | Work on a STOPPED-service or SNAPSHOT copy, never the hot file. Save extracted rows to a NEW database / .csv / .sql on a separate disk; keep the damaged original. |
| Memory | Save the RAM image AND any carved keys to a separate disk. Never write to the suspect machine; capture during/just after the incident. |
| Ransomware | Keep the encrypted originals (a decryptor may appear later). Save recovered/decrypted data to a CLEAN separate volume. Preserve the note, a malware sample, encrypted+original pairs, a RAM image and a disk image before remediation. |
| Phone | Save the pull/image to a separate disk; acknowledge lawful use and opt methods in first; the phone is read-only. |
| Wipe | The opposite of recovery: the destination IS the target. Confirm the serial; save the certificate OFF the wiped drive. |
| Raid Nas | Rebuild to an image on a separate drive large enough for the whole array. |
| Cctv | Save recovered clips to a separate drive. |
| Imaging | The image file goes to a separate drive with room for the entire source (plus headroom). |
| Virtual Machine | Save files recovered from a virtual disk to a separate drive, never inside the VM's folder or the datastore. |
| Cloud | Recover the local sync cache to a separate drive; never write back into the sync folder (it may re-upload). Cloud-side restores go to your chosen location via the provider. |
Database coverage
engines: 52; by_tier: {1: 8, 2: 25, 3: 19}; by_family: {'relational': 16, 'mainframe/legacy': 10, 'document': 2, 'key-value': 4, 'wide-column': 2, 'analytics/columnar': 5, 'time-series': 3, 'graph': 1, 'search': 1, 'in-memory': 1, 'vector/AI': 2, 'object/hierarchical': 3, 'embedded/mobile': 2}
Techniques, and why they work
| Carving | Recover by content signature, no filesystem needed. |
| Filesystem Parsing | Recover files with their original names and folders. |
| Mft Recovery | Rebuild NTFS file records (names + data runs) before carving. |
| Raid Assembly | Reconstruct a striped/parity array from its members. |
| Shadow Copies | Extract point-in-time originals from VSS. |
| Usnjrnl Resurrection | List what was deleted/changed, with paths and time. |
| Entropy Salvage | Recover the plaintext regions of a partially-encrypted file. |
| Family Identification | Name the ransomware from its traces; map to decryptors. |
| Keystream Reuse | Recover data where a stream cipher's keystream was reused. |
| Rsa Weakness | Factor a weak modulus (close primes / shared prime) to get the key. |
| Key-Material Search | Find AES/RSA keys in a memory image (aeskeyfind-style). |
| Page-Row Extraction | Pull rows from intact database pages the engine won't open. |
| Bson Carving | Recover MongoDB documents from a dump or a raw page. |
| Rdb Parsing | Recover Redis keys/values from a snapshot. |
| Multilingual Search | Find text in any of 40+ scripts, case/accent/form-insensitive. |
| Living Off The Land | Recover the key/password ransomware left behind when it abused BitLocker/EFS/an archive - no crypto break. |
| Format Reconstruction | Recover a document's text from the intact Office-ZIP parts / PDF streams a partial encryption left behind (White-Phoenix). |
| Virtual-Disk Recovery | Open a VMware/Hyper-V/VirtualBox/QEMU disk image and recover the files inside it, following snapshot chains. |
| Cloud Recovery | Recover the local sync cache and route the cloud side to the provider's version history / point-in-time restore. |
Glossary
| sector | The smallest chunk a drive reads or writes at once - classically 512 bytes, 4096 on newer drives. |
| cluster | A group of sectors the filesystem allocates as one unit. |
| filesystem | The index a drive uses to track files and folders (NTFS, FAT, exFAT, ext4, APFS ...). |
| MFT | NTFS's Master File Table - the record of every file on an NTFS volume. |
| unallocated space | Areas of a drive the filesystem currently counts as free - where deleted files often still sit until overwritten. |
| carving | Recovering files by recognising their content signatures, without any filesystem - works on formatted or damaged media. |
| slack | The leftover bytes between the end of a file's data and the end of its last cluster - can hold remnants of older data. |
| image | A byte-for-byte copy of a whole drive in a file - you recover from the copy so the original is never stressed. |
| shadow copy (VSS) | Windows' automatic point-in-time snapshots - a common way to get an unencrypted original back after ransomware. |
| $UsnJrnl | NTFS's change journal - lists what files changed or were deleted, and when. |
| entropy | A measure of randomness. Encrypted (and compressed) data looks random - near the maximum of 8 bits per byte. |
| keystream | The pseudo-random stream a stream cipher XORs with data. Reusing one is a fatal mistake we can exploit. |
| page | The fixed-size block a database reads/writes (e.g. 8 KB in SQL Server, 16 KB in InnoDB). |
| WAL | Write-Ahead Log / journal - a database's record of recent changes; often holds rows the main file no longer shows. |
| TDE | Transparent Data Encryption - a database encrypting its own files; you need its key to read them. |
| TRIM | An SSD command that erases deleted blocks quickly - which is why carving deleted files rarely works on a TRIM-enabled SSD. |
| BSON | Binary JSON - how MongoDB stores documents. |
| casefold | Unicode's correct way to compare text case-insensitively across languages (better than lower()). |
| chain of custody | The documented, tamper-evident record of who handled evidence and when - what keeps it admissible. |
| write blocking | Ensuring the source is only ever read, never written - and, here, measuring it to prove it. |
Command reference
list | List attached storage devices. |
find-drive | Search every usable attached device for a file by name, without picking a drive first - free, seconds not a scan. |
recover | Recover files from a device or image. |
mail | Open a mailbox - Outlook PST/OST, mbox, Maildir - including a store so damaged that Outlook itself refuses it, and write every message out as .eml. |
raid | Assemble and recover a RAID array. |
image | Gently image a failing drive. |
check | Can it be recovered? Test areas across the drive and state the chances - the estimated unreadable range, read speed and what to expect back - before any copying, with a PDF report. |
unlock | Unlock an encrypted volume (BitLocker/LUKS/FileVault). |
veracrypt | Unlock a VeraCrypt / TrueCrypt container with the password (recovers the cipher, master keys and geometry). |
cctv | Recover surveillance video from an NVR/DVR, then play, list, download, cut a range, extract several, enhance a frame or range, capture stills, or build a media report from what came back (subcommands: index, play, clips, download, custom, extract, enhance, frames, report). |
remote | Image a disk on another machine over the network. |
bootusb | Prepare a USB that images another computer's drive. |
acquire | Guided drive acquisition (for the booted rescue USB). |
fixvideos | Repair recovered videos so they play. |
fixwith | Repair a damaged video or photo using a healthy file from the SAME camera or phone as a reference - rebuilds a video's missing index, or gives a photo back the tables it needs. Only the description is borrowed; every byte of picture and footage comes from your own damaged file. |
timemachine | List the Apple Time Machine backups on a disk and check they can really be read - a backup is mostly hard links to earlier copies, and following them is what turns a list of empty stubs into the real files. |
validate | Run the engine against known images and write a report. |
audit | Show / verify the tamper-evident audit trail. |
wipe | Sanitise the working folder. |
erase | Securely erase a whole device (destructive). |
legal | Show / record the lawful-use acknowledgement. |
capabilities | The pre-case method checklist + acquisition toolbox. |
ransomware | Ransomware triage / identify / recover-originals / verdict. |
db | Identify a database artifact and how to recover it; coverage matrix. |
search | Fast indexed keyword search (SQLite FTS5) over a recovery output folder's search index. |
wizard | Show the plain-English guided steps for a workflow. |
detect | Every device this computer can see, usable or not, with the reason in plain words - cannot be read, needs administrator, in use, Windows cannot start it, a phone in MTP mode - plus bus, serial, sector size and health. --report writes it as HTML, PDF and JSON to send with a "not detected" question. |
which | Describe a situation in your own words and get the feature to use, why that one rather than the obvious alternative, a worked example, the commands, and what NOT to do. The question that comes before steps. |
steps | The order to do a job in, for data recovery or for forensics, with the published practice behind each stage and the command that carries it out. --commands prints a paste-ready runbook. |
case | Group several recovered sources - drives, images, phones - into one case for a single customer or job, and see everything recovered across them deduplicated by SHA-256, so the same file found on two sources is shown once (subcommands: new, add, list, status, dedup). The dedup is a view and never deletes a source's own copy. |
compare | Diff two scans of the SAME source - a first pass and a re-scan, or a deeper scan - and see what the second one added, what came back different, and what is unchanged, in four buckets: only in scan A, only in scan B, in both (identical bytes), and same name but different content. Matching is by exact SHA-256, so a file with the same name and different bytes is its own bucket and is never called the same file. Export the comparison as CSV or JSON. Comparing reads what the two scans already wrote, so it is free and charges no use. |
batch | A bench queue: image and/or recover several drives in sequence, unattended (subcommands: new, add, list, status, remove, move, start, pause, stop, resume, report). State lives on disk, so the queue survives the app closing and the machine restarting - a job left mid-flight by a crash is picked up again through the same resumable map/checkpoint a single job already has, never restarted from zero. Pre-flight is checked again immediately before each job starts, not when it was queued, and a job that cannot finish is recorded FAILED with the reason while the rest of the bench carries on - one bad drive never stalls the others. pause/stop are typed in another window while start is running elsewhere; report writes what happened across the whole batch. |
guide | Generate this Bible (the living guide) as HTML or Markdown. |
cloud | Authorised cloud acquisition and cloud-cache recovery. steps shows the stages an authorised collection follows. ingest takes in a provider EXPORT the organisation's own admin produced (a Purview PST, a Vault mbox) - offline, hashed, turned into .eml plus a manifest and an error report. collect acquires one mailbox the organisation owns live over the provider API, needing a token and a stated authority; scope is enforced, never assumed. caches finds local OneDrive/Dropbox/Drive sync caches on a recovered tree. Nothing runs without a stated basis, and an account a token could reach is still refused unless it is in scope. |
nandrecon | Rebuild a mountable image from a raw chip-off NAND dump - the file a lab produces by reading a bare memory chip. It works out the page and block geometry, de-scrambles the controller's XOR, applies the chip's error correction, and puts the blocks back into the order a filesystem expects, then writes an image the ordinary recovery flow can open. --analyse reports those four findings and writes nothing; run it first. Any figure the lab already knows can be supplied and is then taken as fact rather than inferred. The image reports how many pages carried more bit errors than the correction could fix, so an image that is complete but not fully verified says so instead of looking sound. |
hpa | Measure and, deliberately, reveal a Host Protected Area - the region some drives hide above the size they report, where data can be put out of an ordinary tool's sight. Without --reveal it only MEASURES (read-only). With --reveal, and only after you type the drive's own serial back, it lifts the HPA volatilely, images what was hidden, and puts the HPA back - restoring it even if the run is interrupted, every step in the audit trail. A DCO is measured but never removed, because that is not reversible in a way an examiner could testify to. |
distribute | Spread a signature carve across a fleet of machines: each worker node searches the byte ranges it is given and returns only header positions, and every file is extracted and written on the coordinator by the ordinary carver - so the result is byte-for-byte what one machine would produce, only the search was shared. plan sizes it, node runs a worker, carve coordinates. A worker serves no data and needs its own key. |
ecryptfs | Decrypt a recovered eCryptfs tree - an Ubuntu encrypted home or a Synology encrypted share - turning the encrypted filenames and file bodies back into readable files with the mount passphrase. A file or name that does not unlock is reported and left encrypted, never guessed at. |
gui | Launch the graphical app. |
Ready to run your first recovery?
Once your partner account is approved, open Module 1 and follow the steps. You have got this.