
From exhibit to certificate, without a wrong turn.
Every forensic feature - the examination workbench, ingest, the viewers, gallery, geo, timeline and memory, the media enhancement lab and metrology, authenticity, steganalysis, plate reading, the DVR recorders registry, the case workbench and the report - each with the exact steps, the options and what to choose, the modals, and ten real situations.
Open a case, verify it, and work the investigator loop
The forensic core: a sealed case, hashed exhibits, verification before analysis, the examiner's reading sealed before any AI observation, and a court-ready report.
1How to get there
Home opens on the case workbench. The examination itself spans several workspaces; this is where it starts and ends.
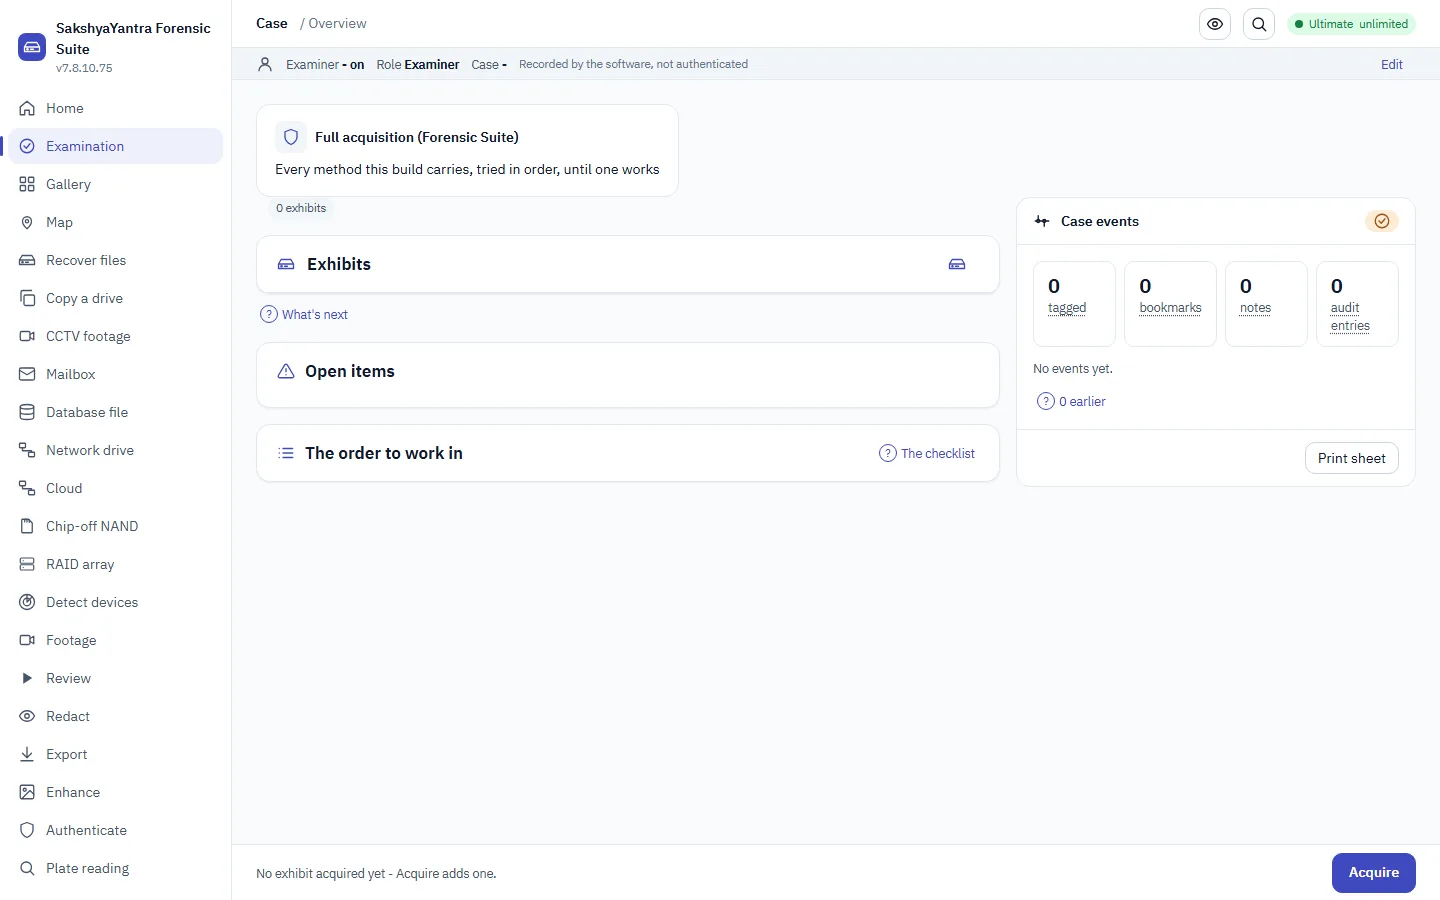
- 1Add an exhibit add an exhibit - it is hashed on the way in.
- 2What's next the guided next step through the investigator loop.
- 3The checklist the standing-order checklist for the whole examination.
- 4Print sheet print the intake sheet for the paper file.
2AI: which mode, and when
The rule that keeps it admissible. The examiner's own reading is sealed BEFORE any AI answer is shown, and an AI response is an “AI observation” - model, version, prompt and input hashes recorded - never a finding, and never promoted except by a typed reviewer decision. This is the discipline that keeps the work admissible.
3The options that seal the case
| Option | What it does | What to choose |
|---|---|---|
| mode forensic | Sets the bench to hash every item and write the chain-of-custody manifest. | Always, before the first acquisition or scan on a case. |
| validate | Runs the shipping engine against images whose contents are known and writes a dated report. | Before the tool is used on a case, or when a quality process asks for evidence it performs as claimed. |
| audit <case> | Verifies the hash-chained trail and names the first break, if any. | At the close of a case, and again before disclosure. |
| audit --manifest | Adds the sealed receipt so truncation at the end of the trail is caught too. | For evidential work: treat the manifest as required, or a cut-short trail still verifies. |
4Step by step
- Set the bench to forensic modeThis hashes every item and writes the manifest. Do it before any acquisition or scan.
- Open or create the caseA case seals its exhibits and records who did what, when.
- Add the exhibitThe image or extraction is hashed on the way in; the hash is the anchor for everything after.
- Verify before you analyseVerification sits between acquisition and analysis so every finding rests on a checked copy.
- Work the loopTimeline, memory, artefacts, keyword search - each writes to the case, not to a scratchpad.
- Seal your reading, then reveal any AIThe examiner's own conclusion is recorded first; only then is an AI observation shown, and it stays an observation.
- ReportThe CASE-UCO export and the S.63(4) BSA-2023 certificate, generated from what the case actually holds.
Do not do this. Do not examine the original machine. Work from a verified image, or every finding rests on something that has since changed. And do not rely on one artefact - corroborate across several, because that is what makes a finding hold up.
5Ten situations, and exactly what to do
What happened, and when
You need an ordered account of activity on a seized disk, not the content of one file.
Deterministic mode. Fold every dated artefact into one super-timeline.
- mode forensic
- Add and verify the disk image
- Run the super-timeline
- Export the ordered events to CSV
Prove nothing changed
The handling of the exhibit will be examined as closely as the findings.
The hash-chained audit trail and the write-block report - both measured, not asserted.
- Add the exhibit (hashed in)
- Run validate on this bench
- Verify the audit chain with the manifest
- Attach both to the report
What was run on this machine
Whether a program executed, and when, has to be answered from several artefacts.
Windows execution artefacts - Prefetch, AmCache, ShellBags - folded onto one timeline.
- Recover the artefact files from the image
- Timeline, narrowed to prefetch
- Corroborate across several artefacts
- Cite each in the report
A memory image to examine
Memory was captured while the machine ran; it answers what the disk cannot.
Deterministic memory analysis - name the OS first, then run the plugin.
- Identify the OS and symbols
- Run pslist through Volatility 3
- Record a process row as a finding
- Keep the JSON with the case
The tool has to be validated first
An accreditation or a client requires evidence the tool performs as claimed at this version.
The validation harness against images whose ground truth is known, written to a dated report.
- Run every group
- Or run selected groups
- Add the federated conformance report
- File the dated report with the quality record
A recovery turns into an investigation
Part way through a routine recovery something changes the nature of the job.
Switch the bench to forensic mode before the next action, then re-run in the forensic profile.
- mode forensic before touching anything else
- Re-run recovery in the forensic profile with a report
- Verify the trail before disclosure
- Keep the manifest
A departing employee denied copying
You need to show whether a USB device connected and files left with it.
The change journal, shortcut files and ShellBags together, on one timeline, corroborated.
- Examine a verified image, never the original machine
- Timeline the artefacts
- Filter to the device and the window
- Corroborate across artefacts before concluding
Injected code in one process
A memory image shows a process you want to test for injection.
Deterministic malfind on the one PID, as structured output.
- Identify the OS
- Run malfind on the process id
- Read the injected regions
- Record the row as a finding
No Volatility 3 on the bench
You have a memory image but the machine has no Volatility 3 installed.
The in-house reader, which needs no symbol file, for processes including terminated ones.
- Run the in-house scan action
- Read the process table
- Note the honest limit against a full Volatility run
- Record the finding
References to one binary
You need to find where a specific executable is mentioned, separating deleted from present.
A case search on the binary name, with the deleted state kept distinct.
- Recover the artefacts and content
- Search the case for the binary
- Separate deleted from present
- Cite the artefact, not the search
6The same job at the command line
recoveryantra mode forensic && recoveryantra audit E:/Case/Ex1/audit_trail.jsonl --manifest E:/Case/Ex1/recovery_manifest.jsonBring evidence into a case through one pipeline
Add a source, hash it on entry, and run every processing stage with a live dashboard - stopping only at clean stage boundaries.
1How to get there
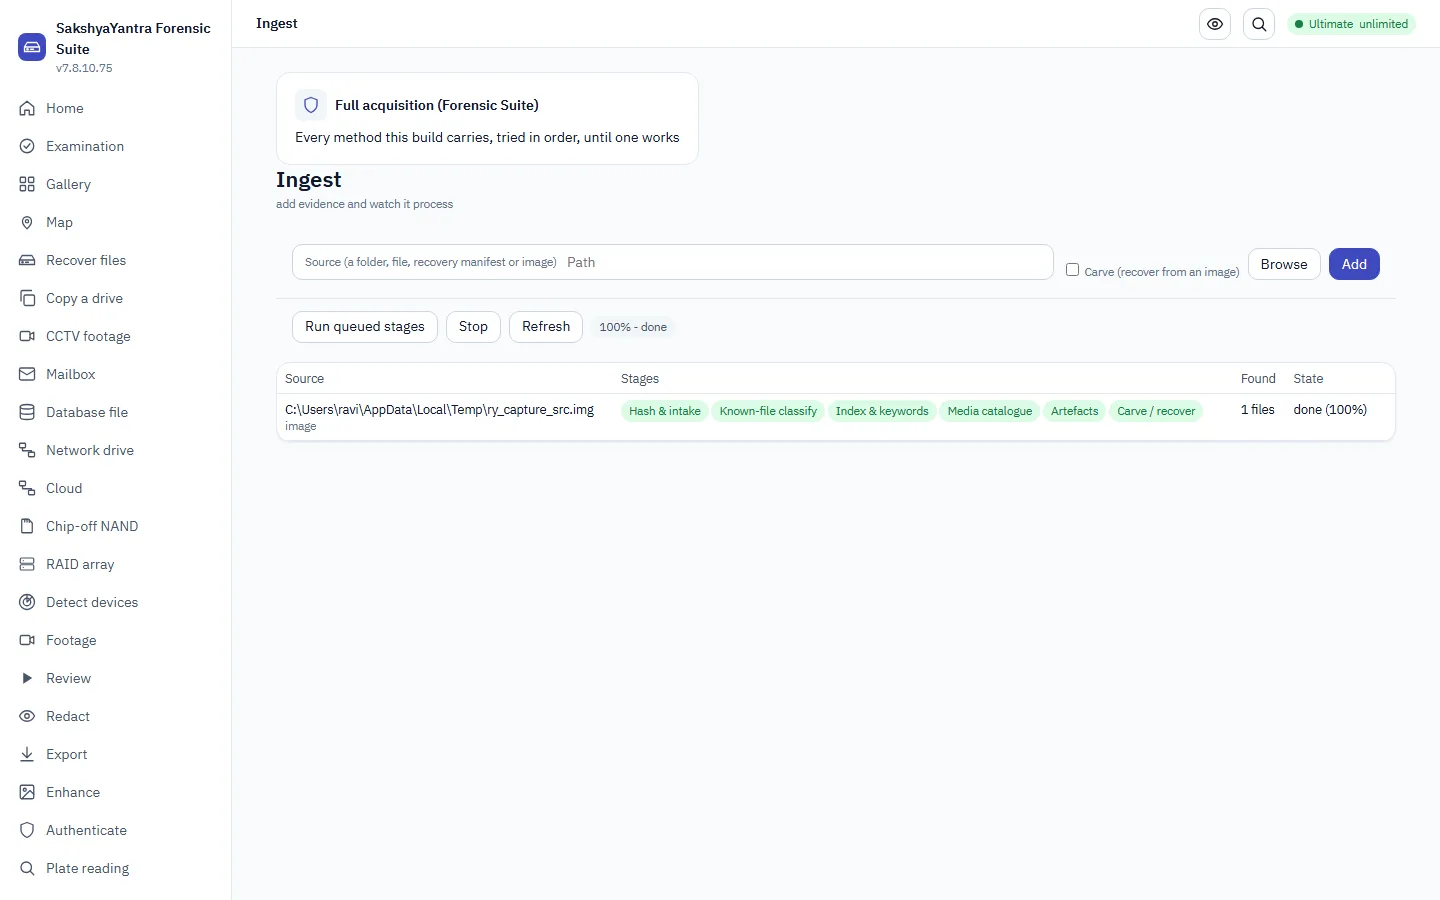
- 1Source path the source to add to the case queue.
- 2Add enqueue the source for the pipeline.
- 3Run queued stages run the pipeline stages with live progress.
- 4Stop halt at a stage boundary, cleanly.
2The commands, and when to use them
| Option | What it does | What to choose |
|---|---|---|
| ingest add | Enqueues a source into the case pipeline, hashing it on entry. | First, for every exhibit before any analysis. |
| ingest run | Runs the queued stages in order with a live dashboard. | Once the queue holds everything for this pass. |
| ingest status | Prints the dashboard: the queue and its live progress. | To check where a long ingest has reached without stopping it. |
| ingest stop | Halts at a stage boundary, never inside a stage. | When you must pause; nothing is left half-processed. |
| ingest retry | Re-queues a failed stage. | After a stage failed for a reason you have fixed, such as a full destination. |
3Step by step
- Add the sourcePoint at the image, folder or extraction. It is hashed as it enters the case.
- Run the queued stagesThe pipeline processes each stage in order, writing progress to the dashboard.
- Watch the dashboardThe queue and its live progress are on one screen; a stalled figure is a display fault, never silent.
- Stop at a boundary if you mustA stop lands between stages, so the case never holds a partly processed exhibit.
- Retry a failed stageFix the cause, then re-queue only the stage that failed.
Stop cleanly. A stop halts at a stage boundary and never inside a stage, so the case never holds a partly processed exhibit. Do not kill the process to stop it; use the stop control, or a resumed ingest cannot trust where it left off.
4Ten situations, and exactly what to do
First look at a new exhibit
A fresh disk image has arrived and nothing has been done with it yet.
ingest add then run - the pipeline hashes it in and processes every stage.
- Add the image as a source
- Run the queued stages
- Watch the dashboard to completion
- Move to the gallery or timeline
Several exhibits at once
A case has three images to process in one pass.
Queue all three, then run once - the dashboard shows each in turn.
- Add each source
- Run the queue
- Watch each exhibit progress
- Check the tally per exhibit
A stage failed on a full disk
One stage stopped because the destination ran out of room.
Free space, then ingest retry the one stage - not the whole exhibit again.
- Read the dashboard for the failed stage
- Free space on the destination
- Retry the failed stage
- Confirm it completes
Need to pause overnight
A long ingest must stop so the bench can be used, then resume.
ingest stop lands at a stage boundary; resume the queue in the morning.
- Stop at the next boundary
- Confirm nothing is mid-stage
- Resume with run
- Watch it finish
How far has it reached
You need to report progress without disturbing the run.
ingest status prints the live dashboard read-only.
- Run status
- Read the per-stage progress
- Report the figure
- Leave the run untouched
A folder of loose files
The exhibit is a folder of extracted files rather than a disk image.
Add the folder as the source; the pipeline treats each file as an item.
- Add the folder
- Run the queue
- Watch the item count climb
- Move to keyword or hash-set classify
A phone extraction
A logical extraction from a phone needs to enter the case.
Add the extraction folder; it is hashed in like any other source.
- Add the extraction as a source
- Run the queue
- Confirm the hash on entry
- Proceed to gallery and link analysis
Re-processing after a rule change
You imported new YARA rules and want the exhibit scanned again.
Retry the scan stage rather than re-adding the exhibit.
- Import the new rules
- Retry the scan stage
- Read the new hits
- Tag what matters
Confirm every exhibit is in
Before analysis you want to be sure nothing is still queued.
Read the dashboard; the queue must be empty and each stage complete.
- Run status
- Confirm the queue is empty
- Confirm each stage complete
- Begin the analysis loop
A source that will not read
One source errors on entry rather than during a stage.
The add is refused with the reason; fix the source, then add again - nothing enters half-hashed.
- Read the refusal reason
- Fix or re-copy the source
- Add it again
- Run the queue
5The same job at the command line
recoveryantra ingest add E:/Case/Ex1/disk.E01 --case E:/Case/Ex1 && recoveryantra ingest run --case E:/Case/Ex1Open a hive, a plist, a database or raw bytes inside the case
Structured viewers for the artefacts an examination turns on - registry, plist, SQLite with its deleted rows, and hex - each printing JSON and each able to bookmark the exact bytes a finding rests on.
1How to get there
- 1Viewer kind choose the viewer for the artefact in hand.
- 2Path the artefact file to open.
- 3A hive key the registry key to open, for the hive viewer.
- 4Open open the artefact in the structured viewer.
2The viewers, and what each is for
| Option | What it does | What to choose |
|---|---|---|
| view registry | Browses a registry hive by key. | For SOFTWARE, SYSTEM, NTUSER and the rest - execution, devices, mounted volumes. |
| view plist | Shows an Apple property list, binary or XML. | For macOS and iOS settings, recents and state files. |
| view sqlite | Browses a database and its deleted rows. | For chat stores, browser history, app data - and to see rows a delete left behind. |
| view hex | Pages raw bytes. | When the structure is unknown, or to confirm a header byte for byte. |
| view interpret | Decodes the bytes at an offset as a chosen type. | To turn a field at a known offset into a timestamp, an integer or a string. |
| view bookmark | Marks bytes on the case. | To record the exact offset a finding rests on, into the case. |
3Step by step
- Pick the viewer for the artefactRegistry, plist, SQLite, hex - the kind follows what the file is, not what it is named.
- Open the fileIt opens structured, inside the case, and every view prints JSON so a result can travel.
- Read the structureKeys, rows, property pairs - and for SQLite, the deleted rows a normal reader would not show.
- Interpret a field if you mustDecode the bytes at an offset as a timestamp or integer rather than guessing.
- Bookmark what a finding rests onMark the exact bytes into the case so the report can cite the offset, not a screenshot.
Good to know. The SQLite viewer shows deleted rows recovered from free pages and the write-ahead log. A row a normal reader cannot see is still evidence; record where it came from with a bookmark rather than trusting a screenshot.
4Ten situations, and exactly what to do
Which USB devices connected
You need the mounted and connected device history from a Windows disk.
view registry on SYSTEM - USBSTOR and MountedDevices carry it.
- Pick the registry viewer
- Open the SYSTEM hive
- Walk USBSTOR
- Bookmark the device entry
A deleted chat message
A chat app's SQLite store may still hold a deleted message.
view sqlite - the viewer surfaces deleted rows from free pages and the WAL.
- Pick the SQLite viewer
- Open the chat store
- Read the deleted rows
- Bookmark the message
An iOS recents list
A binary plist on an iPhone extraction holds recent activity.
view plist decodes binary and XML property lists alike.
- Pick the plist viewer
- Open the plist
- Read the pairs
- Record what matters
Confirm a file header
You want to prove a file's first bytes are what a format demands.
view hex pages the raw bytes so the header can be read byte for byte.
- Pick the hex viewer
- Open the file
- Read the first bytes
- Bookmark the header offset
A timestamp at a known offset
A record holds a date at a fixed offset you must decode.
view interpret turns the bytes at that offset into a timestamp.
- Open the file in hex
- Interpret the offset as a filetime
- Read the decoded date
- Bookmark it
Program execution from AmCache
AmCache in a hive records programs that ran.
view registry on the AmCache hive, at InventoryApplicationFile.
- Open the AmCache hive
- Walk InventoryApplicationFile
- Read the execution entries
- Bookmark the program
Browser history rows
Chrome or Firefox history sits in a SQLite database.
view sqlite reads the visits table and any deleted rows.
- Open the history database
- Read the visits
- Include deleted rows
- Bookmark a visit
A ShellBags tree
ShellBags in NTUSER shows folders a user browsed.
view registry on NTUSER, at the BagMRU tree.
- Open NTUSER
- Walk BagMRU
- Read the folder items
- Bookmark the path
Record the exact bytes for a finding
A finding rests on a specific field, and a screenshot is not enough.
view bookmark marks the exact bytes into the case.
- Open the artefact
- Locate the field
- Bookmark the byte range
- Cite the offset in the report
Hand a viewer result to another tool
You need the parsed structure as data, not a picture.
Every viewer prints JSON, so the result can be scripted or attached.
- Open the artefact
- Read the JSON output
- Feed it to the report generator
- Keep the raw with the case
5The same job at the command line
recoveryantra view registry E:/Case/Ex1/Out/SYSTEM --key USBSTOR --jsonEvery carved photo and video on one wall
The media a case holds, filtered by camera, kind, date, size and known-file status, opened full in a lightbox with its SHA-256 and tagged straight into the case.
1How to get there
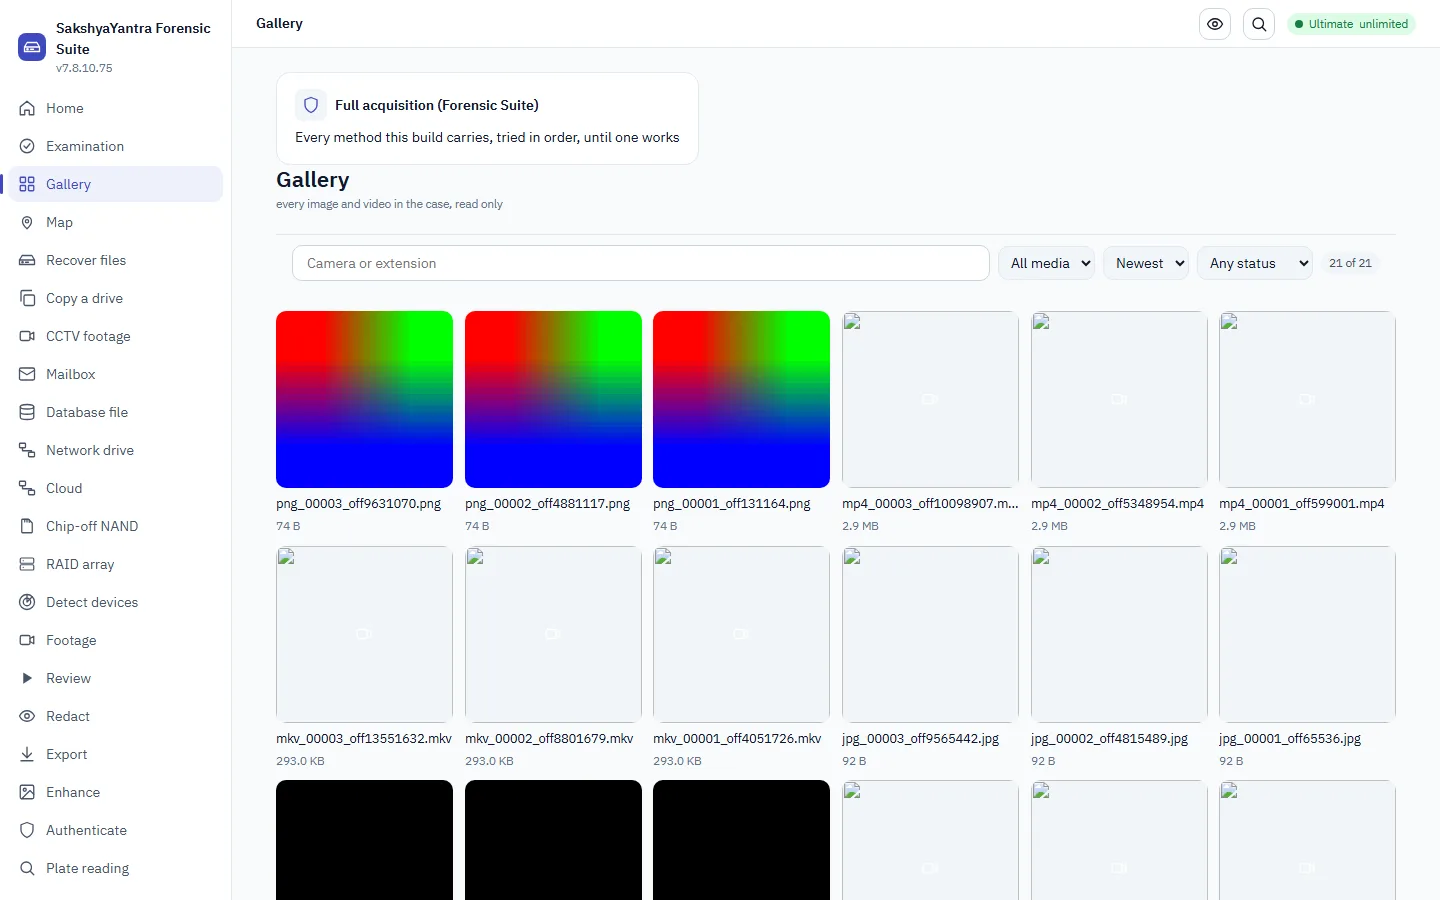
- 1Camera / extension filter by camera or by file type.
- 2Media kind show all media, images, or videos.
- 3Sort order the wall by date, size or name.
- 4Known status filter by known-file status from a hash set.
2The filters, and what to set them to
| Option | What it does | What to choose |
|---|---|---|
| --type | Shows only images, or only videos, on the wall. | When the question is about one medium, such as photographs only. |
| --camera | Keeps exhibits whose EXIF camera make or model contains the text. | To gather everything from one device, such as a single phone model. |
| --known | Filters by known-file status. | After a hash set is installed: hide known-good, surface known-bad. |
| --from / --to | Keeps exhibits dated within a day range, by EXIF or observed time. | To bound the wall to the period in question. |
| --tag-asset / --label | Tags one exhibit id (ev_...) with a label, into the case. | On a case you are examining, not a read-only glance - it writes to the open case. |
3The lightbox
Open a tile to see the image full, with its SHA-256, and the tagging that writes to the case.
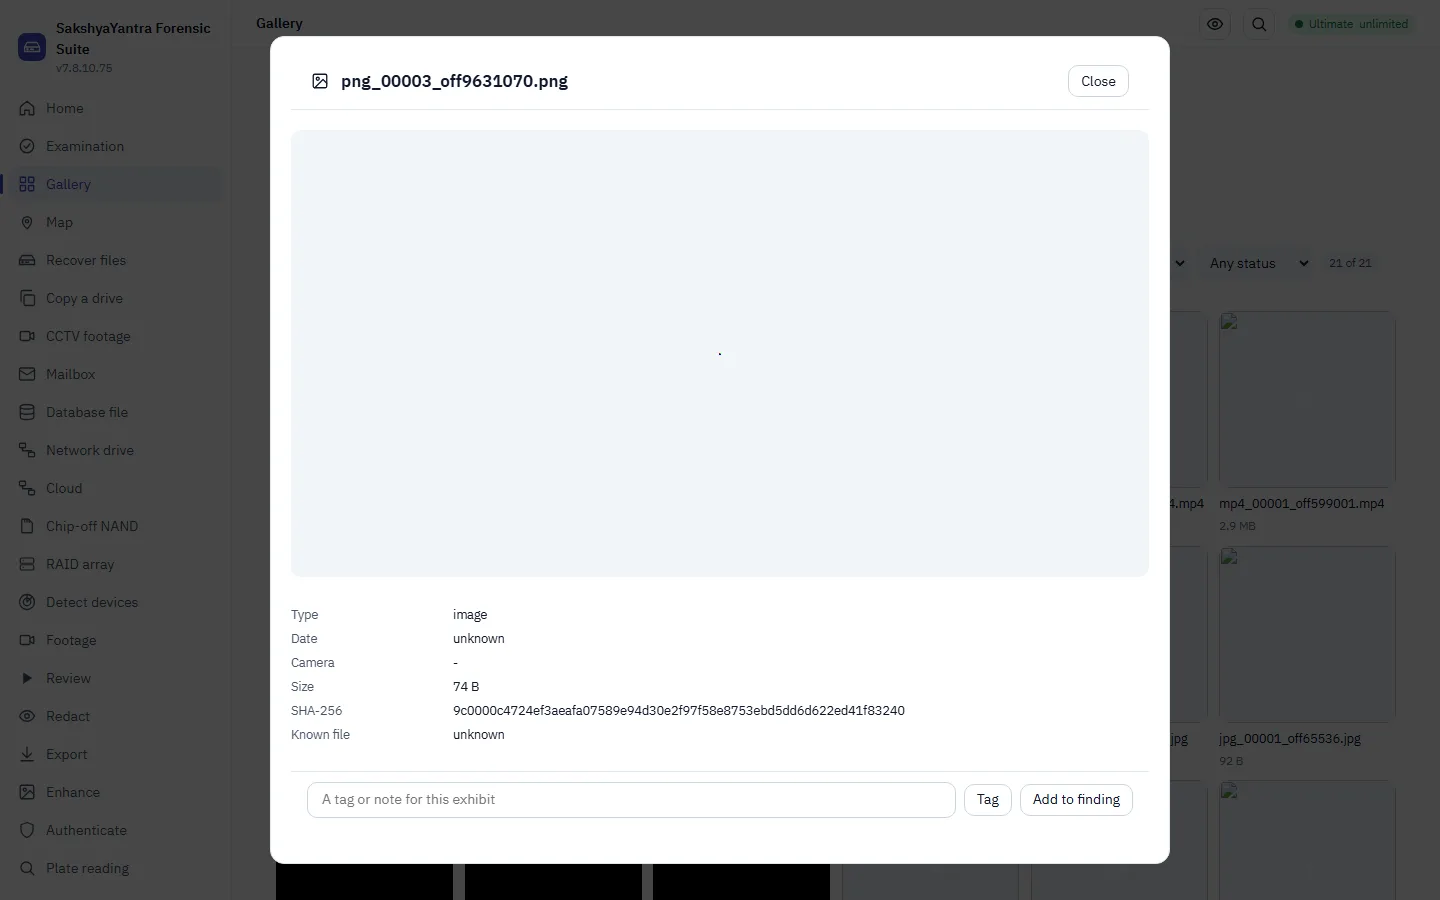
- 1Close close the lightbox.
- 2Tag or note write a tag or note onto the exhibit.
- 3Add to finding add the exhibit to a finding.
4Step by step
- Open the gallery on the caseThe wall shows every carved and extracted image and video. Omit the case to read the most recent one.
- Narrow to what mattersBy kind, camera, extension, date, size or tag. The count stays the full filtered total, so paging never hides how much matched.
- Open a tile in the lightboxThe image opens full with its SHA-256; a video has a frame stepper.
- Tag it or add it to a findingA tag or note is written to the case; adding to a finding promotes it, through the case's own door.
- Classify against a hash setInstall a hash set to turn the known-file column from unknown into known-good or known-bad.
Read the status honestly. The known-file column reads unknown for every exhibit until a hash set (NSRL or a custom set) is installed. Do not read unknown as clean; it means unclassified.
5Ten situations, and exactly what to do
Every photo from one phone
You need all images taken by a specific camera model.
Filter by --camera on the make and model from EXIF.
- Open the gallery on the case
- Filter camera to the model
- Sort by date
- Tag the relevant images
Images in the incident window
Only photos from a two-day period are in scope.
Bound the wall with --from and --to.
- Open the gallery
- Set the from and to dates
- Read the bounded wall
- Add to a finding
Hide the operating-system pictures
The wall is full of stock and system images.
Install a hash set, then filter --known good out to leave the unknowns.
- Install a hash set
- Classify the case
- Filter to unknown
- Review what is left
One image into a finding
A single photograph is central to the case.
Open it in the lightbox, confirm its SHA-256, add it to a finding.
- Open the tile in the lightbox
- Read its SHA-256
- Add to finding
- Note why it matters
Only video, largest first
You want the biggest video files to review first.
Filter --type video and sort by size.
- Open the gallery
- Filter to videos
- Sort by size, descending
- Open the largest
A specific file type
Only a certain extension is relevant, such as HEIC.
Filter --ext to that extension.
- Open the gallery
- Filter by extension
- Read the matching tiles
- Tag them
Everything already tagged faces
You want to return to the images you marked earlier.
Filter --tag to the label you used.
- Open the gallery
- Filter by the tag
- Review the marked set
- Add to a finding
Surface known-bad images
A known-bad hash set is installed and you want its matches.
Filter --known bad to leave only the flagged exhibits.
- Classify the case
- Filter to known-bad
- Open each in the lightbox
- Add to a finding
Page a large case
The wall holds tens of thousands of images.
Page with --offset and --limit; the full count is still shown.
- Open the gallery
- Set the page limit
- Step through the offsets
- Note the full total
Only large photos
Small thumbnails and icons are noise; you want full-size photos.
Filter --min-size to a byte floor.
- Open the gallery
- Set a minimum size
- Sort by date
- Review the full-size images
6The same job at the command line
recoveryantra gallery --type image --camera "Canon" --from 2026-03-01 --to 2026-03-02Put the located photos and videos on a map
The case's EXIF-GPS points plotted and, where timestamps allow, joined into a track, exported as GeoJSON or KML - and only ever from real location data.
1How to get there
- 1Media kind choose which media to map.
- 2Date range bound the points by date.
- 3GeoJSON export as GeoJSON for QGIS or a web map.
- 4KML export as KML for Google Earth.
2The commands, and what each is for
| Option | What it does | What to choose |
|---|---|---|
| geo points | Prints the located points and the track as JSON. | To read the case's locations, or feed them to another tool. |
| geo points --type | Narrows the points to images or videos. | When only one medium's locations are in scope. |
| geo export --format geojson | Writes GeoJSON (RFC 7946). | For QGIS, a web map, or a report that ingests GeoJSON. |
| geo export --format kml | Writes KML. | To open the points in Google Earth or share them widely. |
3Step by step
- Plot the pointsThe map shows only files carrying real EXIF GPS; nothing is guessed from a name or a network.
- Narrow if neededBy media kind or date, to the locations that matter to the case.
- Read the trackOrdered points become a track where the timestamps allow it.
- Export for the reportGeoJSON for a mapping tool, KML for Google Earth.
Only real GPS is plotted. Only files carrying real EXIF GPS appear on the map. Nothing is guessed from a filename, a network or a nearby cell; an empty map means no exhibit carried a location, not that the tool failed.
4Ten situations, and exactly what to do
Where were these photos taken
A set of images may carry GPS from the camera.
geo points plots only files with real EXIF GPS.
- Open the map on the case
- Read the plotted points
- Confirm each has real EXIF GPS
- Export for the report
A movement track
Images across an afternoon may form a path.
The ordered points become a track where timestamps allow.
- Plot the points
- Read the ordered track
- Bound to the afternoon
- Export as KML
Only video locations
You want where the videos were taken, not the photos.
Narrow --type video.
- Plot the points
- Filter to videos
- Read the locations
- Export
Into QGIS
An analyst will work the points in QGIS.
Export GeoJSON (RFC 7946).
- Plot the points
- Export GeoJSON
- Open in QGIS
- Keep the file with the case
Into Google Earth
The report will show the points in Google Earth.
Export KML.
- Plot the points
- Export KML
- Open in Google Earth
- Attach to the report
No locations appear
The map is empty and you need to know why.
The corpus carries no EXIF GPS; an empty map is the honest answer, not a fault.
- Plot the points
- Read the empty result
- Confirm no file carries EXIF GPS
- Record that plainly
Bound to a day
Only one day's locations are relevant.
Filter the points by date.
- Plot the points
- Set the date range
- Read the bounded set
- Export
Hand the points to a script
A case script consumes the locations.
geo points prints JSON.
- Plot the points
- Read the JSON
- Feed it to the script
- Keep the raw
Corroborate a claimed location
A subject claims to have been somewhere; photos may say otherwise.
Plot the located photos and compare with the claim - state only what the EXIF supports.
- Plot the points
- Find the relevant image
- Read its EXIF location
- Report what the data supports, not more
Locations for the certificate
The report needs the mapped points attached.
Export the format the report ingests and keep it with the case.
- Plot the points
- Export GeoJSON or KML
- Attach to the report
- Cite the source exhibits
5The same job at the command line
recoveryantra geo export --format kml -o E:/Case/Ex1/points.kmlFold every dated artefact into one ordered account
The change journal, event logs, prefetch, registry, shortcuts and the rest on a single timeline, bounded to the incident window and exported as the l2tcsv every timeline tool reads.
1How to get there
- 1Start / end bound the timeline to the period in question.
- 2Kind filter narrow to one artefact type when testing a hypothesis.
- 3Text filter filter to a filename, a user or a device.
- 4Export CSV export the log2timeline/Timesketch CSV.
2The options, and when to use them
| Option | What it does | What to choose |
|---|---|---|
| --start / --end | Bounds the timeline to a period. | On a busy machine, always - the unbounded timeline is too large to read. |
| --kind | Narrows to one artefact type. | When testing a specific hypothesis; establish the sequence on the full timeline first. |
| --text | Filters to rows mentioning a filename, user or device. | To follow one object through the events. |
| --histogram | Prints event counts per time bucket instead of rows. | To find the window worth zooming into before reading individual events. |
| --l2t | Folds an existing log2timeline/psort export in beside the native events. | When a full plaso run and the built-in artefact parsers should share one timeline. |
3Step by step
- Build the full timeline firstPoint at the artefact files or the folder holding them; establish the sequence before you filter it.
- Find the window with the histogramThe event count per bucket shows the shape of activity and the period to zoom into.
- Bound to the incident windowSet start and end once the period is known, so the view is readable.
- Test a hypothesis by kindNarrow to execution evidence, or logins, only after the sequence is understood.
- Export for the reportWrite the l2tcsv every timeline tool reads; remove any row cap before the run that produces the report.
Full first, then filter. Narrowing hides context, and a capped timeline is a sample, not the record. Establish the sequence on the full timeline before filtering, and remove any row cap before the run that produces the report.
4Ten situations, and exactly what to do
One combined account of events
Many artefacts have to become one ordered story.
Build the combined super-timeline and write it to CSV.
- Point at the artefacts folder
- Build the full timeline
- Read it in order
- Export to CSV
Bound to the incident
Only a one-week window matters.
Set --start and --end to the window.
- Build the full timeline
- Bound it to the window
- Read the bounded events
- Export the window
Execution evidence only
You are testing whether a program ran.
Narrow --kind prefetch, after the full sequence is understood.
- Build the full timeline first
- Narrow to prefetch
- Cap while exploring
- Remove the cap for the report
Where is the activity
The machine was busy and you need the dense periods.
The --histogram shows counts per bucket.
- Build the timeline
- Print the histogram
- Read the busy buckets
- Zoom into the window
Follow one file
You want every event mentioning a specific file.
Filter --text to the filename.
- Build the timeline
- Filter to the filename
- Read the events
- Export
Event logs only
The question is about logins recorded in the event log.
Narrow --kind evtx.
- Build the timeline
- Narrow to evtx
- Filter to the account
- Export the logins
Share a plaso run
A colleague produced a plaso l2tcsv you want folded in.
--l2t merges it beside the native events.
- Build the native timeline
- Fold in the l2t export
- Read one merged view
- Export
One evidence source
The case has several exhibits and you want one exhibit's events.
Narrow --source to that object.
- Build the timeline
- Narrow to the source
- Read its events
- Export
Machine-readable output
A report generator will ingest the timeline.
Emit JSON with --json rather than the human summary.
- Build the timeline
- Emit JSON
- Feed the generator
- Keep the raw
Empty because no dated artefacts
The timeline is empty and you must explain it.
A synthetic or wiped image with no dated OS artefacts yields an empty timeline honestly.
- Build the timeline
- Read the empty result
- Confirm no dated artefacts exist
- Record that plainly
5The same job at the command line
recoveryantra timeline E:/Case/Ex1/artefacts --start 2026-03-01 --end 2026-03-08 --out E:/Case/Ex1/window.csvRead what was running from a captured memory image
Processes, injected code, network connections and command lines through Volatility 3, or the in-house reader where it is absent - each result saveable as a case finding.
1How to get there
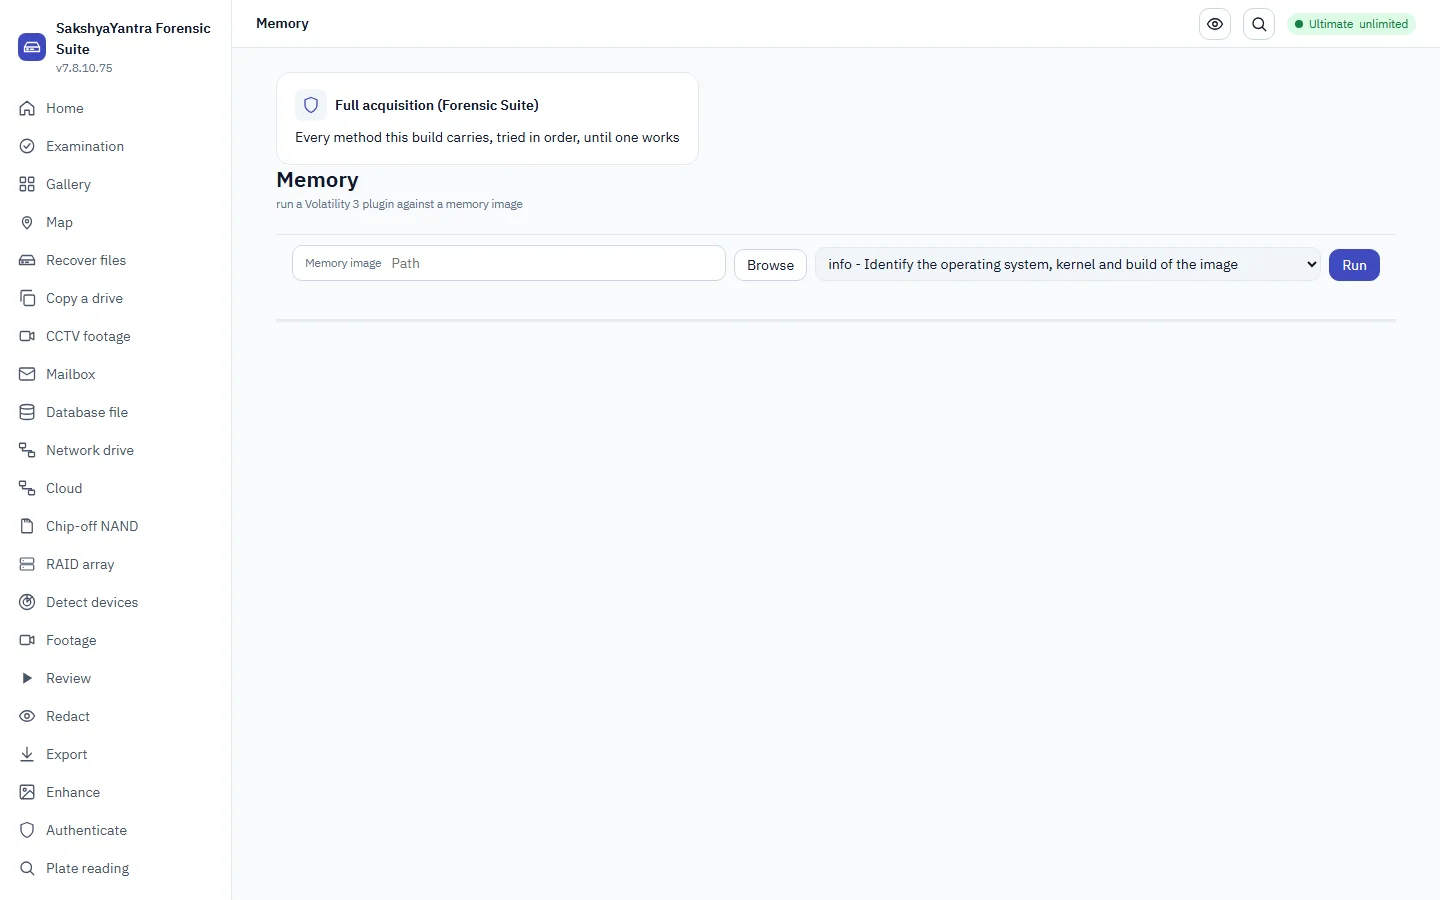
- 1Image path the captured memory image.
- 2Browse choose the memory image file.
- 3Identify the OS identify the OS and the symbols it needs.
- 4Run run one plugin and read its table.
2The commands, and what each is for
| Option | What it does | What to choose |
|---|---|---|
| memory plugins | Lists what can run and whether Volatility 3 is installed. | First, to see the plugins available on this bench. |
| memory info | Identifies the operating system and kernel. | Before any plugin - a plugin needs the right OS and symbols. |
| memory run | Runs one Volatility 3 plugin and prints its table. | For processes, network, injected code and the rest, with symbols supplied. |
| memory finding | Adds a row of a saved result to the case. | To record one process or connection exactly as returned. |
| memory scan | The in-house reader that needs no Volatility 3. | Where Volatility 3 is not installed - processes, including terminated ones. |
3Step by step
- See what can runList the plugins and whether Volatility 3 is present on this bench.
- Identify the operating systemName the OS and kernel, and the symbols the plugins will need.
- Run a pluginpslist for processes, malfind for injection, netscan for connections - saved so a row can become a finding.
- Record a row as a findingOne process or connection, exactly as returned, into the case.
- Fall back to the in-house readerWhere Volatility 3 is absent, the in-house scan reads processes without a symbol file.
Deterministic by design. Memory analysis is deterministic: pick a plugin, run it, read the table. Where Volatility 3 is not installed the in-house reader still returns processes, and it says so rather than pretending a plugin ran.
4Ten situations, and exactly what to do
Name the operating system
A memory image arrived and you must identify it before anything else.
memory info names the OS, the kernel and the symbols.
- Point at the image
- Run info
- Read the OS and kernel
- Note the symbols needed
List the processes
You need the running processes at capture time.
memory run pslist, saved so a row can become a finding.
- Identify the OS
- Run pslist with symbols
- Save the output
- Record a process as a finding
Injected code in a process
One process is suspected of holding injected code.
memory run malfind on the PID, as structured output.
- Identify the OS
- Run malfind on the PID
- Read the injected regions
- Record the finding
Record a process row
A specific process is evidence and must enter the case.
memory finding records the row exactly as returned.
- Save the pslist output
- Pick the row
- Record it as a finding
- Cite the plugin and version
No Volatility 3 installed
The bench has no Volatility 3 and you still need processes.
The in-house memory scan needs no symbols and finds terminated processes too.
- Run the in-house psscan
- Read the process table
- Note the honest limit
- Record the finding
Network connections
You want the connections open at capture time.
memory run netscan with symbols.
- Identify the OS
- Run netscan
- Read the connections
- Record the relevant ones
What plugins are available
You are unsure which plugins this bench can run.
memory plugins lists them and whether Volatility 3 is installed.
- Run plugins
- Read the list
- Confirm Volatility 3 status
- Choose the plugin
Command lines of processes
You need the command lines the processes were launched with.
memory run cmdline with symbols.
- Identify the OS
- Run cmdline
- Read the command lines
- Record the suspicious ones
Loaded DLLs of one process
A process may have loaded a malicious module.
memory run dlllist on the PID.
- Identify the OS
- Run dlllist on the PID
- Read the modules
- Record the finding
Terminated processes
You need processes that had already exited.
The in-house psscan finds terminated processes the live list misses.
- Run the in-house psscan
- Read terminated entries
- Corroborate with other artefacts
- Record the finding
5The same job at the command line
recoveryantra memory run E:/Case/Ex1/memory.raw --plugin pslist --os windows --symbols E:/symbols --out E:/Case/Ex1/pslist.jsonSearch a case with reusable named lists
Named keyword lists of words and patterns, shared across cases as plain text, run against the ingested case with every hit shown and taggable into evidence.
1How to get there
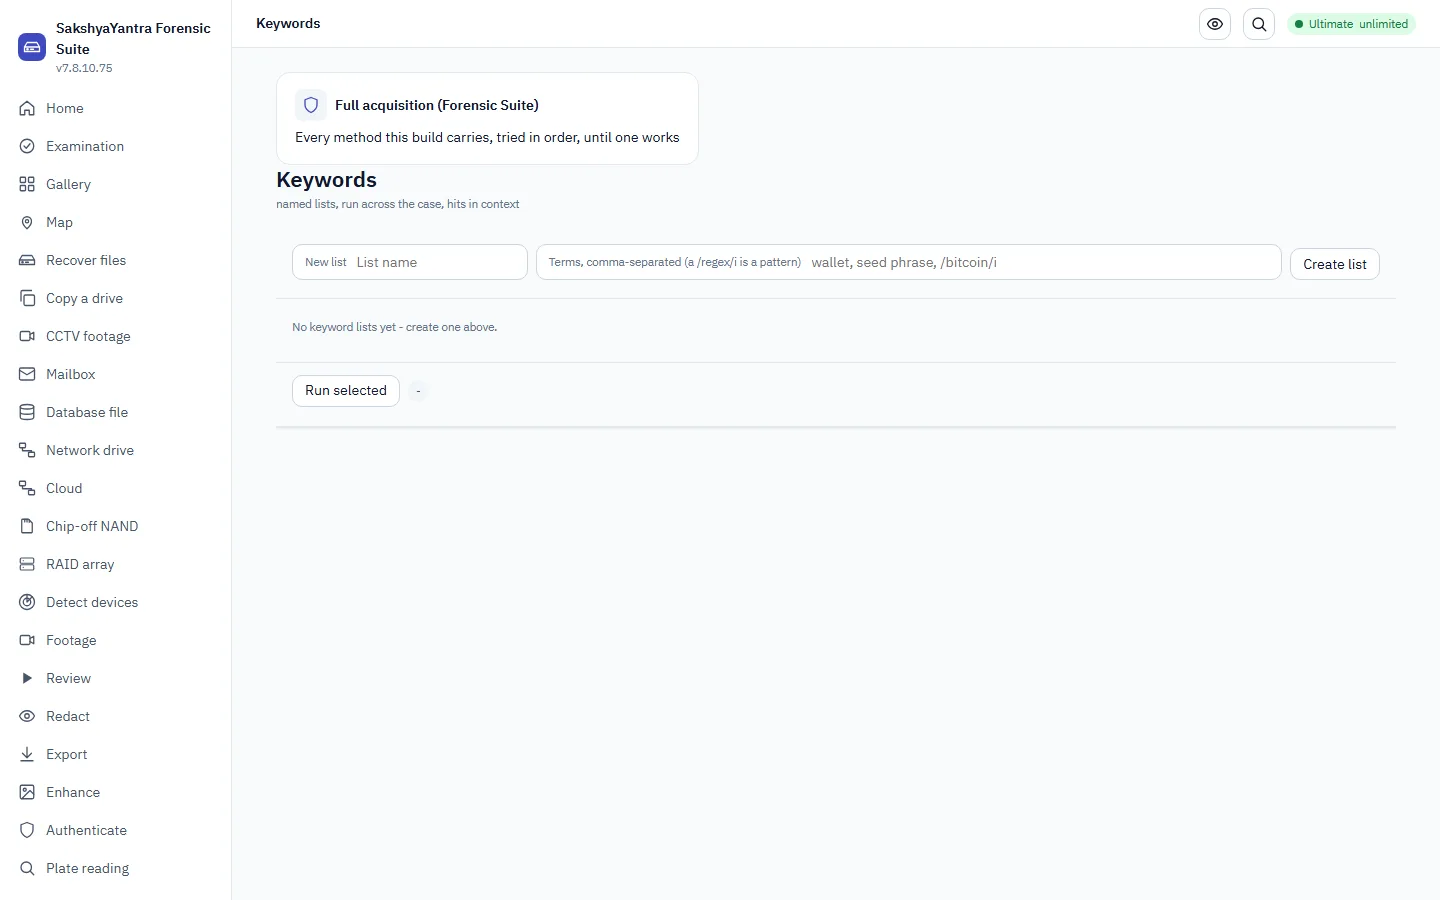
- 1List name name the keyword list.
- 2Terms and patterns the words and patterns to search for.
- 3Create list create and save the named list.
- 4Run selected run the list against the case.
2The commands, and what each is for
| Option | What it does | What to choose |
|---|---|---|
| keyword create | Builds a new named list. | First, for a reusable set of terms such as wallet and seed-phrase words. |
| keyword add | Adds terms to an existing list. | To extend a list as the case suggests new terms. |
| keyword import / export | Moves a list as plain text. | To share a standard list between benches or cases. |
| keyword run | Searches the case and prints the hits. | Once the list is ready and the case is ingested. |
| keyword tag | Marks a hit on the case. | To record a hit that matters as case evidence. |
3Step by step
- Build a named listPlain words or a /regex/. A reusable list beats re-typing terms each case.
- Add or import termsExtend it as the case suggests, or import a standard list as plain text.
- Run it against the caseEvery hit is shown with where it was found.
- Tag the hits that matterA hit becomes case evidence through the case's own door.
- Export the list for reuseKeep the list as plain text so the next case starts from it.
Good to know. A keyword list is reusable. Build it once, export it as plain text, and the next case starts from it rather than from a blank box.
4Ten situations, and exactly what to do
Wallet and seed-phrase words
A case may involve cryptocurrency and you want the tell-tale terms.
Build a list with wallet, seed phrase and a /bitcoin/i pattern, then run it.
- Create the list
- Add the terms and pattern
- Run against the case
- Tag the hits
A person's name
You need every mention of a named individual.
A one-term list, run across the case.
- Create the list
- Add the name
- Run it
- Tag the relevant hits
A standard fraud list
Your unit keeps a standard list of fraud terms.
keyword import the plain-text list, then run it.
- Import the list
- Confirm the terms
- Run it
- Tag the hits
Record one hit
A single keyword hit is central to the case.
keyword tag marks it as case evidence.
- Run the list
- Find the hit
- Tag it
- Cite it in the report
Extend a list mid-case
The case surfaces a new term to search for.
keyword add the term, then re-run.
- Add the term to the list
- Re-run the list
- Read the new hits
- Tag them
A regular expression
You need a pattern, not a fixed word, such as a card number shape.
Add a /regex/ term to the list.
- Create the list
- Add the regex term
- Run it
- Review the pattern hits
See the lists you have
You are unsure which lists already exist on this bench.
keyword lists shows them.
- Run lists
- Read the names
- Pick the one to run
- Run it
Share a list to another bench
A colleague needs the same list.
keyword export writes it as plain text.
- Export the list
- Send the text file
- They import it
- Both run the same terms
Remove a stale list
An old list no longer applies.
keyword remove deletes it.
- List the lists
- Remove the stale one
- Confirm it is gone
- Keep the case tidy
Run one list, not all
Several lists exist and only one is relevant now.
keyword run the selected list against the case.
- List the lists
- Run the selected one
- Read the hits
- Tag what matters
5The same job at the command line
recoveryantra keyword create crypto --term wallet --term "seed phrase" && recoveryantra keyword run --list crypto --case E:/Case/Ex1Hide the standard files, flag the known-bad
Known-file hash sets - NSRL to recognise operating-system and application files, custom sets to flag known-bad - classifying the whole case so the unknowns are what remains.
1How to get there
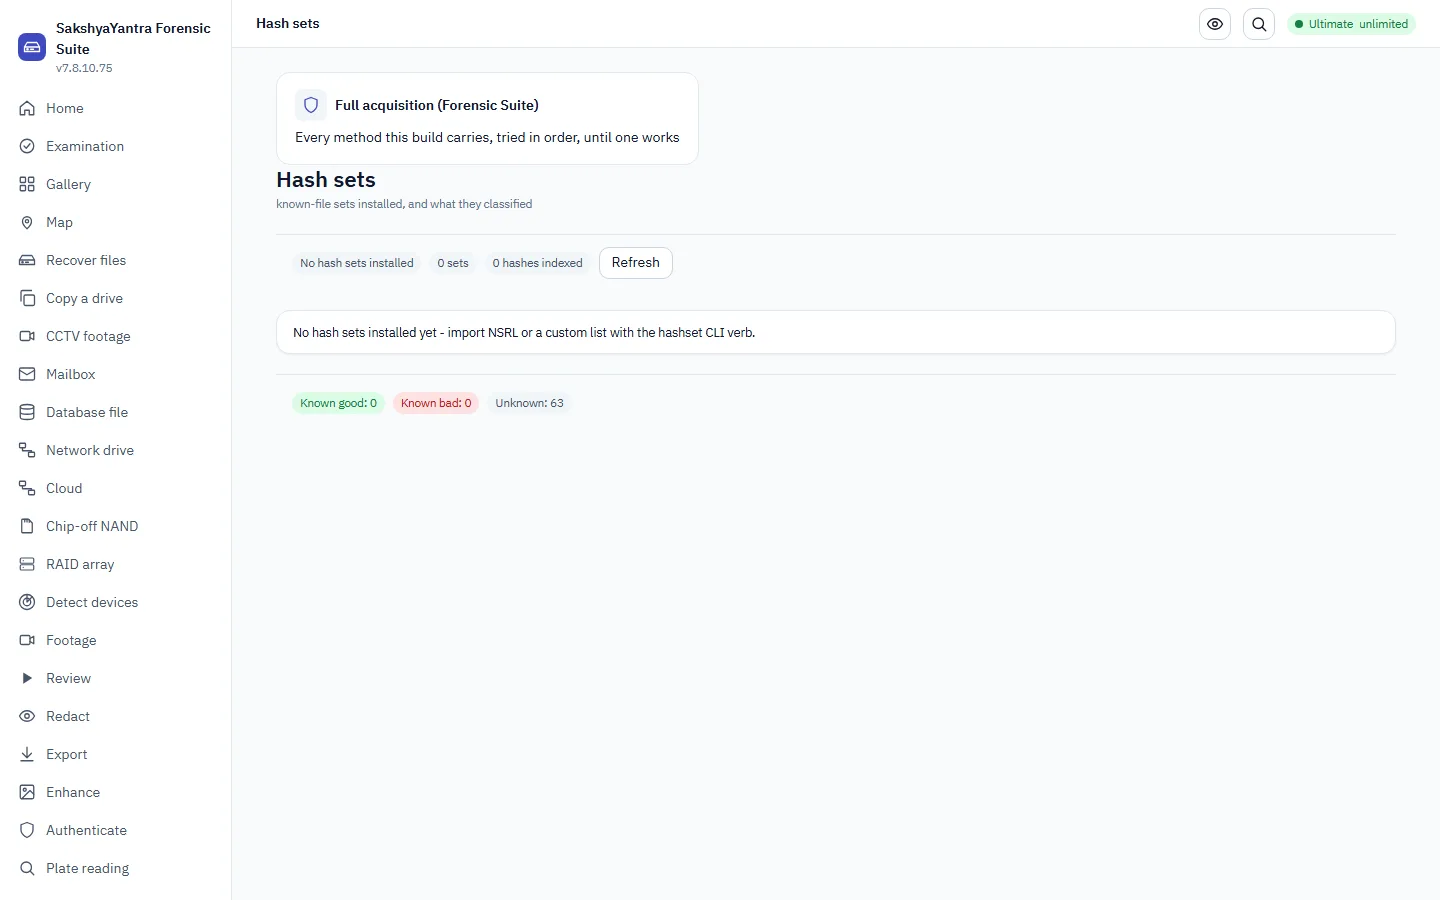
- 1Refresh refresh the installed sets and the classify tally.
2The commands, and what each is for
| Option | What it does | What to choose |
|---|---|---|
| hashset import | Loads an NSRL RDS or a hash list. | First, to install a known-good (NSRL) or known-bad set. |
| hashset list | Shows the installed sets. | To confirm which sets this bench carries. |
| hashset lookup | Classifies one hash or file. | To check a single item against the installed sets. |
| hashset classify | Runs the whole case against the sets. | To label every exhibit known-good, known-bad or unknown in one pass. |
| hashset remove | Deletes a set. | When a set is stale or was installed by mistake. |
3Step by step
- Install a hash setAn NSRL RDS to recognise operating-system and application files, or a known-bad list to flag them.
- Classify the caseEvery exhibit is labelled known-good, known-bad or unknown in one pass.
- Read the tallyThe panel shows how many fell into each class.
- Hide the known-goodFilter the gallery and lists to the unknowns, so the noise of standard files is gone.
- Surface the known-badA known-bad match is a lead; open each and corroborate before it becomes a finding.
A match is a lead. A hash set hides the files that are the same on every machine and flags files that match a known-bad set. A known-bad match is a lead, not a verdict; open it and corroborate before it becomes a finding.
4Ten situations, and exactly what to do
Hide the operating-system files
The case is drowning in standard Windows files.
Import an NSRL set and classify, then work the unknowns.
- Import the NSRL set
- Classify the case
- Read the tally
- Filter to unknown elsewhere
Flag known-bad files
You hold a known-bad hash list for this class of case.
Import it as known-bad and classify.
- Import the known-bad list
- Classify the case
- Read the known-bad tally
- Open each match
Check one file
You want to know whether a single file is a known standard file.
hashset lookup classifies it.
- Point at the file
- Look it up
- Read the class
- Record it
Classify the whole case
You want every exhibit labelled in one pass.
hashset classify runs the case against all installed sets.
- Install the sets
- Classify the case
- Read the tally
- Move to the gallery
Confirm which sets are installed
You are unsure which sets this bench carries.
hashset list shows them.
- Run list
- Read the installed sets
- Confirm coverage
- Classify
Remove a stale set
An old set is out of date.
hashset remove deletes it, then re-classify.
- List the sets
- Remove the stale one
- Re-classify
- Confirm the tally
Check one hash value
You have a hash from another source to test against the sets.
hashset lookup takes a hash directly.
- Have the hash
- Look it up
- Read the class
- Record it
Why the gallery shows unknown
Every gallery tile reads unknown and you need to explain it.
The known column is unknown until a set is installed; install and classify to change it.
- Confirm no set installed
- Import a set
- Classify
- Re-read the gallery status
A custom good set
Your unit maintains its own known-good list.
Import it as known-good alongside NSRL.
- Import the custom set
- Classify
- Read the combined tally
- Filter to unknown
Refresh after ingest
New exhibits were ingested after the last classify.
Refresh and re-classify so the tally covers everything.
- Refresh the panel
- Re-classify the case
- Read the updated tally
- Work the unknowns
5The same job at the command line
recoveryantra hashset import E:/sets/nsrl.rds --kind known-good && recoveryantra hashset classify --case E:/Case/Ex1Scan a case's evidence with YARA rules
Import or start from a rule set, enable what applies, and scan the ingested case - each hit named by its rule and taggable into evidence once corroborated.
1How to get there
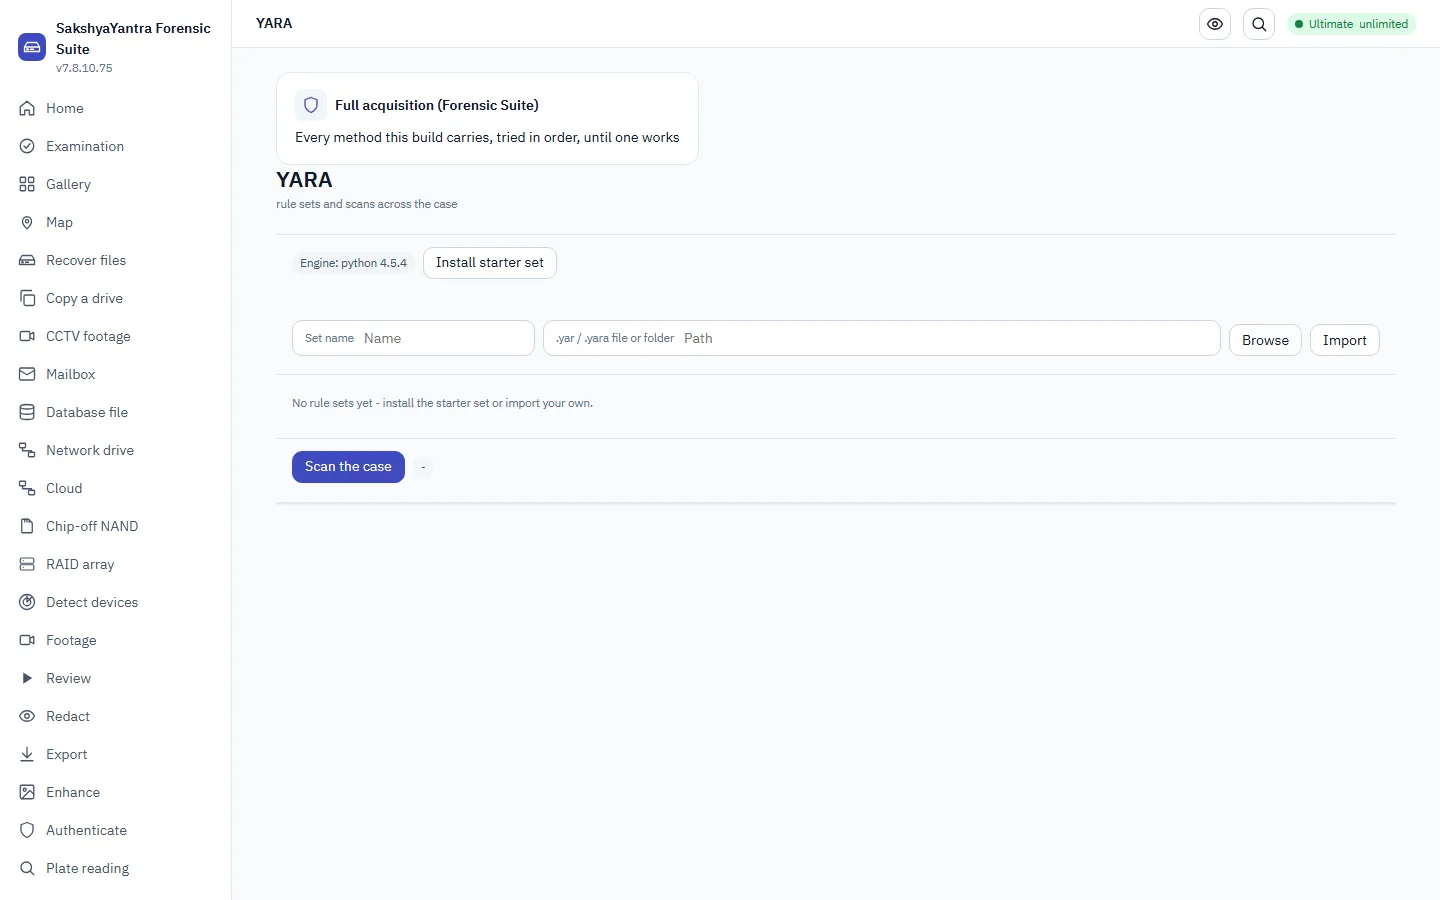
- 1Install starter set install a starter rule set.
- 2Name name the imported rule set.
- 3Path the rule file to import.
- 4Scan the case scan the case with the enabled rules.
2The commands, and what each is for
| Option | What it does | What to choose |
|---|---|---|
| yara starter | Installs a starter rule set. | To begin when you have no rules of your own yet. |
| yara import | Brings a .yar / .yara rule set in. | To add your unit's or a vendor's rules. |
| yara enable / disable | Turns a rule set on or off for scanning. | To scope a scan to the rules that apply to this case. |
| yara scan | Runs the enabled rules across the case evidence. | Once the rules you want are enabled and the case is ingested. |
| yara tag | Marks a hit on the case. | To record a rule hit that matters as evidence. |
3Step by step
- Install or import rulesA starter set to begin, or your own .yar files by name and path.
- Enable the ones that applyScope the scan to the rules relevant to this case.
- Scan the caseThe enabled rules run across the evidence; every hit names its rule.
- Read and tag the hitsA hit is a lead; corroborate, then tag the ones that matter.
- Manage the setsDisable or remove rule sets that no longer apply.
A hit is a lead. A YARA hit names the rule that fired; it is a lead, not a finding. Open the exhibit and corroborate before the hit becomes case evidence.
4Ten situations, and exactly what to do
Start with no rules
You have no YARA rules and want a baseline.
yara starter installs a starter set to scan with.
- Install the starter set
- Enable it
- Scan the case
- Read the hits
Import a vendor rule set
A vendor supplied .yar rules for a malware family.
yara import by name and path.
- Import the rule set
- Enable it
- Scan the case
- Tag the hits
Scan for one family
You only want a specific family's rules to run.
Enable that set, disable the rest, then scan.
- Enable the family set
- Disable the others
- Scan the case
- Read the hits
Record a rule hit
A rule hit is central to the case.
yara tag records it as evidence.
- Scan the case
- Find the hit
- Tag it
- Cite the rule in the report
See the installed sets
You are unsure what rules this bench holds.
yara list shows them and their state.
- Run list
- Read the sets
- Confirm which are enabled
- Enable what you need
Disable a noisy set
One rule set produces too many false hits.
yara disable it, then re-scan.
- List the sets
- Disable the noisy one
- Re-scan
- Read the cleaner hits
Remove an obsolete set
An old rule set no longer applies.
yara remove deletes it.
- List the sets
- Remove the obsolete one
- Confirm it is gone
- Re-scan
Scan a fresh ingest
New exhibits were added after the last scan.
Re-run yara scan across the case.
- Confirm rules enabled
- Scan the case
- Read the new hits
- Tag what matters
Combine your rules with a vendor's
You want your own rules and a vendor set to run together.
Import both, enable both, scan once.
- Import both sets
- Enable both
- Scan the case
- Read the combined hits
A hit needs corroboration
A rule fired but you must confirm before it is a finding.
Open the exhibit, corroborate, then tag - a rule hit is a lead.
- Read the hit and its rule
- Open the exhibit
- Corroborate the match
- Tag only if it holds
5The same job at the command line
recoveryantra yara import --name emotet --path E:/rules/emotet.yar && recoveryantra yara scan --case E:/Case/Ex1Map who connects to whom, from the evidence
A connections graph built from the case's contacts, messages, calls, chats, mailboxes and history - entities and links with centrality, the path between two people, and export to Gephi or yEd.
1How to get there
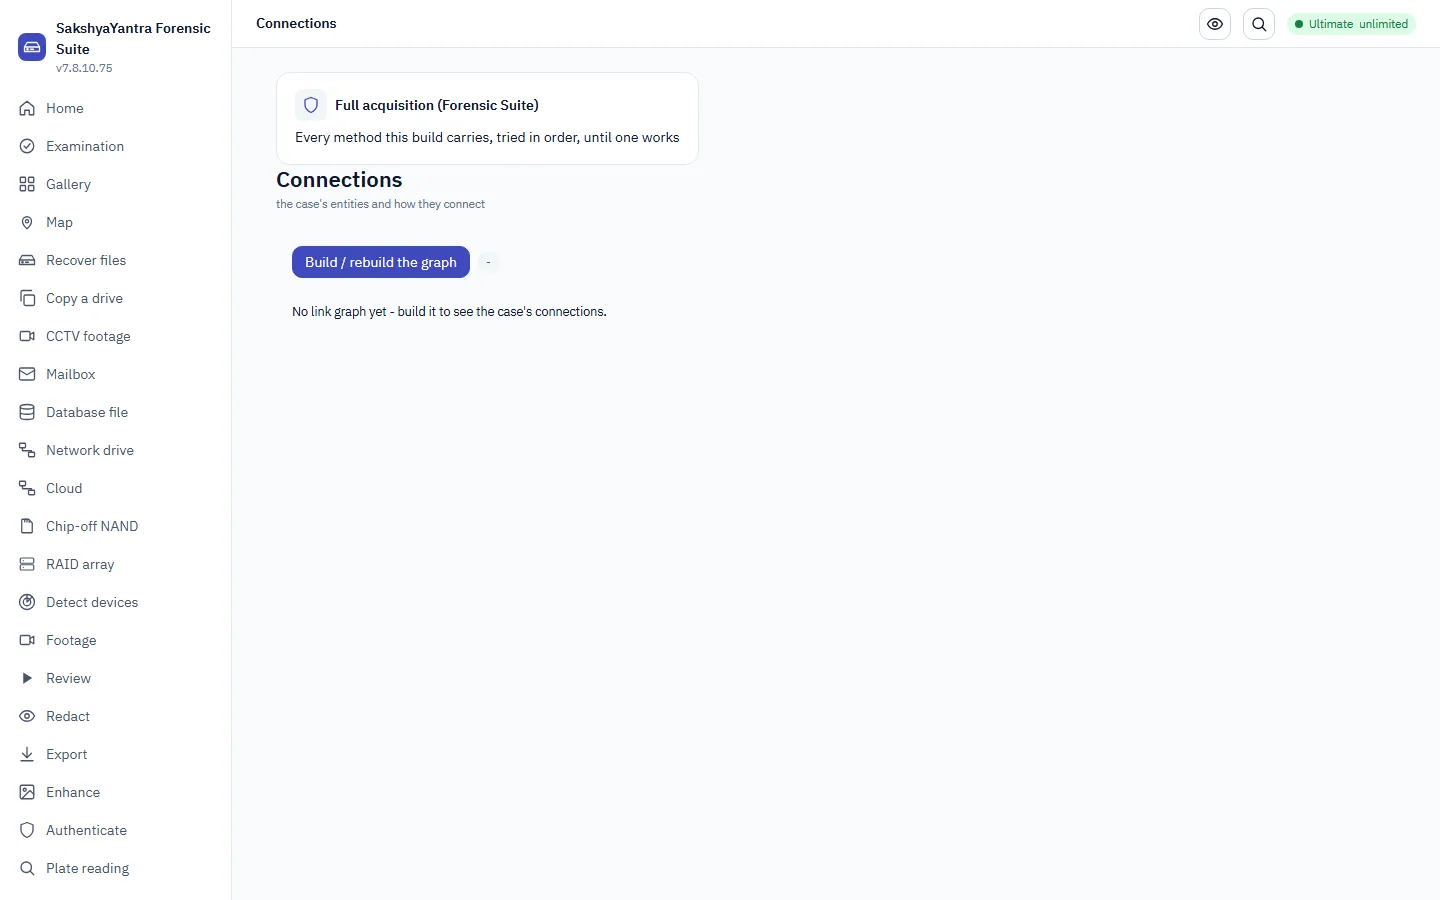
- 1Build / rebuild the graph build the connections graph from the case's own parsers.
2The commands, and what each is for
| Option | What it does | What to choose |
|---|---|---|
| link build | Reads contacts, SMS, call logs, chat stores, mailboxes and browser history into a graph. | First, once the case is ingested. |
| link nodes / edges | Lists entities and links with counts and centrality. | To see who and what the graph holds, and who is central. |
| link path | Answers how two people connect. | When the question is the route between two named entities. |
| link ego | Shows who surrounds one entity. | To map one person's immediate connections. |
| link export | Hands the graph to Gephi or yEd. | For a large graph better explored in a dedicated tool. |
| link finding | Records an entity or a link as case evidence. | To promote a connection that matters into the case. |
3Step by step
- Build the graphIt reads the case's own parsed data - contacts, messages, calls, chats, mailboxes, history.
- Read the entities and linksNodes and edges with counts and centrality show who and what matter.
- Ask how two people connectThe path between two entities, and the ego network around one.
- Export for a large graphHand it to Gephi or yEd when the graph is too large to read here.
- Record the connectionPromote an entity or a link into a case finding.
Built from the evidence. The graph is built only from the case's own parsed data - contacts, messages, calls, chats, mailboxes and history. It shows connections that exist in the evidence, not inferred ones; a link is a finding only once you record it.
4Ten situations, and exactly what to do
Who is connected to whom
You need the map of contact between people in the case.
link build reads the case's communications into a graph.
- Ingest the case first
- Build the graph
- Read the nodes and edges
- Record the key links
How do these two connect
Two named people must be shown to be connected.
link path answers the route between them.
- Build the graph
- Ask the path between the two
- Read the route
- Record it as a finding
Who surrounds one person
You want one subject's immediate contacts.
link ego shows the surrounding network.
- Build the graph
- Ask the ego network
- Read the neighbours
- Record the relevant ones
Who is central
You want the most connected entities.
link nodes lists entities with centrality.
- Build the graph
- List nodes by centrality
- Read the central entities
- Record the finding
Export to Gephi
The graph is large and an analyst prefers Gephi.
link export hands it over.
- Build the graph
- Export it
- Open in Gephi
- Keep the file with the case
Record one link
A single connection is central to the case.
link finding records the link as evidence.
- Build the graph
- Find the link
- Record it
- Cite it in the report
List the links
You want the edges with their counts.
link edges lists them.
- Build the graph
- List edges
- Read the counts
- Record the strong ones
Chats and calls together
The case has both chat stores and call logs.
The build reads both through the existing parsers into one graph.
- Confirm chats and calls ingested
- Build the graph
- Read the combined links
- Record what matters
Mailbox connections
A mailbox in the case holds correspondence.
The build reads the mailbox into the graph alongside the rest.
- Confirm the mailbox ingested
- Build the graph
- Read the email links
- Record the finding
Rebuild after new evidence
New communications were added to the case.
link build again to fold them in.
- Ingest the new evidence
- Rebuild the graph
- Read the updated links
- Record what changed
5The same job at the command line
recoveryantra link build --case E:/Case/Ex1 && recoveryantra link path --from "A. Rao" --to "S. Menon" --case E:/Case/Ex1Read a recorder export a normal player gives up on
The decode ladder - container, then index, then raw stream - turning a DVR's own format into readable, hashed footage, recorded into the case with the examiner named and the recorder's own frames and clock kept.
1How to get there
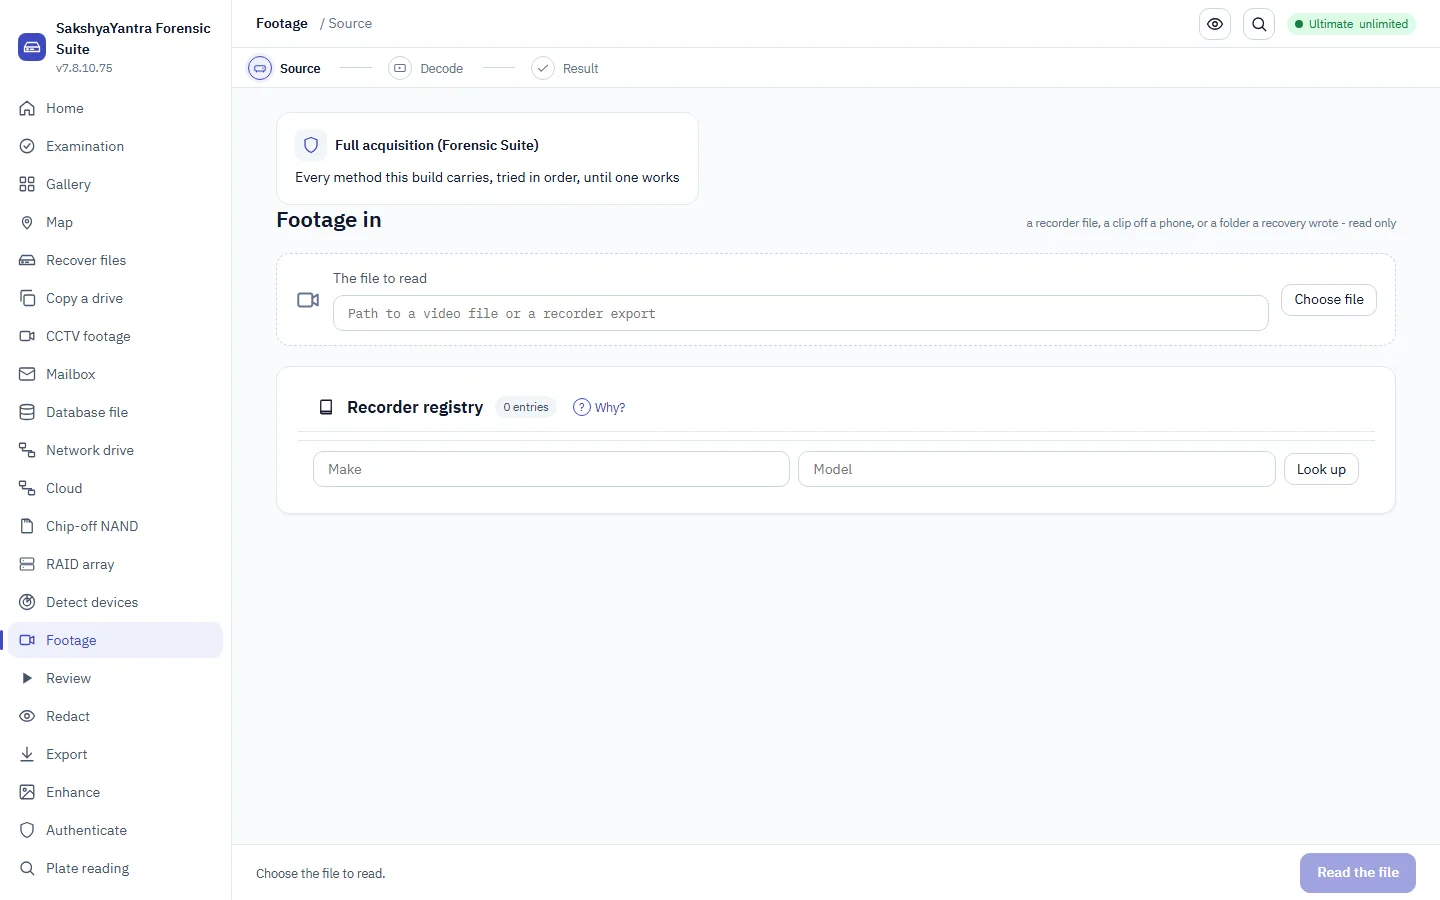
- 1Source path the recorder export or video to decode.
- 2Choose file choose the source file.
- 3Why? read why a decode is needed.
- 4Make / Model check the recorder against the tested registry.
2The commands, and what each is for
| Option | What it does | What to choose |
|---|---|---|
| footage formats | Lists what this build can read. | First, before anything is promised - state the coverage. |
| footage registry | Looks a recorder up by make and model. | To see whether the recorder is in the tested registry. |
| footage acquire | Decodes an export through the ladder to a folder. | To turn a recorder's own container into a readable, hashed decode. |
| footage intake | Records the intake, hashing and naming the examiner. | To bring the decoded footage into the case with a chain of custody. |
| footage convert | Batch-converts a folder of exports. | When several exports must be decoded in one pass. |
3Step by step
- State what can be readCheck the formats this build handles before promising anything to a court.
- Look the recorder upThe tested registry says whether the make and model are known.
- Decode through the ladderThe ladder tries the container, then the index, then the raw stream, to a folder on another drive.
- Record the intakeCopy and hash the export, and type the examiner's name into the case.
- Keep the recorder's own framesDo not re-encode with a converter first; the recorder's frames and its overlay clock are the evidence.
Do not do this. Do not re-encode a recorder export with a converter first. The converter's frames are not the recorder's frames, and the overlay clock burnt into the picture is the only clock the recorder gave you. Copy and hash before playing; the intake does both.
4Ten situations, and exactly what to do
A DVR export will not play
A station has a recorder export nobody can open, and it is evidence.
Decode it through the ladder to another drive, then record the intake.
- Check the formats
- Decode through the ladder
- Record the intake with the examiner named
- Keep the recorder's own frames
Is this recorder supported
You need to know whether the make and model are tested.
footage registry looks it up.
- Note the make and model
- Look them up in the registry
- Read the coverage
- Decide the route
State the coverage first
A court asks what the tool can read before you promise anything.
footage formats lists exactly what this build handles.
- Run formats
- Read the coverage
- State it plainly
- Proceed only within it
Record the intake
A decoded export must enter the case with a chain of custody.
footage intake copies, hashes and names the examiner.
- Decode the export
- Record the intake
- Type the examiner's name
- Confirm the hash
Several channels at once
A recorder disk holds several channels to decode.
Batch-convert the folder of exports in one pass.
- Point at the folder
- Batch-convert
- Confirm each channel decoded
- Record the intake
One channel salvaged from the raw stream
The container and index fail on one channel.
The ladder's last rung salvages it from the raw stream; the decode says so.
- Decode through the ladder
- Note which rung succeeded
- Record the salvage state
- Keep the intake
Do not re-encode first
Someone suggests converting the export with a media tool first.
Decode with the ladder instead; a converter's frames are not the recorder's frames.
- Refuse the pre-conversion
- Decode with the ladder
- Keep the recorder's frames
- Keep the overlay clock as text
Copy and hash before playing
The export is on the pen drive it arrived on.
The intake copies and hashes it; do not play from the pen drive.
- Copy off the pen drive
- Decode to another drive
- Record the intake (copy and hash)
- Work from the decoded copy
What can this machine handle
You want to know the media worker's capability on this bench.
footage formats reports what the worker can decode here.
- Run formats
- Read the worker capability
- Note any gap
- Decide the route
Hand the decode to review
The decoded footage is ready for frame-exact review.
Pass the decoded asset to the review workspace for a frame pack.
- Decode the export
- Record the intake
- Open it in review
- Build the frame pack there
5The same job at the command line
recoveryantra footage acquire E:/Exhibits/E3/ch07.dav -o F:/Case-176/decoded && recoveryantra footage intake F:/Case-176/decoded --case F:/Case-176 --examiner "S. Menon"Take the frames that matter, with their provenance
Frame-exact review of decoded footage, building a small frame pack - each frame carrying its ticks, index, overlay clock as text, source hash and its own SHA-256 - which is the only unit that leaves the machine.
1How to get there
- 1Asset path the decoded footage to review.
- 2Choose file choose the asset to open.
2The commands, and what each is for
| Option | What it does | What to choose |
|---|---|---|
| review open | Opens the asset's timeline: frames, keyframes, gaps, the time base. | First, to see the structure before choosing frames. |
| review bookmark | Records a bookmark at one frame ordinal, into the case. | To mark the exact frame that shows the event. |
| review frames | Builds a frame pack from a range, at an interval. | To produce the few frames that leave the machine for a report. |
| review verify | Re-hashes every frame and the manifest of a pack. | Before the pack leaves, and again on receipt, to prove it is unchanged. |
3Step by step
- Open the asset's timelineFrames, keyframes, gaps and the time base - the structure you choose frames from.
- Bookmark the key frameRecord the exact ordinal that shows the event, into the case.
- Build a frame packA range at an interval becomes a small pack - each frame with its ticks, index, overlay clock as text, source hash and its own SHA-256.
- Verify the packRe-hash every frame and the manifest before it leaves and again on receipt.
- Keep the three times separateThe presentation ticks, the overlay clock as text, and the case time are three fields, never merged.
The frame pack, and the three times. The frame pack is the only unit that leaves the machine - a few captured frames, each with its presentation ticks, decoded index, the overlay clock as text, the source hash and its own SHA-256, plus a hashed manifest. Never the video. And the three times - the ticks, the overlay clock, the case time - are never merged.
4Ten situations, and exactly what to do
The frames that show the vehicle
A court wants the frames showing a vehicle, with their times.
Build a frame pack from the range; the video itself never leaves.
- Open the asset timeline
- Bookmark the key frame
- Build the pack over the range
- Verify it before it leaves
See the structure first
Before choosing frames you need the timeline of the footage.
review open shows frames, keyframes, gaps and the time base.
- Open the asset
- Read the frames and gaps
- Note the time base
- Choose the range
Mark one frame
A single frame is the evidence.
review bookmark records the ordinal into the case.
- Open the asset
- Find the frame ordinal
- Bookmark it in the case
- Note why it matters
Prove the pack is unchanged
The defence will check the frames you sent.
review verify re-hashes every frame and the manifest.
- Build the pack
- Verify it before sending
- Send with the manifest
- Verify again on receipt
One frame per second
A long event needs a frame every second, not every frame.
Set the interval on the frame pack.
- Open the asset
- Choose the range
- Set the interval
- Build and verify
Do not send a screenshot
Someone offers a player snapshot as the still.
Build a frame pack instead; a screenshot has no time base, no hash and no chain.
- Refuse the screenshot
- Open the asset
- Build the frame pack
- Verify it
The overlay clock is not the case time
The recorder shows a time burnt into the picture.
Keep it as text in its own field; the case time is separate with its own uncertainty.
- Read the overlay clock as text
- Record it in its field
- Set the case time separately
- Never merge the two
Bookmark several frames
A sequence of frames each matters.
Bookmark each ordinal into the case, then build the pack over the range.
- Open the asset
- Bookmark each key ordinal
- Build the pack over the span
- Verify
Only a few frames leave
The whole recording must not leave the machine.
The frame pack is the only unit that leaves; the video stays.
- Open the asset
- Build the small pack
- Confirm only frames are in it
- Send the pack, not the video
Hand the pack to the report
The frames are ready to attach to the certificate.
Verify the pack, then attach it to the export and certificate.
- Build the pack
- Verify it
- Attach to the report
- Cite the source asset and hashes
5The same job at the command line
recoveryantra review frames F:/Case-176/decoded/ch07.mp4 --from 1410 --to 1416 --interval 2 -o F:/Case-176/packs && recoveryantra review verify F:/Case-176/packs/pack_001.zipMask what must not be disclosed, under a typed review
Mask a fixed or moving region across a range, have a named person approve it in a typed decision, and export a redacted copy - which is refused until that approval exists, with the original untouched.
1How to get there
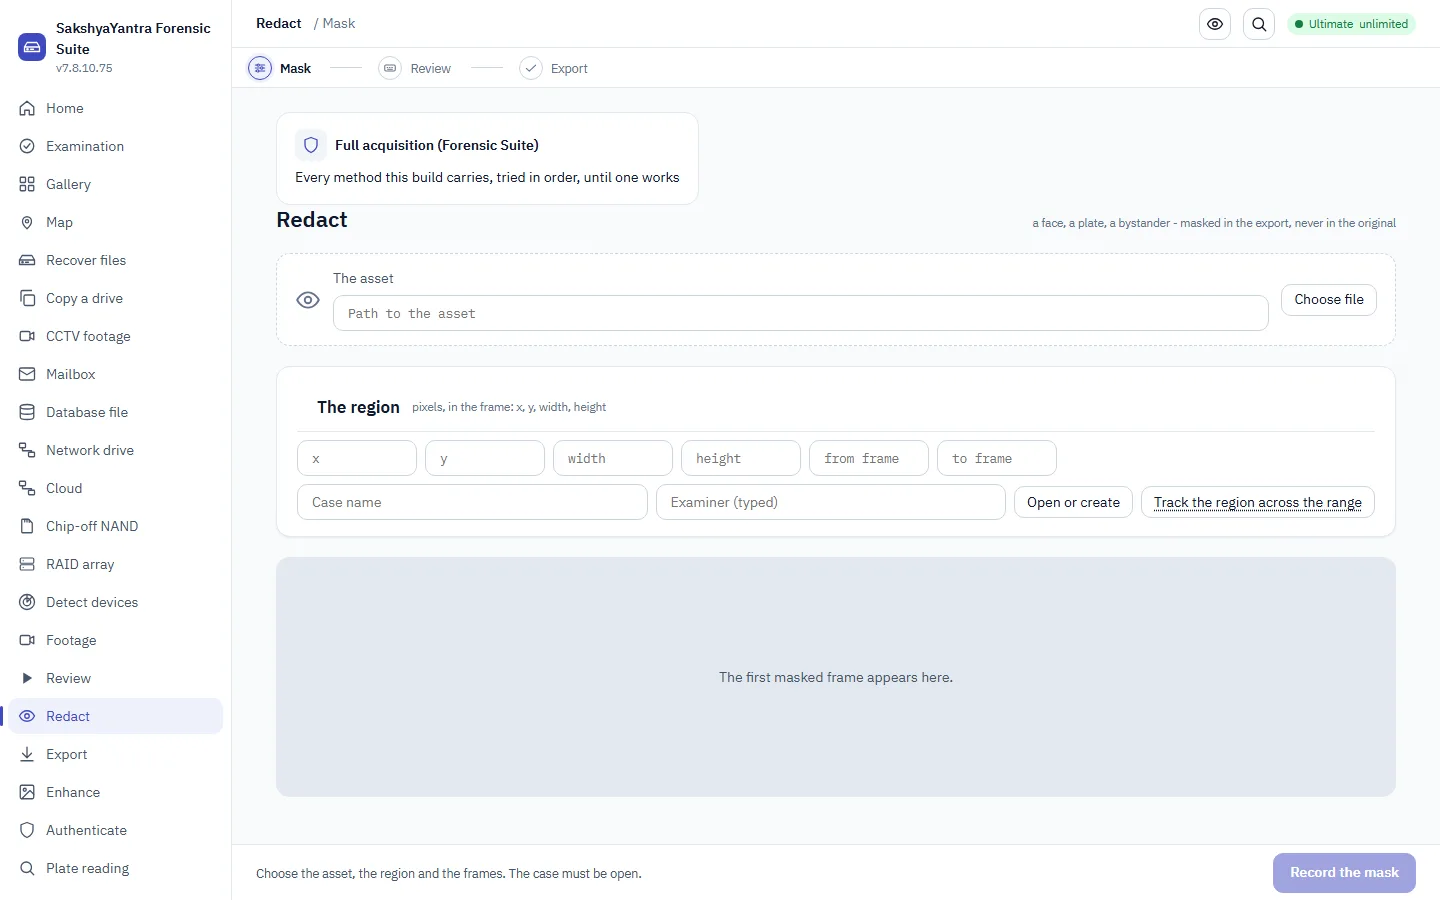
- 1Asset path the footage or image to redact.
- 2Region x,y,w,h the region to mask.
- 3Frame range the frame range to mask across.
- 4Open or create the case, and the typed examiner.
2The commands, and what each is for
| Option | What it does | What to choose |
|---|---|---|
| redact mask | Masks a region on one frame or asset, into the case. | For a fixed region on a still or a single frame. |
| redact track | Masks a region and follows it across a frame range. | For a moving subject - the mask holds on every frame in the range. |
| redact review | Records the examiner's typed decision. | A named person must approve before export; the decision is typed and recorded. |
| redact export | Writes the redacted copy. | Last, and only after an approve decision exists - it is refused otherwise. |
3Step by step
- Mask the regionA rectangle in pixels on the frame, recorded against the case. The original is never touched.
- Track it across the rangeFor a moving subject, the mask follows the region from the first frame to the last.
- Have a named person reviewThe decision is typed - who checked, what they decided, and a note - into the case.
- Export only after approvalThe redacted copy is refused until an approve decision exists.
- Keep the original untouchedRedaction produces a copy; the exhibit stays as it was.
Do not do this. Export is refused until a named person has recorded an approve decision, and the original is never touched - redaction produces a copy. A mask that no one checked, or one applied to the original, is not a disclosure this tool will produce.
4Ten situations, and exactly what to do
Mask a bystander's face
Footage must go to a party who may not see everyone in it.
redact track the face across the range, have it reviewed, then export.
- Track the region across the frames
- Have a named person approve
- Export the redacted copy
- Keep the original untouched
A fixed sign in shot
A number plate sits still in the corner of a still.
redact mask the fixed region.
- Open the asset
- Mask the fixed region
- Have it reviewed
- Export
The reviewer approves
A named person has checked every masked frame.
redact review records the typed approve decision.
- Complete the masking
- The reviewer checks every frame
- Record the typed approve
- Then export
Export is refused
You try to export before anyone reviewed.
Export is refused until an approve decision exists; record the review first.
- Attempt export
- Read the refusal
- Record the review decision
- Export again
A moving subject
The subject to mask moves across the frame.
redact track follows the region across the range.
- Set the region on the first frame
- Track it to the last
- Review every frame
- Export
The original must not change
The exhibit has to stay exactly as it was.
Redaction writes a copy; the original is never touched.
- Mask on the copy
- Confirm the original is untouched
- Review
- Export the copy
Two regions in one frame
Two people must both be masked.
Mask each region; both are recorded against the case.
- Mask the first region
- Mask the second
- Review both
- Export
Record who checked
The disclosure must show a named person approved.
The review decision names the reviewer and carries a note.
- Complete the masking
- Reviewer checks the frames
- Record reviewer and note
- Export
A reviewer rejects
The reviewer finds a frame where the mask slipped.
Record a reject decision; fix the mask before any export.
- Reviewer finds the gap
- Record the reject with a note
- Re-track the region
- Review again
Hand the redacted copy over
The approved redaction is ready for disclosure.
redact export writes the redacted copy to the disclosure folder.
- Confirm the approve decision
- Export the copy
- Keep the review record
- Disclose the copy only
5The same job at the command line
recoveryantra redact track F:/Case-176/decoded/ch07.mp4 --region 412,88,96,120 --from 1400 --to 1520 --case F:/Case-176 && recoveryantra redact review --case F:/Case-176 --decision approve --reviewer "A. Rao"Enhance a frame two ways, and keep them apart
Deterministic classical recipes for an evidentiary result another examiner can repeat, and a separate, labelled AI hypothesis track - the enhanced image always beside the original, the chain printed beneath.
1How to get there
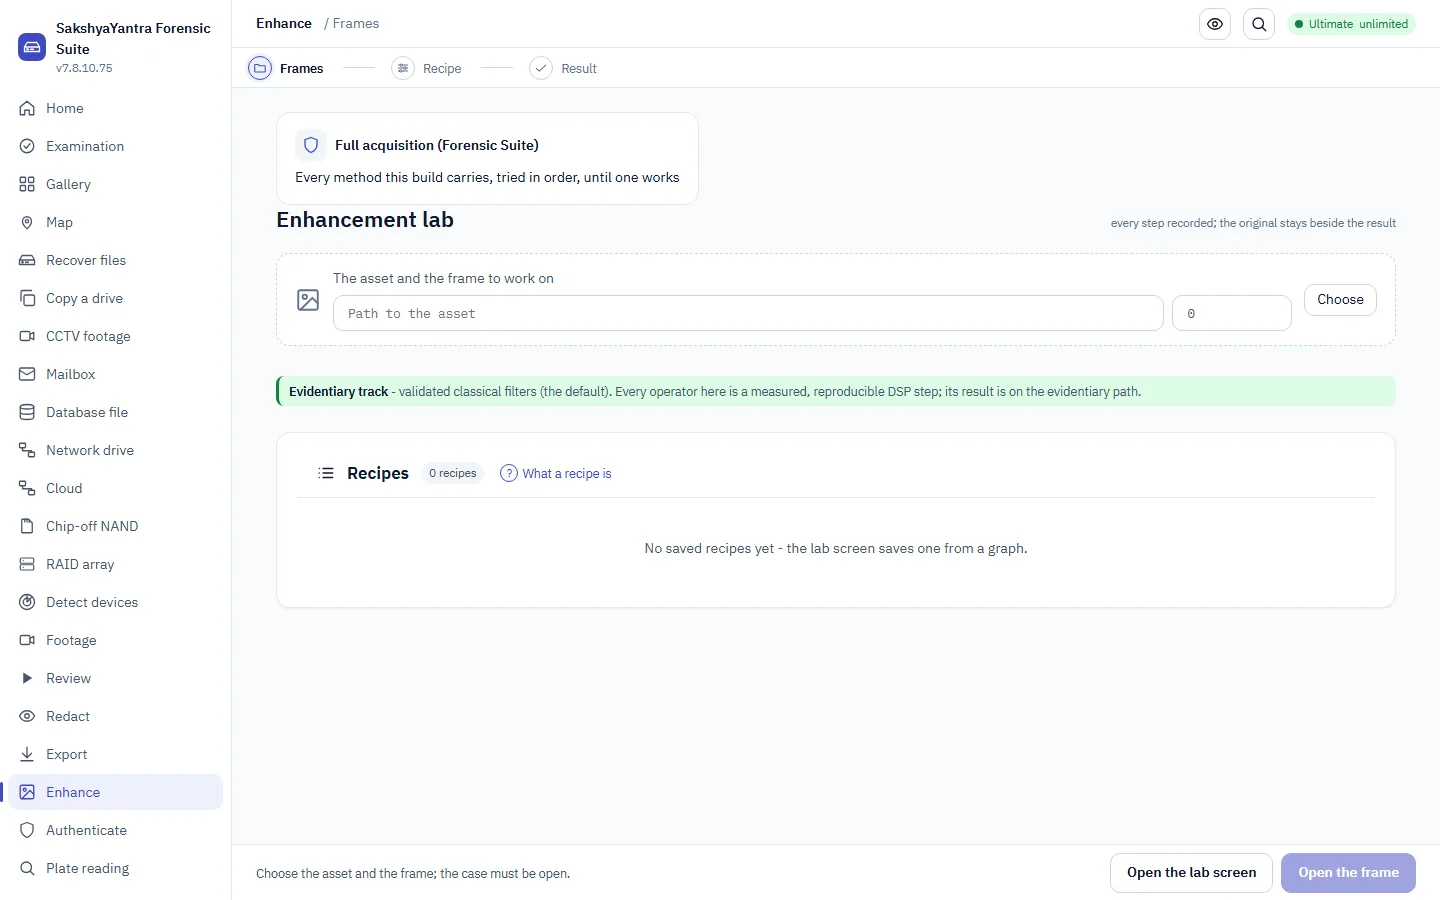
- 1Asset path the case asset to work on.
- 2Choose choose the asset.
- 3What a recipe is read what a recipe is, and the two tracks.
2Two tracks: which to use, and when
3The recipe cards
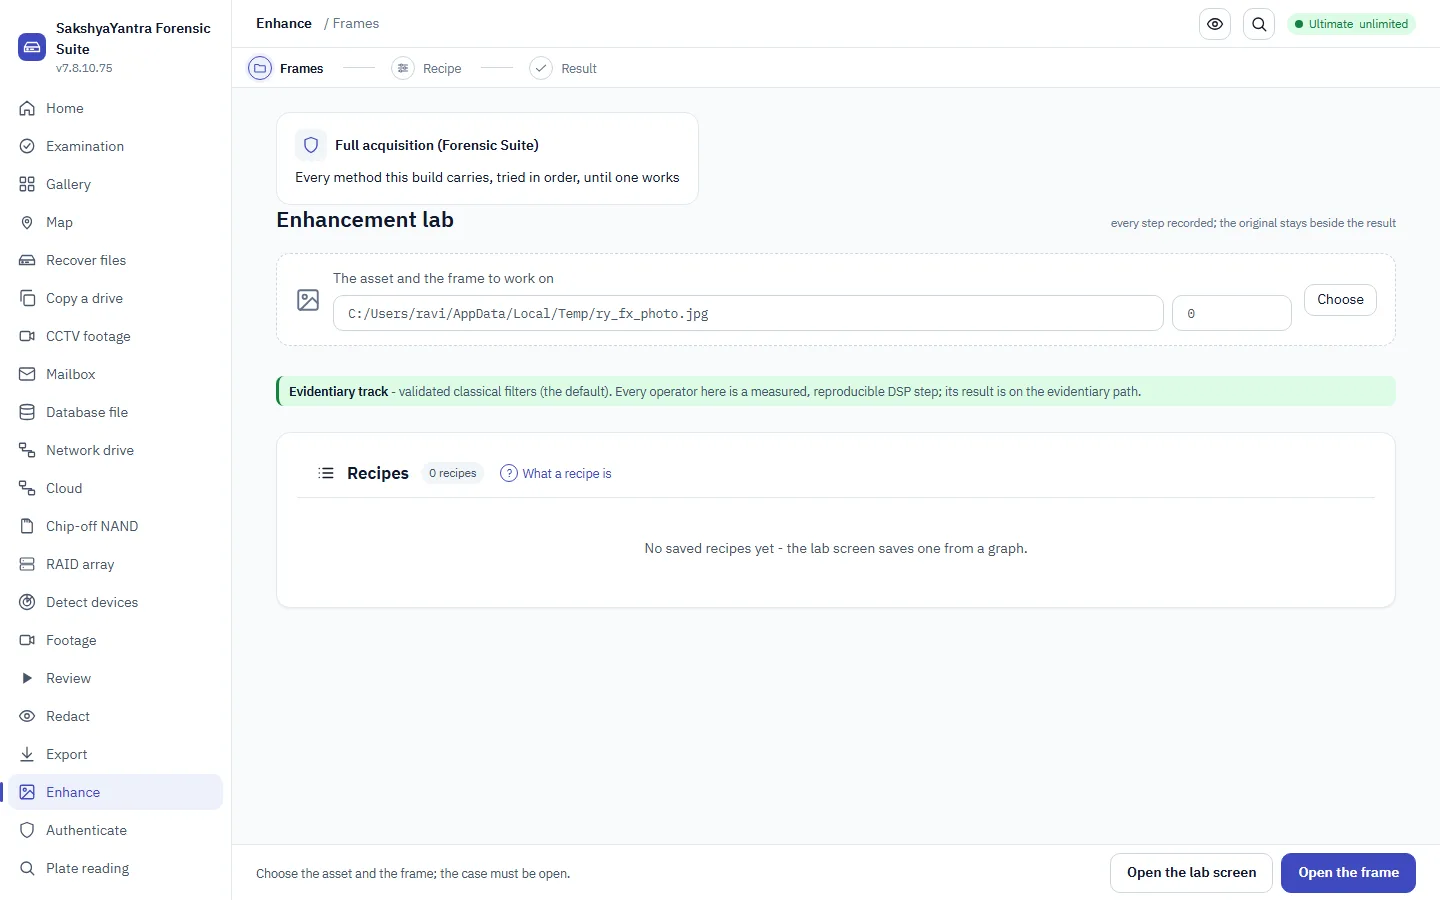
- 1Recipe cards the recipe cards and their two-track framing.
4The commands, and what each is for
| Option | What it does | What to choose |
|---|---|---|
| medialab recipe list | Lists the saved classical recipes. | First, to see the deterministic operations available. |
| medialab run | Runs a recipe on frames and writes the result to a folder. | To apply a classical recipe to a frame pack or asset. |
| medialab save | Saves an operation as a named recipe. | To make an operation repeatable across cases. |
| medialab measure | Takes a calibrated 2-D measurement (see Metrology). | When the question is a length, a height or a distance, not a clearer picture. |
5Step by step
- Take frames into the labThe lab works on a case asset - a frame pack from review, or an ingested exhibit.
- Choose the trackClassical for an evidentiary result another examiner can repeat; the AI track for a labelled hypothesis.
- Run the recipeA deterministic recipe writes an enhanced copy; the chain of operations is printed beneath it.
- Keep both imagesThe enhanced image is shown beside the original, never instead of it, and both are exported.
- Label a hypothesis as a hypothesisAn AI-enhanced result is an observation, kept apart from the evidentiary track and never presented as the original.
Beside, never instead. The enhanced image is never shown instead of the original: it is placed beside it with the chain of operations printed beneath, and both are exported. A classical recipe is evidentiary because it is reproducible; an AI enhancement is a labelled hypothesis and stays one.
6Ten situations, and exactly what to do
A dark frame of the vehicle
The frame that shows the vehicle is underexposed.
A classical contrast recipe - deterministic and repeatable.
- Take the frame pack into the lab
- List the recipes
- Run the contrast recipe
- Keep both images
A motion-blurred plate
The plate is blurred by motion.
A classical deblur recipe; the chain is printed beneath.
- Take the frames in
- Run the deblur recipe
- Read the printed chain
- Keep original and enhanced
See the recipes available
You want to know which classical operations exist.
medialab recipe list shows the saved recipes.
- Open the lab
- List the recipes
- Read what each does
- Choose one
An AI upscale as a lead
You want a model to suggest detail, understanding it is a lead.
The AI hypothesis track - labelled, kept apart from the evidentiary result.
- Take the frame in
- Run the AI track
- Label it a hypothesis
- Do not present it as the original
Repeat an operation across cases
You apply the same operation often.
medialab save makes it a named recipe.
- Perform the operation
- Save it as a recipe
- Reuse it next case
- Keep the chain printed
The enhanced must not replace the original
A reviewer worries the original was overwritten.
The enhanced image is shown beside the original and both are exported.
- Run the recipe
- Confirm both images kept
- Export both
- Print the chain beneath
Stabilise a shaky clip's frames
The captured frames jitter.
A classical stabilise recipe on the frame pack.
- Take the frames in
- Run the stabilise recipe
- Read the chain
- Keep both
Prove the enhancement is repeatable
The defence must be able to repeat your steps.
A classical recipe's chain is printed; another examiner runs the same recipe.
- Run the classical recipe
- Print the chain
- Attach it to the report
- State it is reproducible
Keep the two tracks separate
You have both a classical result and an AI lead.
Write them to separate folders; the AI output stays a labelled hypothesis.
- Run the classical recipe to /enh
- Run the AI track to /hyp
- Label the hypothesis
- Never merge the two
A measurement, not a clearer picture
The question is a real dimension in the frame.
That is metrology - a calibrated measurement, not an enhancement.
- Recognise it as a measurement
- Use medialab measure
- Calibrate against a known length
- Report the value with its uncertainty
7The same job at the command line
recoveryantra medialab recipe list && recoveryantra medialab run deblur F:/Case-176/packs/pack_001.zip -o F:/Case-176/enhMeasure height, speed and distance from the footage
Calibrated 2-D and 3-D measurement - length, height, speed, camera pose and distance - against a known reference in the scene, every figure reported with its assumptions and uncertainty.
1How to get there
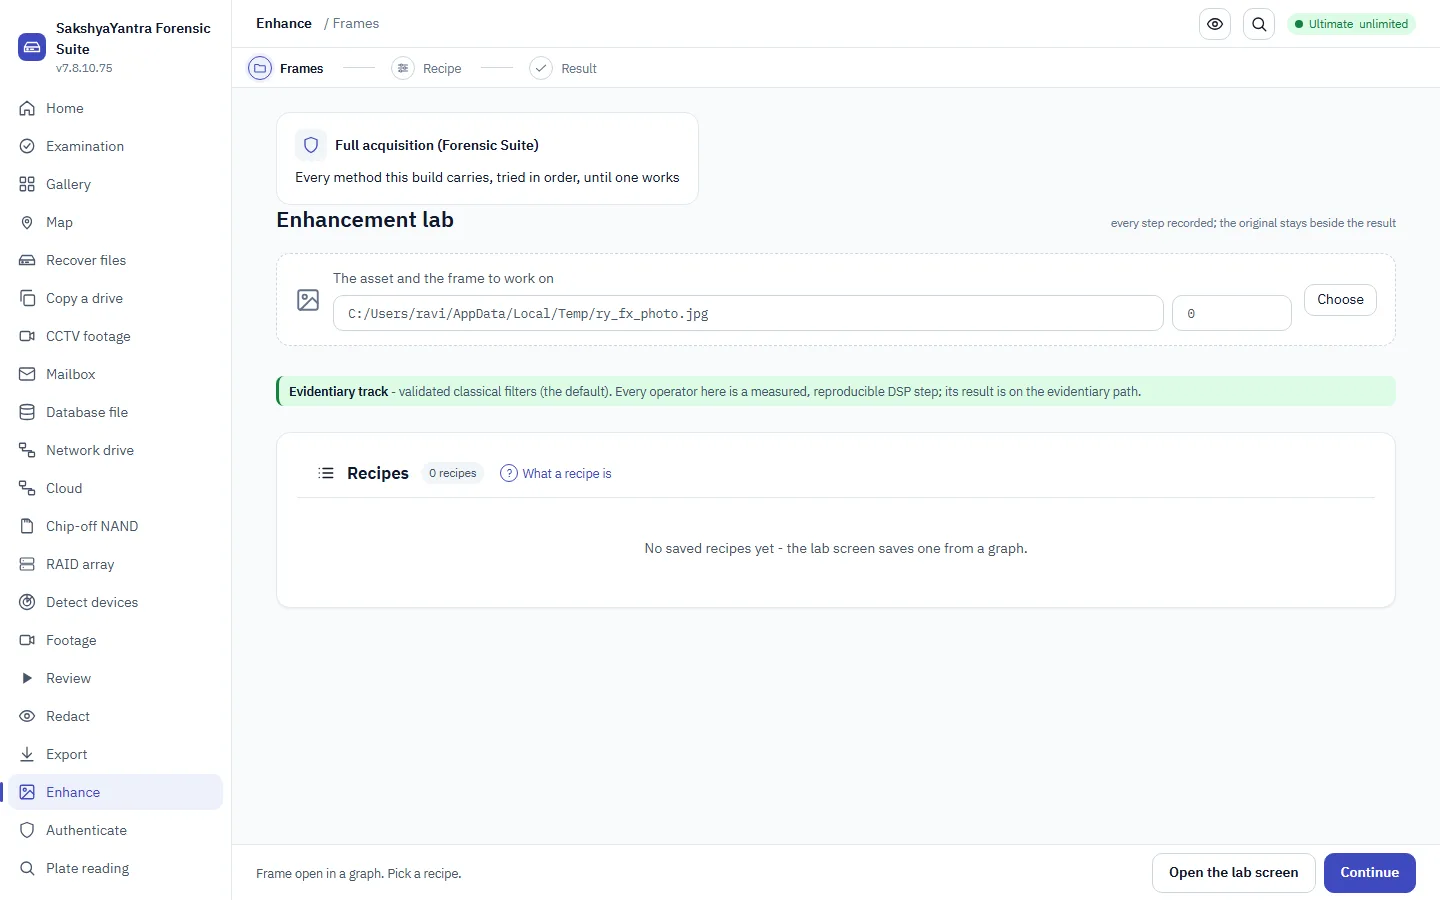
- 1Case asset the ingested case asset the graph opens on.
- 2The operation the measurement operation to run.
2The measurements, and what each is for
| Option | What it does | What to choose |
|---|---|---|
| Length (2-D) | A calibrated distance in the image plane against a known reference length. | For a measurement that lies flat in the scene, such as a marking on the ground. |
| Height | An object or person's height using scene geometry and a reference. | To estimate a subject's height from footage with a known reference in frame. |
| Speed | Distance travelled over known frame timing. | For a vehicle's speed across a measured distance and the frame time base. |
| Camera pose | The camera's position and orientation from scene points. | When later measurements depend on where the camera stood. |
| 3-D distance | A distance recovered with a calibrated scene, not a flat plane. | For a measurement that is not in a single image plane. |
3Step by step
- Open the case assetThe measurement runs on an ingested exhibit, not a loose file path, so the result is anchored to the case.
- Choose the measurementLength, height, speed, camera pose or 3-D distance - the question decides which.
- Calibrate against a known referenceA measurement needs a known length or scene geometry in the frame; without it, it is a guess.
- Read the value with its uncertaintyThe result carries the assumptions and the uncertainty; a single number without them is not a measurement.
- Record it against the caseThe measurement, the reference and the assumptions go into the case together.
Calibration, and honest uncertainty. A measurement needs a known reference or a calibrated scene; without one it is a guess, not a metrology result. Every figure carries its assumptions and its uncertainty, and a number reported without them is not a measurement.
4Ten situations, and exactly what to do
How tall is the subject
Footage shows a person beside a door of known height.
A height measurement using the door as the reference.
- Open the case asset
- Choose the height measurement
- Calibrate on the door height
- Report the range with its uncertainty
How fast was the vehicle
A vehicle crosses a measured distance over known frames.
A speed measurement from the distance and the frame time base.
- Open the asset
- Choose speed
- Enter the measured distance and frames
- Report the speed with its uncertainty
The length of a marking
A ground marking's length is in question.
A 2-D length against a known reference in the plane.
- Open the asset
- Choose length
- Calibrate on a known length
- Report the value
Where did the camera stand
Later measurements depend on the camera position.
A camera pose from scene points.
- Open the asset
- Choose camera pose
- Mark the scene points
- Record the pose for later use
A distance out of the plane
The distance is not in a single flat plane.
A 3-D distance with a calibrated scene.
- Open the asset
- Calibrate the scene
- Choose 3-D distance
- Report with uncertainty
No reference in frame
There is nothing of known size to calibrate against.
State the limit honestly - without a reference the measurement cannot be made.
- Open the asset
- Look for a reference
- Find none
- Record that a measurement is not possible
Report the uncertainty
The court needs the confidence in the figure.
The measurement carries its assumptions and uncertainty; report them with the value.
- Take the measurement
- Read the uncertainty
- State the assumptions
- Report value and range together
Measure on a case asset
You have a loose file, not a case asset.
Ingest it first - the graph opens on an ingested exhibit, not a loose path.
- Ingest the file into the case
- Open the case asset
- Run the measurement
- Record it
Two independent measurements agree
One figure alone is thin.
Take two independent measurements and report their agreement.
- Measure one way
- Measure another
- Compare the two
- Report the agreement and the range
Attach the measurement to the report
The figure has to go into the certificate.
Record it against the case with its reference and assumptions.
- Take the measurement
- Record it against the case
- Attach the reference
- Cite it in the report
5The same job at the command line
recoveryantra medialab measure F:/Case-176/packs/pack_001.zip --case F:/Case-176Say what a file's structure and statistics support
Every authenticity method - structure, codec history, double compression, frame statistics and PRNU sensor-noise - run together and ranked, reported as evidence rather than a score, with any model pack kept as a labelled observation.
1How to get there
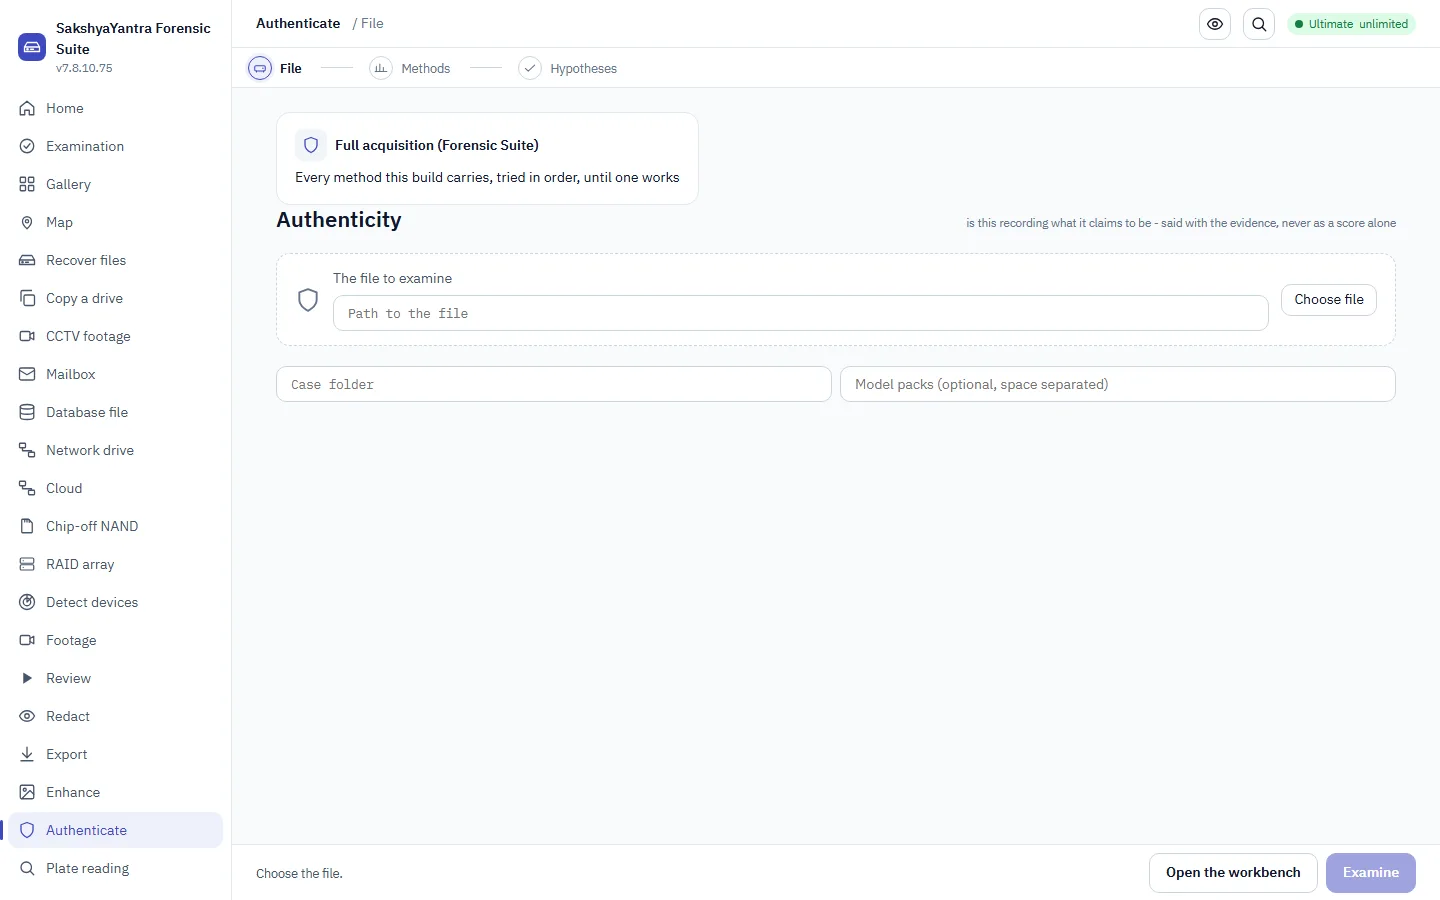
- 1File the file to examine.
- 2Choose file choose the exhibit.
- 3Case folder the case to record against.
- 4Model packs optional signed model packs.
2Methods, and the optional model pack
3The examine wizard and its method cards
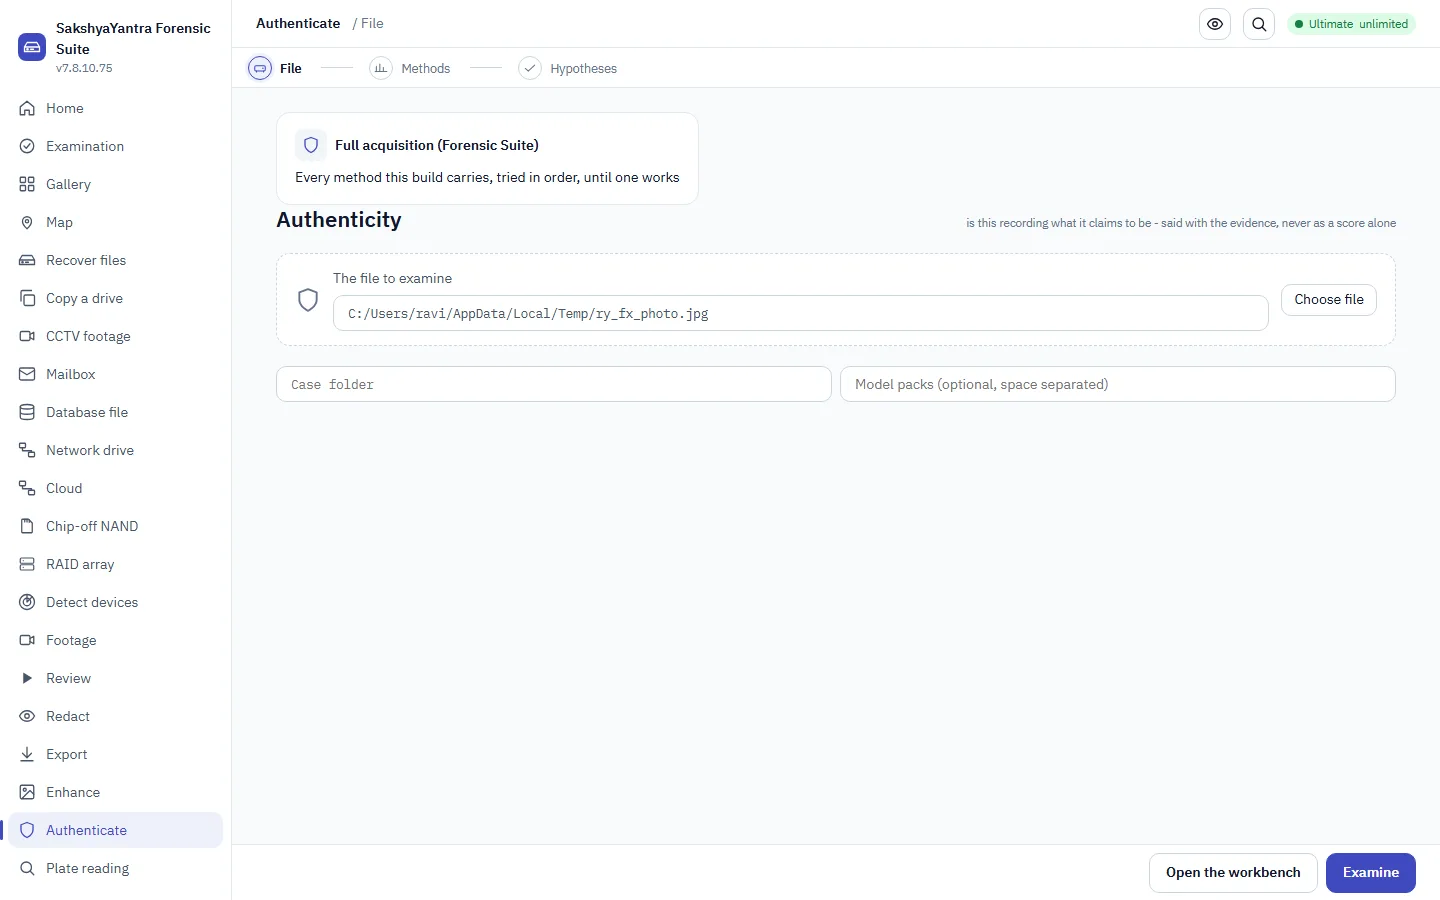
- 1File the queued image.
- 2Case folder the case the method cards are recorded to.
4The options, and what to set them to
| Option | What it does | What to choose |
|---|---|---|
| authenticate <file> | Runs every method, ranks them, and records the result in the case. | As the standard examination when authenticity is challenged. |
| --case | Records the examination against a case. | Always, so the ranking and the methods are part of the case record. |
| --models | Adds a signed local model pack to the method set. | For an extra labelled opinion, kept as an AI observation. |
| -o | Writes the report data to a folder. | When the method output has to travel with the case. |
5Step by step
- Hash and copy the exhibitExamine the copy, never the only original.
- Run every methodStructure, codec history, double compression, frame statistics and PRNU - reported together, not as one score.
- Read the method cardsEach method's result is a card - ELA, noise, PRNU - and the workbench ranks what each supports.
- Weigh the model pack as an observationA model's opinion is labelled and never quoted as the finding; the methods and the examiner make the finding.
- Record the ranked resultThe methods, the ranking and the examiner's reading go into the case.
Methods make the finding. One score convinces nobody, and a model's verdict is an observation, not the finding. The workbench runs every method - structure, codec history, double compression, frame statistics, PRNU - and reports what each supports; the methods and the examiner make the finding. Examine the copy, never the only original.
6Ten situations, and exactly what to do
The clip was said to be cut
The other side says the clip was cut, re-encoded or generated.
Run every method; the finding rests on the methods and the examiner, not a score.
- Hash and copy the clip
- Run every method
- Read the ranked cards
- Record the result in the case
Double compression
You suspect the image was saved twice.
The double-compression method reports whether the statistics support it.
- Run the examination
- Read the double-compression card
- Corroborate with codec history
- Record the finding
A container from the wrong editor
The container may have been written by editing software.
The structure method reports the container's writer against the recorder.
- Run the examination
- Read the structure card
- Compare writer with the recorder
- Record it
PRNU sensor match
You want to test whether an image came from a specific camera sensor.
The PRNU method compares the sensor-noise fingerprint.
- Run the examination
- Read the PRNU card
- Weigh the match strength
- Record what it supports
Add a deepfake model pack
You want a model's labelled opinion alongside the methods.
Add a signed pack with --models; its output is an observation.
- Run every method
- Add the signed model pack
- Label its output an observation
- Keep the methods as the finding
Do not quote the model
The model returned a confident verdict.
A model output is an observation; the methods and the examiner make the finding.
- Read the model observation
- Do not quote it as the finding
- Rely on the ranked methods
- Record the examiner's reading
Examine the copy, not the original
There is only one copy of the exhibit.
Hash it, copy it, examine the copy.
- Hash the exhibit
- Copy it
- Examine the copy
- Keep the original untouched
Frame statistics anomaly
A region of frames looks statistically odd.
The frame-statistics method reports the anomaly and where.
- Run the examination
- Read the statistics card
- Locate the anomaly
- Record it
Write the report data out
The method output must travel with the case.
Write it to a folder with -o.
- Run the examination
- Write the report data
- Keep it with the case
- Attach to the certificate
Several methods agree
One method alone convinces nobody.
Report the methods that support the finding together, with the ranking.
- Run every method
- Read which support the finding
- State them together
- Record the ranked result
7The same job at the command line
recoveryantra authenticate E:/Exhibits/E5/clip.mp4 --case F:/Case-176Examine a file for hidden data
A steganalysis pipeline that grades whether an exhibit carries a concealed payload and, on request, carves out appended data, embedded files and LSB payloads to a case folder - reading only, with unconfirmed carves labelled.
1How to get there
- 1File path the file to examine for hidden data.
- 2Examine for hidden data run the examination - reading only.
- 3Methods and limits read the methods and their honest limits.
2The pipeline and the graded verdict
- 1The pipeline the examination phases and the graded verdict.
3The options, and what to set them to
| Option | What it does | What to choose |
|---|---|---|
| stego <file> | Examines a file for hidden data and prints a graded verdict. | Whenever an exhibit might carry a concealed payload. |
| --extract | Carves out and saves what it finds. | When the examination should recover appended data, embedded files or an LSB payload, not only report it. |
| --out | Where the recovered hidden data is written. | A case folder, never the exhibit's own media. |
| --json | Prints the full report as JSON. | When a tool or a case script consumes the result. |
4Step by step
- Point at the fileAn image larger than its content explains, a file a suspect treated as important, or anything flagged for a second look.
- Run the examinationReading only - the exhibit is never changed - and it prints a graded verdict.
- Read the grade honestlyThe verdict is graded, and an unconfirmed carve is labelled so it is not mistaken for proven.
- Extract what is foundWith extraction on, appended data, embedded files and LSB payloads land in a case folder you can open.
- Record the resultThe verdict and anything carved go into the case, with the honest limits stated.
Reading only, honest grade. The examination is reading only and never alters the exhibit; extraction writes to a separate case folder, never the exhibit's own media. An unconfirmed carve is labelled so it is not mistaken for proven.
5Ten situations, and exactly what to do
An image bigger than it should be
A picture is far larger than its visible content explains.
stego examines it and prints a graded verdict.
- Point at the image
- Run the examination
- Read the graded verdict
- Record it
Recover an appended payload
The examination finds data appended after the image.
--extract carves it into a case folder.
- Run the examination
- Turn on extraction
- Write to a case folder
- Open the recovered data
An LSB payload
You suspect a least-significant-bit payload in the pixels.
The examination tests for it and, with extraction, carves it out.
- Run the examination
- Read the LSB result
- Extract if found
- Record the finding
A file a suspect guarded
A file was treated as important with no obvious reason.
Examine it for concealed data.
- Point at the file
- Run the examination
- Read the verdict
- Extract if found
Audio carrier
A WAV file may carry a concealed payload.
The examination reads any file, audio included.
- Point at the WAV
- Run the examination
- Read the verdict
- Extract if found
An unconfirmed carve
Extraction found something but it is not proven.
The carve is labelled unconfirmed; do not present it as proven.
- Extract the candidate
- Read the unconfirmed label
- State it is not proven
- Corroborate before relying on it
Write to the case, not the media
You need the recovered data in the case's working files.
--out a case folder, never the exhibit's own media.
- Run extraction
- Set the out folder to the case
- Confirm it is not the media
- Record the finding
Feed the result to a script
A case script consumes the verdict.
--json prints the full report.
- Run the examination
- Emit JSON
- Feed the script
- Keep the raw
Nothing is found
The examination finds no concealed data.
The graded verdict says so; absence is reported plainly, not as failure.
- Run the examination
- Read the negative verdict
- Record it plainly
- Note the methods used
The exhibit must not change
The examination must not alter the file.
It is reading only; extraction writes to a separate folder, never the exhibit.
- Run the examination
- Confirm the exhibit is unchanged
- Extract to a case folder
- Record the finding
6The same job at the command line
recoveryantra stego E:/Case/Ex1/Out/photo.png --extract --out F:/Case/hiddenRead a plate from a frame pack, reading sealed first
Plate assistance on a frame pack, offline with the bundled model or OpenALPR or, with authority, a cloud VLM - the examiner's own reading typed and sealed before any engine answer, and Indian plates validated to full depth.
1How to get there
- 1Frame pack the frame pack to read a plate from.
- 2Frames to send which frames to submit.
- 3Provider / model the engine or provider to ask.
- 4The question the question to put to the engine.
2The engine: which one, and when
3The options, and what to set them to
| Option | What it does | What to choose |
|---|---|---|
| <pack> | A frame-pack .zip - the only unit this door accepts. | Always: a video, a clip or a loose picture is refused by type. |
| --reading | The examiner's own reading, typed and sealed before any model answer can be shown. | Always, first: without a sealed reading (or --unreadable) the command stops at the seal step. |
| --engine | local, openalpr or cloud. | local or openalpr to send nothing; cloud only with authority, knowing the frames leave. |
| --country / --constraint | The plate syntax the read is checked against. | India is built to full depth; another country is reported as observed, not forced into a format. |
| --unreadable | Seals the reading as ‘cannot be read’. | When the plate genuinely cannot be read - still a sealed reading, not a bypass. |
4Step by step
- Build the frame packPlate reading takes a frame pack, never a video or a loose picture.
- Type and seal your own readingThe examiner's reading is sealed before any engine answer; without it, or --unreadable, there is no route to an answer.
- Choose the enginelocal or openalpr send nothing and spend nothing; cloud sends the frames and logs each digest.
- Read the engine's answer as an observationThe engine read rides behind the sealed reading; the sealed reading is the record.
- Check against the plate syntaxIndia is validated to full depth; another country is reported as observed, not forced into a format it has no pack for.
Sealed reading first. The examiner's own reading is typed and sealed BEFORE any engine answer can be shown - without it, or an --unreadable seal, the command stops. local and openalpr send nothing and spend nothing; cloud sends the frames and logs each digest in the transfer manifest. The sealed reading is the record; the engine read rides behind it.
5Ten situations, and exactly what to do
Read a plate offline
You have a frame pack showing a plate and no authority to send anything.
Seal your reading, then read with the local engine - nothing leaves.
- Build the frame pack
- Type and seal your reading
- Read with the local engine
- Record the sealed reading as the record
OpenALPR is installed
You want the OpenALPR engine's read, still offline.
Seal your reading, then read with openalpr.
- Seal your reading
- Choose the openalpr engine
- Read offline
- Compare with your reading
A cloud VLM, with authority
Your agency has authorised a cloud read.
Seal your reading, then cloud - the frames leave and each digest is logged.
- Seal your reading
- Confirm authorisation
- Read with the cloud engine
- Keep the transfer manifest
The plate cannot be read
The plate is genuinely illegible.
Seal the reading as --unreadable - still a sealed reading.
- Build the frame pack
- Seal the reading as unreadable
- Optionally ask an engine
- Record the sealed reading
No sealed reading
You try to get an engine answer without sealing a reading.
The command stops at the seal step; there is no route to an answer without a sealed reading first.
- Attempt an engine read
- Read the stop at the seal step
- Type and seal your reading
- Then read
An Indian HSRP plate
The plate is an Indian high-security plate.
India is built to full depth; validate under the HSRP constraint.
- Seal your reading
- Set country India
- Validate under HSRP
- Record the checked read
A plate from another country
The plate is from a country with no pack.
It is reported as observed, not forced into a format it has no pack for.
- Seal your reading
- Read with the engine
- Note it is reported as observed
- Do not force a format
Only some frames
A pack has many frames and you want to submit a few.
Name the frames with --frames; each leaves only if a cloud request proceeds.
- Seal your reading
- Name the frames
- Choose the engine
- Read
A video was offered
Someone hands you a video to read a plate from.
The door takes only a frame pack; build one in review first.
- Refuse the video
- Build a frame pack in review
- Seal your reading
- Read with the local engine
The engine and your reading differ
The engine returns a different plate from your reading.
Your sealed reading is the record; the engine read is an observation behind it.
- Seal your reading first
- Read with the engine
- Note the difference
- Keep the sealed reading as the record
6The same job at the command line
recoveryantra plate F:/Case/packs/pack_001.zip --frames 0 --reading MH12AB1234 --country IN --constraint hsrp --engine localKnow what the tool reads, and record the intake
The proven-format coverage and the tested-recorder registry, honest about what is held but not yet supported, with an intake form that captures make, model, device kind and provenance and writes a receipt line into the case.
1How to get there
- 1Proven coverage the proven-format coverage.
- 2The registry the recorder registry and the held-but-unsupported list.
2The intake form and its receipt
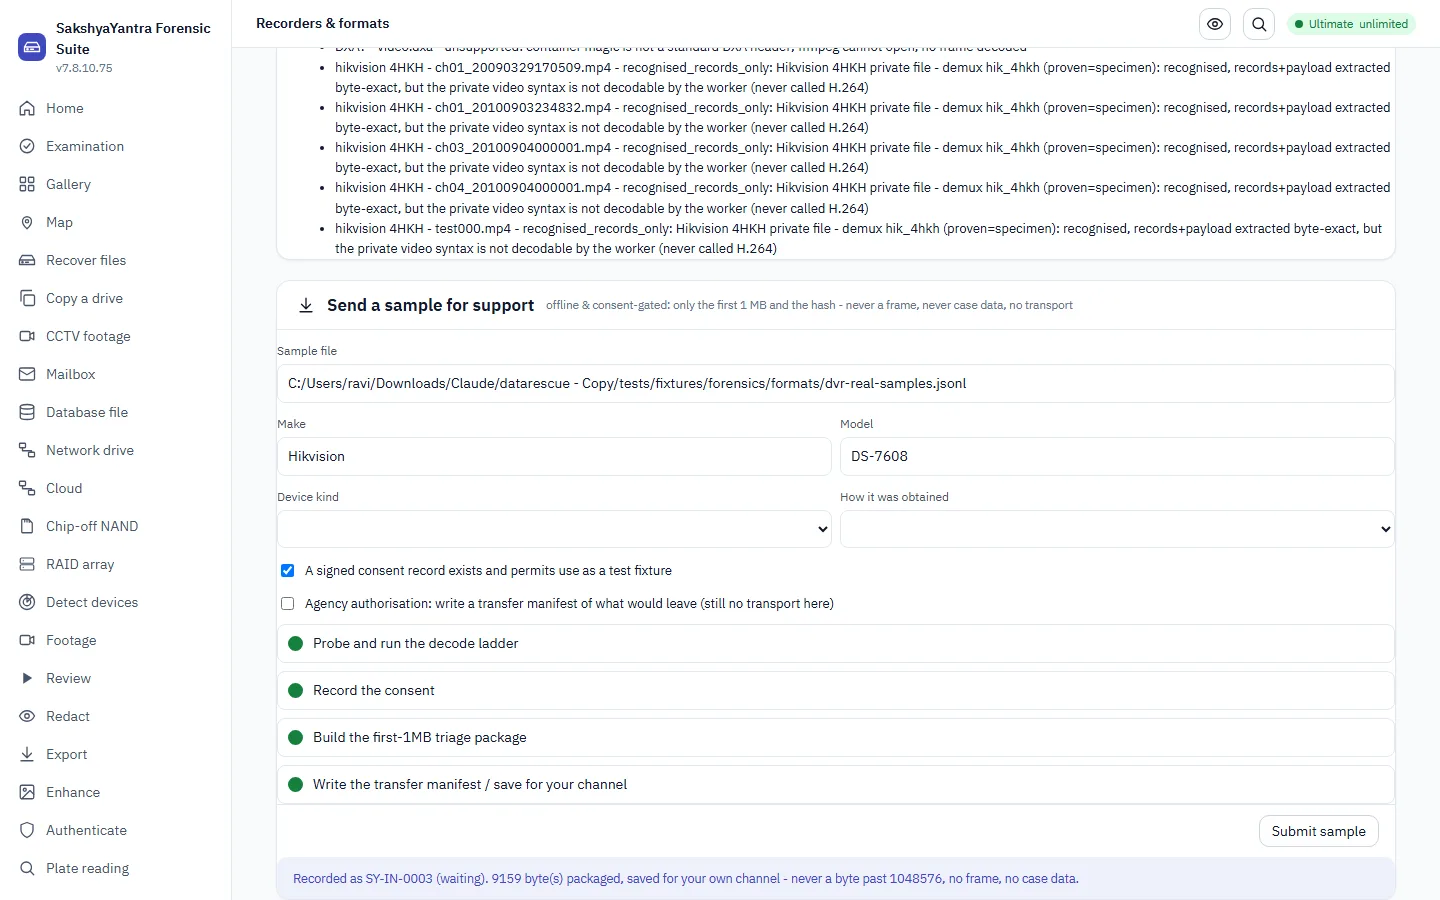
- 1Make the recorder make.
- 2Model the recorder model.
- 3Device kind the kind of device.
- 4Submit sample submit a sample for support.
3The commands, and what each is for
| Option | What it does | What to choose |
|---|---|---|
| footage formats | Lists the proven-format coverage. | To state exactly what this build is proven to read. |
| footage registry | Looks a recorder up by make and model. | To check whether a specific recorder is in the tested registry. |
| footage intake | Records an intake with the examiner named and the source hashed. | To bring a recorder export into the case with a chain of custody. |
| Submit sample | Sends a sample so a held-but-unsupported format can be added. | When a recorder's format is not yet covered and you can share a sample. |
4Step by step
- Read the proven coverageWhat this build is proven to read, before anything is promised.
- Look the recorder upThe registry says whether the make and model are known, and what is held but not yet supported.
- Record the intakeThe intake form captures make, model, device kind and how it was obtained, and writes a receipt line.
- Submit a sample for a gapWhere a format is held but unsupported, a sample lets it be added rather than guessed at.
- Proceed within the coverageDecode and intake only within what is proven; state the limit where it is not.
State the coverage honestly. The registry states what is proven and, honestly, what is held but not yet supported. Where a format is unsupported, submit a sample so it can be added rather than guessed at; do not promise a court a format the registry does not cover.
5Ten situations, and exactly what to do
Is this recorder covered
A specific make and model has to be checked before a promise.
footage registry looks it up.
- Note the make and model
- Look them up
- Read the coverage
- Proceed within it
State what can be read
A court asks what the tool is proven to read.
footage formats lists the proven coverage.
- Run formats
- Read the proven list
- State it plainly
- Promise only within it
Record a recorder intake
A recorder export must enter the case with its provenance.
The intake form captures make, model, kind and source, and writes a receipt.
- Fill the intake form
- Record make, model and kind
- Note how it was obtained
- Keep the receipt line
A format held but unsupported
The registry shows the format is held but not yet supported.
Submit a sample so it can be added, rather than guessed at.
- Look the recorder up
- See it is held but unsupported
- Submit a sample
- Await support
A dashcam, not a DVR
The device is a dashcam.
Record the device kind on the intake as dashcam.
- Fill the intake form
- Set the kind to dashcam
- Record make and model
- Keep the receipt
A body cam export
A body-worn camera export has arrived.
Record it with the kind body cam and its provenance.
- Fill the intake form
- Set the kind to body cam
- Note the source
- Keep the receipt
How the export was obtained
The provenance of the export matters.
The intake records how it was obtained - export menu, pen-drive copy or disk image.
- Fill the intake form
- Record how it was obtained
- Keep the receipt line
- Cite it in the report
Confirm the coverage before decode
Before decoding you want to be sure of the coverage.
Check formats and the registry first, then decode.
- Run formats
- Check the registry
- Confirm coverage
- Decode within it
A phone as the recorder
The footage came from a phone, not a fixed recorder.
Record the kind as phone on the intake.
- Fill the intake form
- Set the kind to phone
- Record make and model
- Keep the receipt
The registry has the recorder
The make and model are in the tested registry.
Proceed to decode and intake within the proven coverage.
- Look the recorder up
- Confirm it is tested
- Decode the export
- Record the intake
6The same job at the command line
recoveryantra footage registry --make Hikvision --model DS-7608 && recoveryantra footage intake E:/Exhibits/E3 --case F:/Case-176 --examiner "S. Menon"Search, tag and audit the whole case
One workbench over the case - a search across keyword hits, gallery and findings, the tags and bookmarks gathered, saved views to return to, and the hash-chained audit log that proves nothing was altered.
1How to get there
- 1Search search across the case.
- 2Tags & bookmarks the tags and bookmarks.
- 3Saved views saved views of the case.
- 4Audit log the audit log of the case.
2The four tabs, and what each is for
| Option | What it does | What to choose |
|---|---|---|
| Search tab | Searches keyword hits, gallery exhibits and findings together. | To find where in the case an item, a person or a term appears. |
| Tags & bookmarks tab | Lists everything tagged or bookmarked across the case. | To gather the marks made in each workspace into one view. |
| Saved views tab | Stores a filter to return to. | For a filter you will reuse, such as one custodian's images. |
| Audit log tab | Shows the hash-chained record of every action. | To read, or to verify with audit, that nothing was inserted, removed or reordered. |
3Step by step
- Search across the caseKeyword hits, gallery exhibits and findings in one search, so nothing is siloed by workspace.
- Gather the tags and bookmarksEvery mark made in every workspace, in one place.
- Save a view you will reuseA filter stored so the next return to the case starts from it.
- Read the audit logThe hash-chained record of who did what, when.
- Verify the chain before disclosureRun audit with the manifest so a trail cut short at the end is caught too.
The chain, and the seal. The audit log is hash-chained, so an edit, deletion, insertion or reorder is detectable and audit names the first break. A chain cannot see a tail cut off the end; verify with the manifest, which holds the sealed receipt the chain alone cannot see past.
4Ten situations, and exactly what to do
Where does this term appear
You need everywhere a term shows up across the case.
The Search tab spans keyword hits, gallery and findings.
- Open case review
- Search the term
- Read the spanning results
- Tag what matters
Gather every mark
Marks were made in several workspaces and you want them together.
The Tags & bookmarks tab collects them.
- Open case review
- Open tags and bookmarks
- Read the collected marks
- Promote to findings
Return to a filter
You will come back to one custodian's images often.
Save it as a view.
- Build the filter
- Save the view
- Return to it later
- Update it as the case grows
Read who did what
You need the record of actions taken on the case.
The Audit log tab shows the hash-chained record.
- Open case review
- Open the audit log
- Read the actions
- Note the sequence
Verify nothing was altered
Before disclosure you must prove the trail is intact.
Verify the chain with the manifest so truncation is caught.
- Open the audit log
- Verify the chain
- Add the manifest
- Attach the result to the report
Find a person across the case
A named individual may appear in messages, images and findings.
Search the name; the results span the case.
- Open case review
- Search the name
- Read across workspaces
- Record the connections
Only deleted items
You want to focus on items recovered from a deleted state.
Search with the deleted state to separate them.
- Open case review
- Search with deleted state
- Read the deleted items
- Tag what matters
The findings so far
You want the findings recorded to date.
The search and tags tabs gather the findings in one view.
- Open case review
- Filter to findings
- Read them together
- Prepare the report
A saved view for the report
The report needs a specific filtered set.
Save the filter as a view and generate the report from it.
- Build the filter
- Save the view
- Generate from it
- Keep the view with the case
Confirm the chain first break
A challenge claims the trail was edited.
audit names the first break, if any; a clean verify answers the challenge.
- Verify the chain
- Read the result
- Name any first break
- Attach the verification
5The same job at the command line
recoveryantra audit E:/Case/Ex1/audit_trail.jsonl --manifest E:/Case/Ex1/recovery_manifest.jsonTrace a selector across cases
A lab store of case properties that a selector - an email, a number, a hash - can be looked up across, with correlation of what a case shares with others, honest about holding only the cases you added.
1How to get there
- 1Value to look up the selector to look up.
- 2Look up look the value up across the store.
- 3Case folder a case to add to the store.
- 4Correlate correlate a case with the store.
2A lookup and its result
- 1The selector the selector being looked up.
- 2Look up the lookup and its result.
3The commands, and what each is for
| Option | What it does | What to choose |
|---|---|---|
| crosscase ingest | Adds a case's properties to the lab store. | To make a case available for cross-case lookup and correlation. |
| crosscase lookup | Finds which cases carry a value. | To trace a selector - an email, a number, a hash - across cases. |
| crosscase correlate | Shows what a case shares with others. | To find overlap between a new case and the store. |
| crosscase export / import | Moves the store. | To share the store between benches. |
| crosscase stats | Summarises the store. | To see how many cases and selectors it holds. |
4Step by step
- Add cases to the storeIngest each case's properties so they can be looked up and correlated.
- Look a selector upAn email, a number or a hash returns the cases that carry it.
- Correlate a caseSee what a new case shares with those already in the store.
- Read the result honestlyWith one case indexed, a lookup returns no matches; that is the honest answer, not a fault.
- Move the store if neededExport and import to share the store between benches.
Only what is in the store. Cross-case works only from cases you have added to the store, and it reports what it holds. With one case indexed a lookup honestly returns no matches; it is not evidence of absence beyond the store.
5Ten situations, and exactly what to do
Has this email appeared before
A selector may link to earlier cases.
crosscase lookup finds which cases carry it.
- Add the cases to the store
- Look the email up
- Read the cases returned
- Record the link
Add a case to the store
A new case's properties should be searchable across cases.
crosscase ingest adds them.
- Point at the case folder
- Ingest it into the store
- Confirm it is added
- Look up selectors
What does this case share
You want overlap between a new case and the store.
crosscase correlate shows the shared selectors.
- Ingest the store's cases
- Correlate the new case
- Read the shared selectors
- Record the overlap
One case, no matches
Only one case is indexed and a lookup returns nothing.
That is the honest result; more cases in the store change it.
- Look the selector up
- Read the no-match result
- Confirm one case indexed
- Record it plainly
A phone number across cases
A number may recur across investigations.
Look it up as a selector.
- Add the cases
- Look the number up
- Read the cases returned
- Record the link
A file hash across cases
A known-bad hash may appear in more than one case.
Look the hash up across the store.
- Add the cases
- Look the hash up
- Read the matches
- Record the connection
Share the store
Another bench needs the same store.
crosscase export then import on the other bench.
- Export the store
- Send it
- Import on the other bench
- Look up there
How big is the store
You want to know the store's coverage.
crosscase stats summarises it.
- Run stats
- Read the case and selector counts
- Judge the coverage
- Add more if thin
Remove a case
A case should no longer be in the store.
crosscase forget removes it.
- Identify the case
- Forget it from the store
- Confirm it is gone
- Re-run stats
Import a colleague's store
A colleague sent their cross-case store.
crosscase import merges it.
- Receive the store file
- Import it
- Run stats
- Look up across the merged store
6The same job at the command line
recoveryantra crosscase ingest F:/Case-176 && recoveryantra crosscase lookup example@bench.localAsk a triage question, your reading sealed first
Retrieval over the case's own indexed data answers a triage question, with the examiner's reading sealed before any model answer is disclosed and every reveal audited - the model always an observation, never a finding.
1How to get there
- 1Case folder the case to query.
- 2The question the triage question to ask.
- 3Ask run the retrieval.
- 4Your reading your own reading, sealed first.
2Seal a reading, or seal it inconclusive
3The retrieval and the sealed verdict track
- 1The question the question asked.
- 2Examiner the examiner, recorded with the reading.
4The options, and what to set them to
| Option | What it does | What to choose |
|---|---|---|
| <question> | A triage question over the case's own indexed data. | For a question like who met whom and when, answered only from the case. |
| --reading | Your own reading, sealed before any model answer. | Always, first: sealed once, and a later change is recorded as an edit. |
| --inconclusive | Seals the reading as inconclusive. | When the case does not support a reading yet but you want the model's words audited. |
| --reveal | Discloses the model's verbatim words after a reading is sealed. | To see the model's observation, knowing the reveal is an audited event. |
| --limit | How many case items to retrieve as context. | When the default breadth is too wide or too narrow for the case. |
5Step by step
- Ask the questionRetrieval returns the case items that bear on it, from the case's own indexed data - nothing outside it.
- Read the retrieved itemsThe items are the evidence; the question is answered from them.
- Seal your own readingType your reading, or seal it inconclusive, before any model answer - it is sealed once, and a later change is an edit.
- Reveal the model's wordsThe reveal is an audited event, recorded with who did it and when.
- Keep the model an observationThe model's text is an observation, never a finding; revealing it records that it was seen.
Reading sealed before the model. Retrieval returns the case items that bear on the question; a model answer, if any, is an observation, never a finding. Your own reading is sealed before any model answer is disclosed, and the reveal is an audited event - so the record shows what the examiner concluded independently of the tool.
6Ten situations, and exactly what to do
Who met whom and when
You want a triage answer over the case's indexed data.
Ask the question; retrieval returns the bearing items, and your reading is sealed first.
- Ask the question
- Read the retrieved items
- Seal your reading
- Reveal the model as an observation
Does a confession appear
You want to know whether a confession is in the case.
Ask over the indexed data; the items are the evidence.
- Ask the question
- Read the retrieved items
- Seal your reading
- Reveal the model
The case does not support a reading
You want the model's words but cannot yet form a reading.
Seal --inconclusive; the model's words are then disclosed and audited.
- Ask the question
- Seal inconclusive
- Reveal the model
- Record it as an observation
Seal before revealing
You must show your reading was independent of the tool.
The reading is sealed before any reveal; the trail shows what you concluded first.
- Ask the question
- Type and seal your reading
- Then reveal the model
- Keep both in the trail
The model differs from your reading
The model's answer disagrees with your reading.
Your sealed reading is the record; the model is an observation behind it.
- Seal your reading
- Reveal the model
- Note the difference
- Keep the reading as the record
Narrow the retrieval
The default retrieval is too broad for the case.
Set --limit to the number of items you want as context.
- Ask the question
- Set the limit
- Read the narrower context
- Seal your reading
Only the case is searched
You must confirm nothing outside the case is consulted.
Retrieval searches the case's own indexed data only, nothing outside it.
- Ask the question
- Confirm the case scope
- Read the retrieved items
- Seal your reading
The reveal is audited
You need the disclosure of the model's words to be on record.
The reveal records who did it and when.
- Seal your reading
- Reveal the model
- Confirm the audit entry
- Keep it with the case
Change a sealed reading
New evidence changes your reading after sealing.
A later change is recorded as an edit, never as the original reading.
- Seal the first reading
- Later, record the edit
- Keep the original in the trail
- Note why it changed
Query the most recent case
You want to query the case you just worked, without naming it.
Leave the case blank to use the most recent.
- Ask the question
- Leave the case blank
- Read the retrieved items
- Seal your reading
7The same job at the command line
recoveryantra casequery "who met whom and when" --case F:/Case-176 --reading "..." --examiner "S. Menon"Turn the case into a court-ready certificate
The CASE-UCO export and the Section 63(4) BSA-2023 certificate, generated from what the case actually holds and signed by a named examiner, with every pack verified before it leaves and the audit chain verified before disclosure.
1How to get there
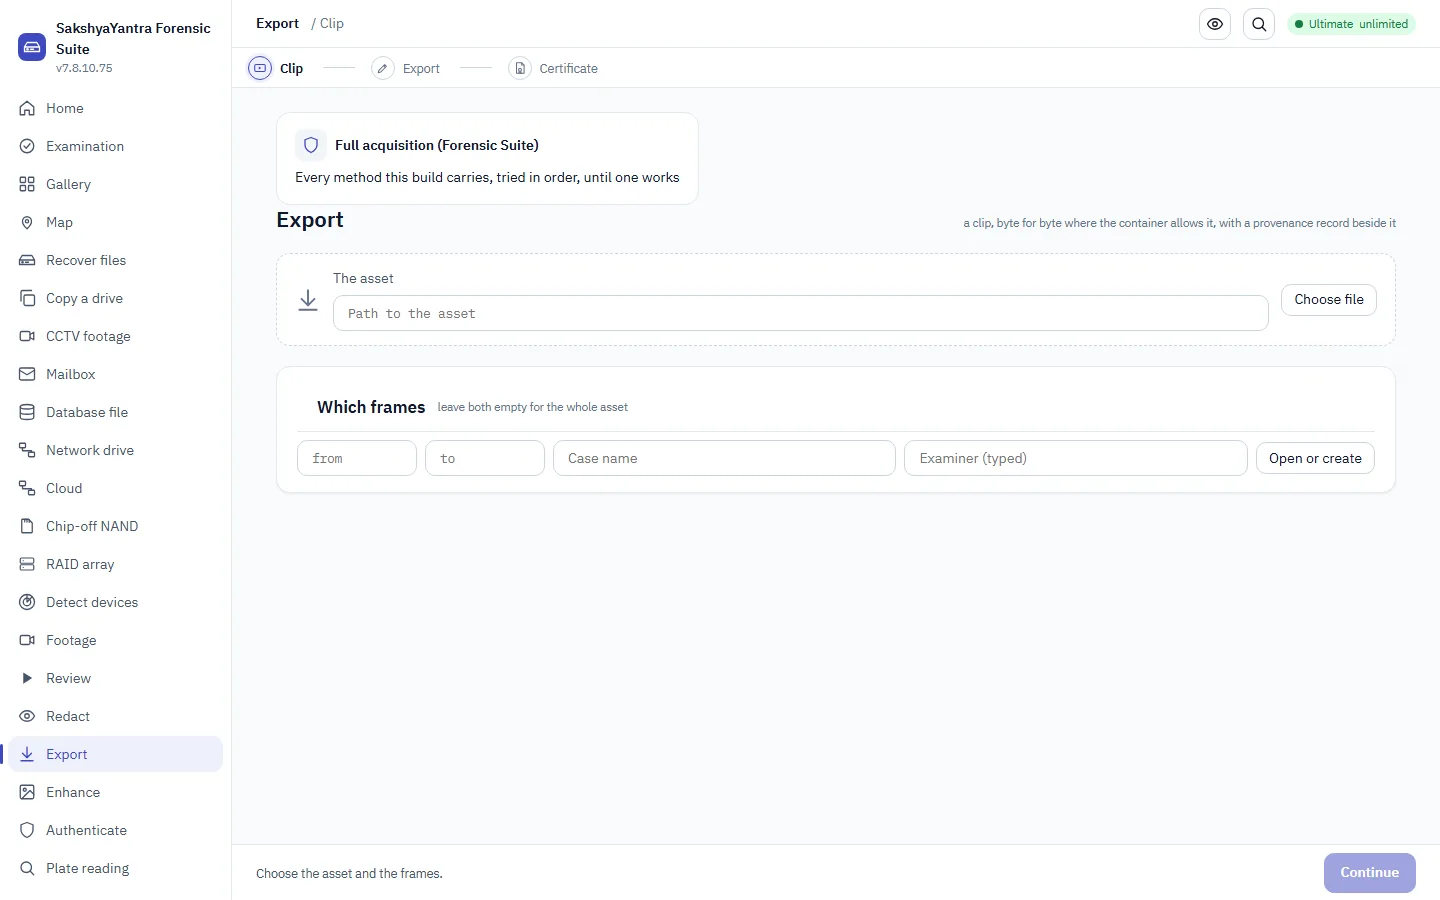
- 1Asset path the asset to export.
- 2From / to the range to export.
- 3Case name the case for the export.
- 4Examiner the typed examiner.
2The certificate builder
- 1Case name the case for the certificate.
- 2Examiner the examiner on the certificate.
3The commands, and what each is for
| Option | What it does | What to choose |
|---|---|---|
| review verify | Re-hashes every frame and the manifest of a pack. | Before export, to prove what leaves is unchanged. |
| certify draft | Drafts the certificate from what the case holds, to a file. | To produce the S.63(4) BSA-2023 certificate and the CASE-UCO export. |
| Case + Examiner | Names the case and the typed examiner on the certificate. | Always: the certificate is drawn from the case and signed by a named examiner. |
| From / to | Bounds the export to a frame range. | When only part of the asset is disclosed. |
4Step by step
- Verify the packRe-hash every frame and the manifest so what leaves is proven unchanged.
- Open the certificate builderIt draws from what the case actually holds, with the case and the examiner named.
- Draft the certificateThe S.63(4) BSA-2023 certificate and the CASE-UCO export, generated from the case.
- Name the examinerThe certificate is signed by a named examiner, typed, not inferred.
- Keep the export with the caseThe certificate, the CASE-UCO export and the verified pack travel together.
Generated, verified, signed. The certificate is generated from what the case actually holds and signed by a named, typed examiner - it is not written by hand. Verify the pack before it leaves and the audit chain before disclosure, so what is certified is provably what the case holds.
5Ten situations, and exactly what to do
A court-ready certificate
The case is ready and needs its statutory certificate.
certify draft produces the S.63(4) certificate from the case.
- Verify the pack
- Open the certificate builder
- Draft the certificate
- Name the examiner
Prove the pack before it leaves
The frames must be shown unchanged.
review verify re-hashes them first.
- Build the pack
- Verify it
- Draft the certificate
- Send both together
CASE-UCO export
The case must go to a system that reads CASE-UCO.
The export draws from the case, alongside the certificate.
- Verify the packs
- Open the builder
- Draft the CASE-UCO export
- Keep it with the case
Name the examiner
The certificate must be signed by a named person.
The examiner is typed on the certificate, not inferred.
- Open the builder
- Type the examiner
- Draft the certificate
- Confirm the name on it
Only part of the asset
Only a frame range is disclosed.
Bound the export with from and to.
- Open the export
- Set from and to
- Verify the range
- Draft the certificate
Drawn from what the case holds
The certificate must match the case exactly.
It is generated from what the case actually holds, not typed by hand.
- Complete the case
- Open the builder
- Draft from the case
- Check it matches the case
Verify again on receipt
The recipient must be able to re-check the pack.
They run review verify against the manifest.
- Send the verified pack
- Recipient verifies it
- Compare hashes
- Confirm it is unchanged
The certificate and pack together
Nothing should travel without its proof.
The certificate, the CASE-UCO export and the verified pack go together.
- Verify the pack
- Draft the certificate
- Bundle them
- Disclose the bundle
A second exhibit's certificate
A second exhibit needs its own certificate.
Draft from that exhibit's case data.
- Complete the second exhibit
- Open the builder
- Draft its certificate
- Name the examiner
Confirm before disclosure
Before disclosure the trail must be verified.
Verify the audit chain with the manifest, then draft the certificate.
- Verify the audit chain
- Add the manifest
- Draft the certificate
- Disclose with the verification
6The same job at the command line
recoveryantra review verify F:/Case-176/packs/pack_001.zip && recoveryantra certify draft --case F:/Case-176 -o F:/Case-176/certificate.pdf