
RecoverYantra Mobile on the command line
Every command this product contains and every parameter it accepts: 12 commands, 74 parameters. Read from the shipping build, version 7.8.10.76. The help text says what a switch does; each entry here adds when a business reaches for it and what it costs.
Before the first command
- Reading a physical drive needs administrator rights. Working from a disk image needs none.
- The source is opened read-only for the whole session, and the application refuses a destination on the drive being read.
- Set the mode before the scan. A recovery-mode scan does not become evidential afterwards.
- Everything below is available in the application as well; the command line is the scriptable surface, not a separate product.
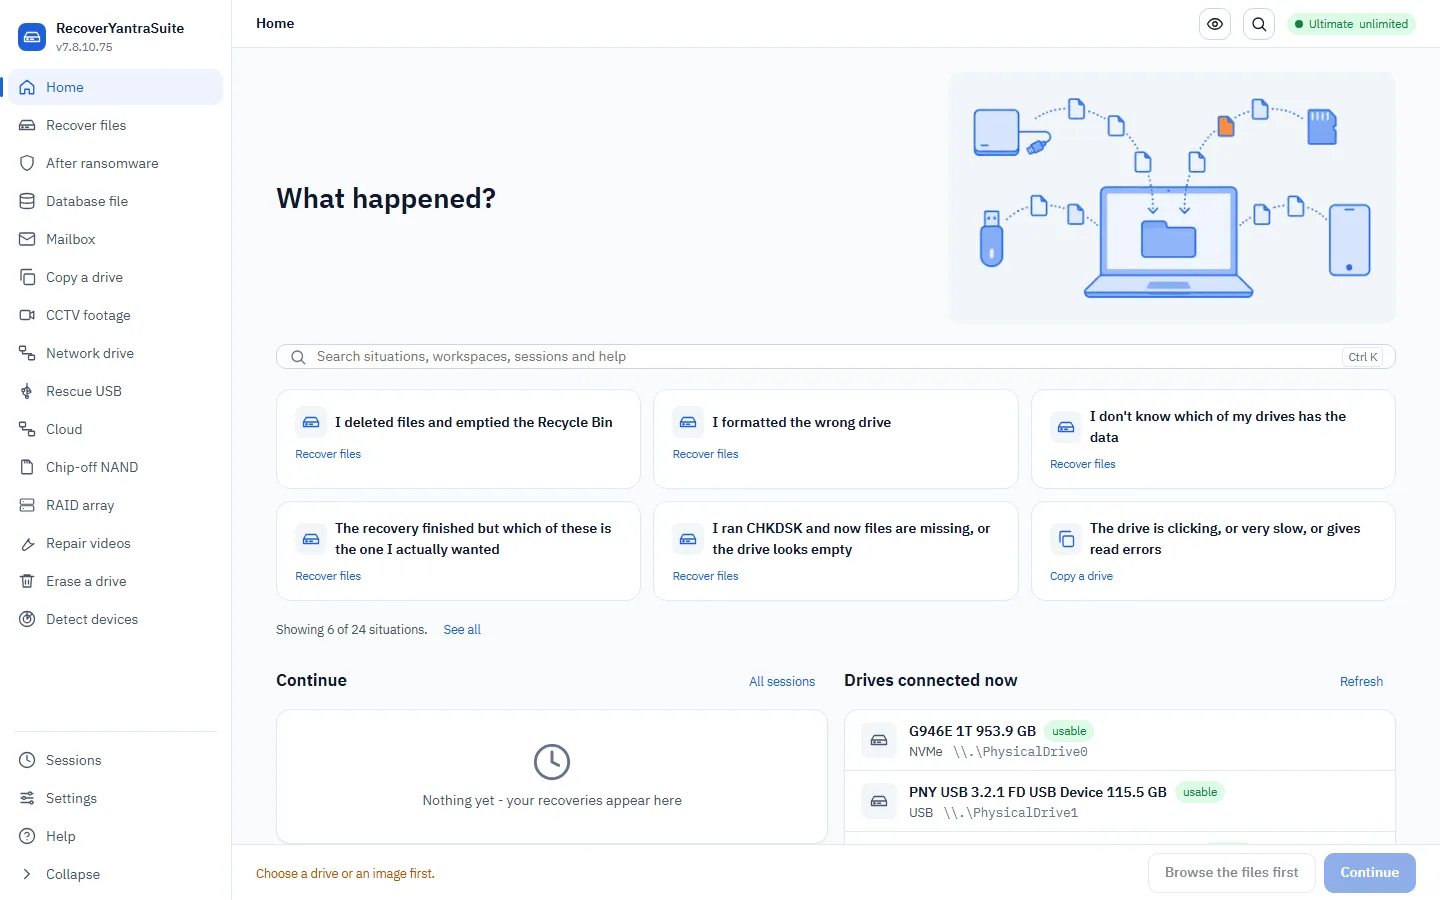
recoveryantra capabilities
--enable | Turn on an advanced method (e.g. checkm8, mtk_bootrom, qualcomm_edl) When to use it. Turn on an advanced acquisition method for a case that needs it and is authorised for it. These methods interact with the device, so they are off until an examiner opts in on the record. What it costs. Enabling is recorded in the audit trail with the operator and case. An advanced method can alter the device; decide before the exhibit is in front of you, not during. |
|---|---|
--disable | Turn an advanced method back off When to use it. Turn a method back off once the step that needed it is complete, so the next case starts from the conservative default. |
--tools | Show the acquisition toolbox: the public methods (checkm8/mtkclient/edl/adb...), what's installed, and what is equipped for this case When to use it. Run before an acquisition to see which external tools are actually installed on this machine and which methods are therefore available today. What it costs. The product orchestrates the operator's own tools for advanced methods; it does not bundle exploits. A method with no tool present is not available however the case is authorised. |
--operator | Examiner making the choice (recorded) When to use it. Name the examiner making the decision. The choice belongs in the record alongside the result it produced. |
--case | Case reference (recorded) When to use it. Tie the capability decision to the case it was made for. |
recoveryantra detect
--report | Also write the report (HTML, PDF, JSON) into DIR When to use it. Write the detection report - HTML, PDF and JSON - into this folder: every device with its state, bus, serial and sector size, the hardware Windows can see but cannot use with the code and the fix, and the Plug-and-Play inventory. Use it when a customer or a partner says a drive is not detected: the report replaces "it does not work" with what the machine actually sees. What it costs. The folder goes through the same pre-flight as every other writing job; the report is small, so only rights and a full disk stop it. |
|---|---|
--no-health | Skip the health read of each usable drive (faster) When to use it. Skip the health read of each usable drive. Detection is then a listing only and returns in a second or two. Use it on a machine with many drives, or when a drive is known to be failing and you do not want even a test read against it before imaging. |
--force | Write the report even if the pre-flight objects When to use it. Write the report even when the pre-flight objects to the folder. Use it only when you have read the objection and it does not apply - a report is a few hundred kilobytes, so the usual reason is a destination the check cannot judge. What it costs. A refusal you have not read is not one you can override safely. |
recoveryantra find-drive
<pattern> | A filename, part of one, or a wildcard (e.g. IMG_2019, *.jpg) When to use it. Search every usable attached device for a file whose name matches PATTERN, without picking a drive first. Free, no licence needed - reads each device's index in seconds, the same tier as `--list`. Use it when the customer cannot say which of several drives holds what they want. |
|---|---|
--timeout | Give up on one drive after this long (default 20); a slow or failing drive never holds up the others When to use it. Seconds allowed per device before moving on. A slow or failing device costs only its own row - the sweep never waits on one device at the expense of the rest. |
--all | List every drive checked, including the ones with no match When to use it. Also sweep devices that are not in a normally-usable state, where possible. Use it only once the plain sweep has come back empty. |
recoveryantra gui
--classic | Use the classic Tkinter wizard When to use it. Fall back to the classic interface on a machine where the modern window will not start, typically an old or minimal Windows install. |
|---|
recoveryantra guide
--html | Write the guide as a self-contained, searchable HTML page When to use it. Produce the manual as a single searchable page to hand to a client, put on an internal share, or carry onto an air-gapped bench. |
|---|---|
--markdown | Write the guide as Markdown When to use it. Produce Markdown when the content is going into your own documentation system or version control. |
recoveryantra legal
--status | Show what has been acknowledged on this install When to use it. Show what lawful-use acknowledgements have been made on this install. Useful when auditing a shared bench machine. |
|---|---|
--reset | Forget remembered acknowledgements (history is kept) When to use it. Clear the remembered acknowledgements when a machine changes hands or a new operator takes it over. What it costs. The history is retained. Resetting does not erase the record of what was previously acknowledged. |
recoveryantra list
--triage | Also check each device's health (SMART + test reads), how it's connected, and what kind of device it is (CCTV recorder, phone, dashcam, card, ...) with advice on what to do When to use it. Run before touching anything. It reports each device's health, how it is connected and what kind of device it is, which is what decides whether to recover directly or image first. What it costs. Triage reads the drive. On a drive that is audibly failing, keep even this brief and go straight to imaging. |
|---|
recoveryantra phone
--store | A phone SQLite database (mmssms.db, msgstore.db, sms.db, contacts2.db, ...) When to use it. Point at a single database pulled from a handset when you already know which application's data you need. |
|---|---|
--deep | Deep-mine a PULLED phone folder for DELETED data (trash, deleted DB rows, thumbnails of purged photos) When to use it. Run against a whole pulled phone folder when deleted material matters: trash folders, deleted database rows and thumbnails of photographs that are no longer present. What it costs. Deep mining takes considerably longer than reading one store, and recovered deleted rows are reported flagged as such. |
--app | Force a profile (android_sms, android_calls, whatsapp, ios_imessage); auto-detected if omitted When to use it. Force a profile when auto-detection picks the wrong one, usually on a renamed or unusually located database. |
--key | Decryption key for an encrypted store: path to a WhatsApp `key` file, or a hex key (WhatsApp crypt / SQLCipher: Signal, WeChat, Wickr, ...) When to use it. Supply the key for an encrypted store: a WhatsApp key file, or a hex key for an SQLCipher database. What it costs. Without the key the store cannot be read. The product does not attempt to break the encryption and will say so rather than returning partial output. |
--deleted-only | Show only recovered deleted records When to use it. Narrow the output to recovered deleted records when the live data is already available from the handset or a backup. |
--areas | Instead of parsing, list the mobile recovery areas (by app + media) When to use it. Use when scoping. It lists what is recoverable per application and media type, including the areas that are honestly not recoverable locally. What it costs. Applications listed as not locally recoverable are ephemeral or server-side. Scope them out of the quote rather than promising them. |
--types | List recovery by DATA TYPE (Contacts, Messages, Photos, ...) and sources When to use it. The same scoping question asked by data type: contacts, messages, calls, photographs, and where each comes from. |
--ffs-dfu | Identify a checkm8 full-filesystem acquisition from a device's DFU USB serial (e.g. 'CPID:8015 ECID:.. SRTG:[..]') and print the honest, ordered FFS plan When to use it. Establish whether a full-filesystem acquisition is possible for a specific iPhone before promising one, from the device's own DFU identifiers. What it costs. The answer for a modern handset is often no, and the plan says so. An unknown chip is never assumed to be vulnerable. |
--android-ffs | Plan an Android full-filesystem acquisition from a device descriptor (VID:PID and/or 'chipset:SM8250 android:13 bootloader:locked credential:unknown'): SoC, download mode, and the honest FBE boundary When to use it. The same question for Android, from the device descriptor. Produces a plan gated on what that specific device actually allows. |
--cloud-tokens | Scan a lawfully-acquired artifact/file for cloud-account tokens (OAuth refresh/access, JWT) and print the lawful cloud-acquisition route per provider (identify-only) When to use it. Scan a lawfully acquired artefact for cloud account tokens, and get the lawful route to the provider rather than to the account. What it costs. Finding a token is not authority to use it. The output is a lawful acquisition route, and it should be followed. |
--methods | List the full mobile-acquisition method registry (in-house protocol / external tool / licensed seam, state, BFU/AFU, certification, provenance) When to use it. List every mobile-acquisition method the engine carries: in-house protocol, detected external tool, or licensed capability package; the state it yields, whether it works before first unlock, and its certification (proto-proven vs needing a device to certify). |
--plan | Rank the acquisition methods that apply to a device: an iOS DFU serial (CPID:.. ECID:..) or an Android descriptor (VID:PID / chipset:.. / adb:device / adb:device+root); honest about what this build offers and, if nothing reaches the device, what WOULD and what it needs When to use it. Rank the methods that actually apply to a described device (an iOS DFU serial or an Android descriptor) - honest about what THIS build offers, and, when nothing reaches the device, which method WOULD and exactly what it needs. What it costs. A recovery build lists a physical method as NOT offered rather than hiding it; only the Forensic Suite may run one. |
--acquire-method | MANUAL acquisition: run ONE method from --methods against a device descriptor (paired with --plan's DESCRIPTOR) into --dest; refused for a build without full mobile acquisition (the recovery family keeps consent-only) When to use it. Run one named method from --plan's device against --dest. Behind the same lawful-use gate as every forensic acquisition. What it costs. Refused by naming the PRODUCT when the build lacks full mobile acquisition, and refused structurally (never a fake success) when the physical device, tool or loader it needs was not provided. |
--acquire-all | AUTOMATIC acquisition: work DOWN the methods that reach this device in order (checkm8 / EDL / MediaTek BROM / rooted ADB / backup), trying each until one succeeds - acquire on the first success, an honest refusal naming what is needed if none reaches it. Needs --plan DESCRIPTOR and --dest When to use it. Acquire a phone automatically: try every method that reaches the device in order (checkm8, Qualcomm EDL, MediaTek BootROM, rooted ADB, backup) until one succeeds, when you want the tool to work down the options rather than picking one by hand. What it costs. It runs real acquisition methods against the device and writes the image to the destination; the operator's stated authority is recorded, and a device no public method reaches is refused, never faked. |
--dest | Destination folder for --acquire-method / --acquire-all When to use it. Where --acquire-method writes the image or the copied files, and the hashed manifest naming the method, its provenance and (for a licensed package) the authority. |
--package-install | Install a signed capability package (.sypkg) after verifying its signature and every payload file's hash; refused if tampered, expired, or signed by the wrong key When to use it. Install a signed capability package (.sypkg) - a vendor's licensed loader/exploit chain under counsel's agreement - after verifying its Ed25519 signature and re-hashing every payload file against the signed manifest. What it costs. A tampered, expired, or wrong-key package is refused outright and contributes nothing to the method registry; it is never partially installed. |
--package-verify | Verify a .sypkg file WITHOUT installing it When to use it. Check a .sypkg file's signature and payload hashes WITHOUT installing it - for auditing a package before it goes anywhere near a case machine. |
--package-list | List installed, currently-verified capability packages When to use it. List the capability packages currently installed and still verifying (a package that no longer verifies is silently absent from this list, per the module's no-partial-trust rule). |
--package-remove | Remove an installed capability package When to use it. Remove an installed capability package by its package_id, and delete its extracted payload from disk. |
--leveldb | Recover key/value records from a LevelDB write-ahead log - the store Chrome, Electron apps (Discord, Slack, WhatsApp Desktop) and browser Local Storage keep. Point it at a `leveldb` folder or a single .log file When to use it. Point at a LevelDB folder or a single .log file when the data lives in a key/value store rather than SQLite, which is what Chrome, Electron chat apps and browser Local Storage use. What it costs. Only the write-ahead log (.log) is read; data already compacted into .ldb table files is a stated limit, not everything the store held. |
--breadth | Run a breadth pass over an ALREADY-ACQUIRED extraction folder with the signed mobile toolpack (iLEAPP for iOS, ALEAPP for Android) to widen coverage beyond our own parsers; needs --platform. Does nothing if the toolpack is not installed When to use it. Point at an already-acquired extraction folder to run the signed toolpack (iLEAPP or ALEAPP) over it and widen coverage past our own parsers, when a case needs the long tail of apps. What it costs. It does nothing when the toolpack is not installed, and its rows are labelled as the tool's, shown under our own parsers as corroboration. |
--platform | Which breadth tool to run for --breadth: ios (iLEAPP) or android (ALEAPP) When to use it. Choose which breadth tool runs on the extraction, ios for iLEAPP or android for ALEAPP, since the two read different artefact layouts. |
--operator | Examiner asserting lawful authority (recorded) When to use it. As on acquire: the examiner asserting lawful authority. |
--authority | Lawful basis: warrant / consent / statutory power When to use it. As on acquire: the lawful basis for touching this device. |
--org | Examiner's organisation (recorded) When to use it. The examining organisation, recorded against the acquisition so the custody record names the body accountable for it. |
--case | Case / FIR reference (recorded) When to use it. The case reference, set consistently across every step. |
recoveryantra recover
--device | Raw device path (e.g. \\.\PhysicalDrive1 or /dev/sdb) When to use it. Recover directly from the attached drive when it is healthy, the job is not evidential, and time matters. What it costs. If the drive is failing, image it first. A direct scan reads the whole surface and can be the read that finishes a dying drive. |
|---|---|
--image | Disk image file (.dd/.img/.iso) When to use it. The default choice for anything evidential, anything failing, and anything where the original must be returned untouched. |
--ios-backup | An iOS (iTunes/Finder) backup folder (Manifest.db) When to use it. Point at an iTunes or Finder backup folder when the handset itself is unavailable, locked, or must not be touched. |
--slabmap | Storage Spaces slab-map JSON: reassemble a pool virtual disk from member images and recover from it When to use it. Reassemble a Storage Spaces virtual disk from member images and recover from the assembled volume. |
-o | Output directory for recovered files (required unless --list) When to use it. Always a separate drive from the source. The product refuses a destination on the drive being read. |
--mode | smart=metadata+carving (default), fs=named files only, carve=signatures only When to use it. Leave at smart. It parses the file system for original names and folders AND carves free space for what the metadata no longer covers. Use fs when you want named files quickly from an intact file system; use carve on formatted or badly damaged media where the metadata is gone. What it costs. fs alone misses everything the file system no longer indexes. carve alone returns files without their original names or folders. smart is what maximises the result. |
--resume | Carry on from where an earlier scan of the same source into the same output folder stopped, instead of starting again from the beginning When to use it. Continue a scan that was stopped, on the same source into the same output folder. A large drive is an overnight job and does not need to be restarted. What it costs. The checkpoint belongs to the DRIVE, not the path. A different disk in the same slot restarts from the beginning, with the reason stated. |
--include-intact | Also recover currently-existing (non-deleted) files When to use it. Add whenever the loss is a volume rather than a deletion: a reformatted disk, a RAW volume, a failed array. In those cases the files were never deleted and the default deleted-only view will look almost empty. What it costs. It substantially increases the output size, because it recovers everything present as well as everything deleted. |
--list | Print the drive's folder tree from its index (live and deleted files) and stop. Fast; nothing is written. -o is not needed. When to use it. Look before you scan. Reads the filesystem index only and prints the folder tree - live and deleted files, deleted ones marked - in seconds, writing nothing. Use it first on any drive whose index is intact: it tells you whether the folder the customer wants is still named, so you can recover that alone with --only instead of reading the whole drive. What it costs. Free, and needs no licence. What it cannot show is anything whose index entry is gone - a formatted card, a wiped table - which still needs the full scan. |
--only | Recover only this folder or file (repeatable). Paths are the volume's own, e.g. --only /Users/jo/Documents/ --only /Photos/IMG_0042.jpg. Implies --mode fs and --include-intact. When to use it. Recover one folder or file rather than everything: the customer wants the Documents folder, not four hours and a terabyte of working folder. Repeat the switch for several paths; a folder path takes everything under it, and 1:/Folder/ names the folder on partition 1 only. Paths are the volume's own, as --list prints them. What it costs. Implies --mode fs and --include-intact. Every content check, the manifest and the organising run exactly as in a full scan; a use is still charged for the drive. |
--engine | native=built-in (default), photorec=use TestDisk's PhotoRec, auto=PhotoRec if installed When to use it. Leave at native. Select photorec only to cross-check a result with a second implementation, which is occasionally useful in a disputed matter. What it costs. The external engine must be installed separately and does not carry this product's validation or its verdicts. |
--workers | Carving processes: 0=auto/all cores (default, byte-identical output, ~3x faster), 1=single-threaded, N=that many When to use it. Leave at 0 so the carve uses the available cores. Set 1 when you need the machine responsive for other work, or when reproducing a result exactly for a report. What it costs. Output is byte-identical either way; only the time changes. Below about 128 MB the product stays single-threaded because process start-up costs more than it saves. |
--sector-size | Bytes per sector (default 512) When to use it. Change from 512 only for 4K-native drives, where the wrong value prevents the volume being recognised. |
--password | Unlock an encrypted drive. A BitLocker 48-digit recovery password, a LUKS passphrase, or a key in hexadecimal. When to use it. Supply the BitLocker recovery password, LUKS passphrase or hex key for an encrypted volume. What it costs. Without the correct credential the volume cannot be read by anyone. The product states that rather than returning fragments. The credential is not retained for a later resume. |
--force | Start even when the pre-flight checks say this cannot finish: too little room, or writing onto the drive being recovered. When to use it. Only when you have read the pre-flight objection and established that it is wrong for your situation. What it costs. The two objections it can override are both serious: too little room means the scan stops part way, and writing onto the drive being recovered overwrites the data you are trying to get back. |
--report | Generate a recovery report after scanning (comma-separated: pdf,docx,html; default all) When to use it. Generate the report at the end of the scan whenever the result goes to somebody else: a client, an insurer, or a case file. |
--profile | Override the mode for this run (forensic=hash+manifest+evidence, recovery=fast+by-type). Defaults to the saved global mode. When to use it. Override the saved mode for this one run, for example a single evidential job on a bench normally used for commercial recovery. What it costs. Setting it per run avoids the more common error, which is leaving a bench in forensic mode and hashing every file on high-volume commercial work. |
--apfs-snapshots | List the APFS snapshots on the source (point-in-time views that may hold deleted/overwritten files) and stop When to use it. Run first on any Mac volume. Snapshots are point-in-time views that often still hold the file as it was before it was deleted or overwritten. |
--apfs-snapshot | Recover files as they were in this named APFS snapshot (byte-exact from the copy-on-write extents) When to use it. Recover from the named snapshot. Where the file exists in a snapshot, this returns it byte-exact and is far better than carving for it. |
--vss-list | List the Windows Volume Shadow Copies on the source (previous versions - originals from before deletion or ransomware) and stop When to use it. Run first on any Windows volume, and always in a ransomware incident. Shadow copies hold previous versions from before the deletion or the encryption. |
--vss-snapshot | Recover files as they were in this shadow copy: the snapshot-time volume is reconstructed and scanned When to use it. Reconstruct the volume as it was at that snapshot and recover from it. This is frequently the fastest complete recovery available. |
recoveryantra report
--case | The case folder When to use it. Point at the case folder you want to hand to another tool or lab. `report` exports it in a standardized interchange format rather than a PDF, so an examiner on different software can load the same evidence, timeline and provenance. The case folder is read only. |
|---|---|
--format | Export format (default case-uco) When to use it. Choose the interchange format for the export; today that is CASE-UCO, the community standard the major forensic tools read, so findings travel to another examiner without being retyped. Leave it at the default unless a receiving lab asks for a specific one. |
-o | Path to write the export to When to use it. Where to write the exported file. Choose a path outside the case folder and the evidence drive so the export never lands among the files it describes; writing it does not change the case. |
--force | Write even if the pre-flight objects When to use it. Write the export even when the pre-flight raises an objection, such as too little free space at the destination. Use it only after you have read the warning and accept it. What it costs. The pre-flight is what stops a half-written export or a destination that cannot hold the file; forcing past it can leave an incomplete export that another tool will reject as malformed. |
recoveryantra steps
<workflow> | Workflow id (e.g. forensics, data_recovery); omit to list them by category When to use it. Show the full procedure for one job - every stage, what it is for, the safety gates that cannot be skipped, and the command that carries each one out. Use it when a technician is doing a job for the first time, when a job is done rarely enough that nobody remembers the order, or when a reviewer asks why the work was done the way it was. |
|---|---|
--category | Show only one category's workflows When to use it. Show only data recovery, or only forensics. The two follow different orders because they are for different things: a recovery is judged on how much comes back, an examination on whether you can prove what you did. Verification therefore ends a recovery and sits in the MIDDLE of an examination, before any analysis. Use this to hand a new examiner only the sequence that applies to them. |
--commands | Print only the commands, in order, ready to copy When to use it. Print only the commands, in order, ready to paste. Use it to build a runbook, to script a job that is done the same way every time, or to check a script somebody else wrote actually follows the procedure. |
--standards | Show the published practice each step comes from When to use it. Show the published practice each stage comes from - ISO/IEC 27037, NIST SP 800-86, the ACPO principles. Use it when a client, an auditor or a court asks why a step exists, and when training staff who need to know the procedure is not this vendor's opinion. |
recoveryantra which
<situation> | What is happening, in plain words (e.g. "drive is clicking"); omit to list every situation When to use it. Describe what is happening in your own words - "drive is clicking", "formatted the wrong disk", "Outlook will not open it" - and get the feature to use, why that one rather than the obvious alternative, a worked example, the commands, and what NOT to do. Use it when somebody hands you a job and you are not sure which part of the product it belongs to, and give it to new staff before you give them anything else. |
|---|---|
--all | Show every situation, grouped, rather than searching When to use it. List every situation, grouped, instead of searching. Use it to see the whole range at once - useful when scoping what a product will cover for a customer, and for training. What it costs. Situations the product you are running does not include are marked, so the list stays honest about what this build can actually do. |